> ## Documentation Index
> Fetch the complete documentation index at: https://support.entegrata.com/llms.txt
> Use this file to discover all available pages before exploring further.
# Step 2: Network Connection Setup
> Establish secure connectivity between Entegrata and your environment.
After activating your subscription, establish a secure network connection between Entegrata and your data sources. This connection enables Entegrata's collectors to access your systems for data collection while maintaining security and network isolation.
After onboarding, network connections can be managed through [Network
Connections](/administration/instance/network-connections) in your instance settings.
## Connection Type Selection
You have three options for establishing network connectivity:
Best for Azure-based resources. Uses cross-tenant Virtual Network peering for direct, private connectivity.
Best for on-premises or hybrid environments. Creates an encrypted VPN tunnel between networks.
Best for dedicated, high-bandwidth private connectivity via an Azure ExpressRoute circuit.
## When to Use VNet Peering
Choose VNet Peering if:
* Your data sources are hosted in Azure
* You want the lowest latency and highest bandwidth
* You prefer a simpler network configuration
* You have existing Azure Virtual Networks
## Configuration Steps
*This section is only shown for self-hosted instances.*
Configure your Databricks workspace connection details.
**Required fields:**
* **Databricks SPN Application ID** - The Application (Client) ID of your Databricks Service Principal. Found in Azure Portal under Enterprise Applications.
* **Databricks SPN Object ID** - The Object (Principal) ID of your Databricks Service Principal. Found in Azure Portal under Enterprise Applications.
* **Databricks Account ID** - Your Databricks Account ID (UUID format). Found in the Databricks Account Console.
These fields will be disabled after the external configuration is complete and cannot be modified later.
Specify **three non-overlapping /23 CIDR ranges** reserved exclusively for Entegrata.
**Required fields:**
* **CIDR Range 1** - First /23 CIDR block (e.g., 10.0.0.0/23)
* **CIDR Range 2** - Second /23 CIDR block (e.g., 10.0.2.0/23)
* **CIDR Range 3** - Third /23 CIDR block (e.g., 10.0.4.0/23)
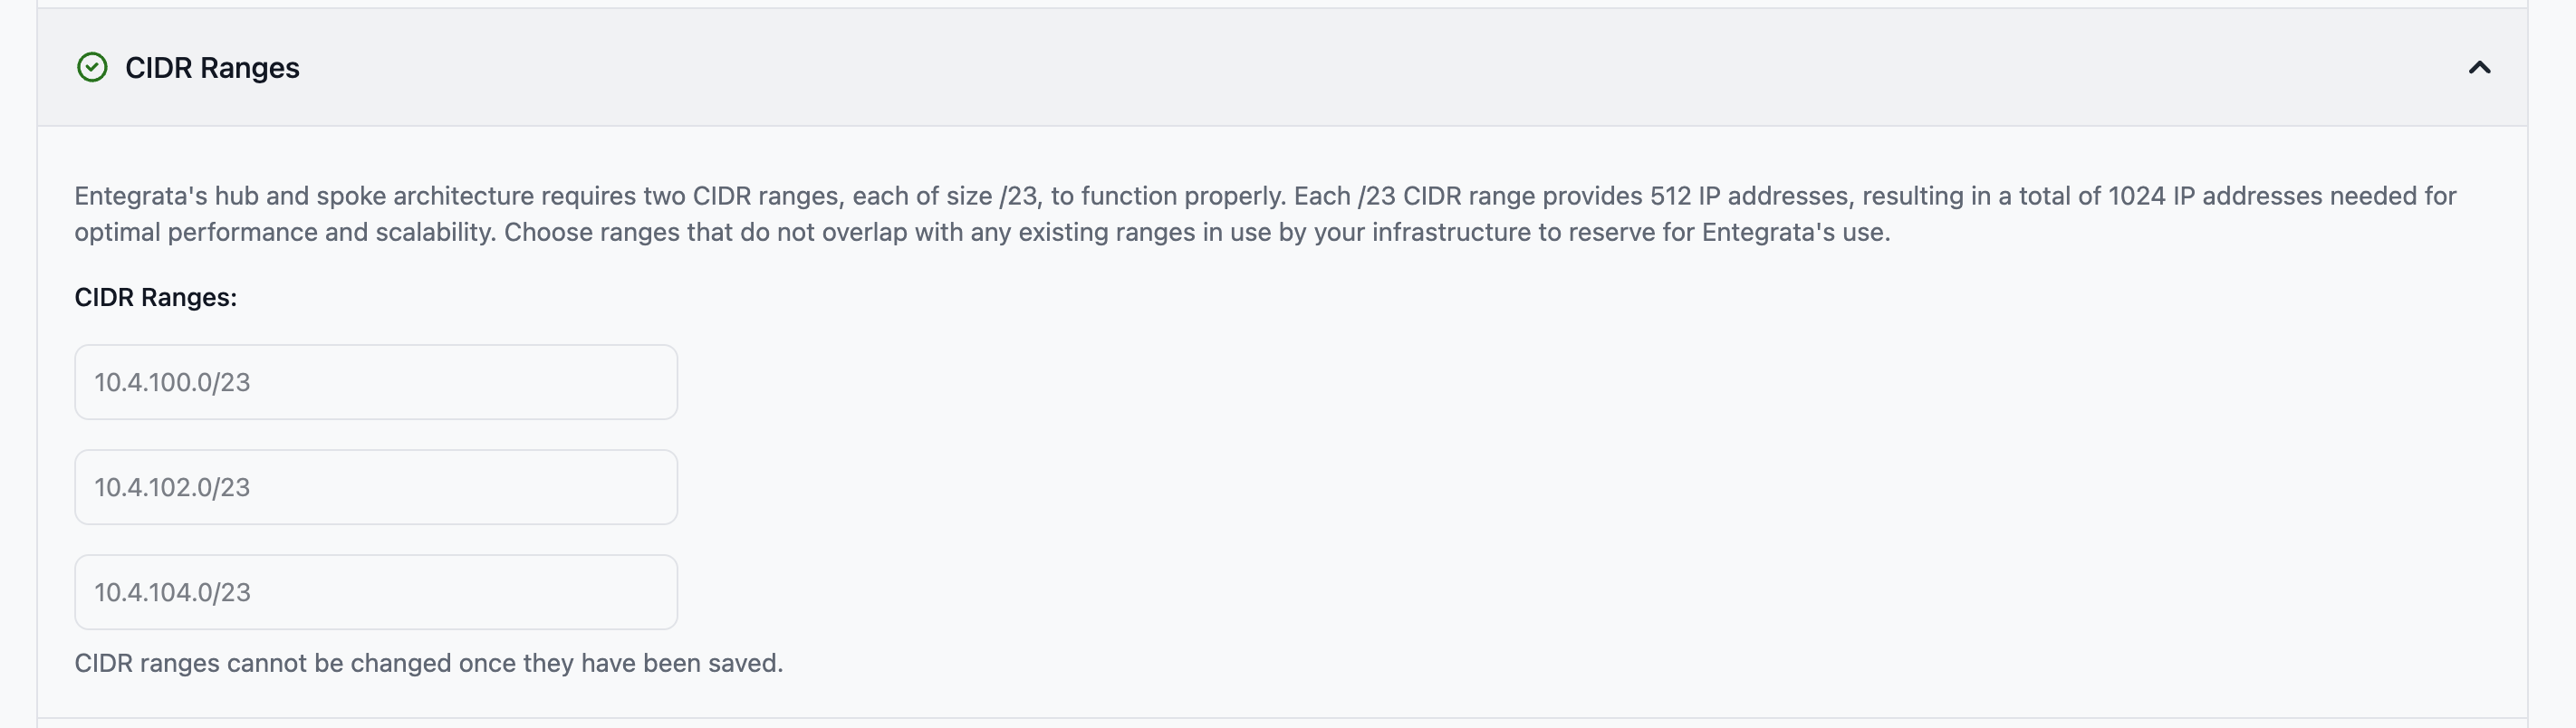 CIDR ranges must not overlap with each other or with your existing network. Once saved, they cannot be changed.
Before proceeding, gather the following information from your Azure environment:
1. Navigate to the Azure Portal
2. Go to **Virtual Networks** → Select your VNet
3. In the Properties section, copy the **Resource ID**
The Resource ID format should be:
```
/subscriptions/{subscription-id}/resourceGroups/{resource-group}/providers/Microsoft.Network/virtualNetworks/{vnet-name}
```
You'll need this in the next section.
Configure the peering connection from Entegrata to your Virtual Network.
**Required field:**
* **Virtual Network Resource ID** - The full Azure Resource ID of your Virtual Network
CIDR ranges must not overlap with each other or with your existing network. Once saved, they cannot be changed.
Before proceeding, gather the following information from your Azure environment:
1. Navigate to the Azure Portal
2. Go to **Virtual Networks** → Select your VNet
3. In the Properties section, copy the **Resource ID**
The Resource ID format should be:
```
/subscriptions/{subscription-id}/resourceGroups/{resource-group}/providers/Microsoft.Network/virtualNetworks/{vnet-name}
```
You'll need this in the next section.
Configure the peering connection from Entegrata to your Virtual Network.
**Required field:**
* **Virtual Network Resource ID** - The full Azure Resource ID of your Virtual Network
 Example format:
```
/subscriptions/12345678-1234-1234-1234-123456789012/resourceGroups/myResourceGroup/providers/Microsoft.Network/virtualNetworks/myVNet
```
After submitting, Entegrata will initiate the peering connection. You'll need to accept it on your side in the next step.
After Entegrata initiates the peering, you need to accept it in your Azure environment.
**For Self-Hosted Instances:**
To allow Entegrata to establish a virtual network peering to your Azure environment, you need to grant the Network Contributor role to the managed identity created for your subscription. The managed identity name will be dynamically generated and resides within the Entegrata subscription in a corresponding resource group.
**Steps to grant Network Contributor role:**
1. Sign in to the **Azure Portal**
2. Navigate to Subscriptions or Resource Groups, depending on where you want to assign the role. Make sure the virtual network you want to peer is within the source group or subscription:
* For the entire subscription, select Subscriptions > Your subscription
* For a specific resource group, select Resource Groups > Your resource group
3. In the left-hand menu, click **Access control (IAM)**
4. Click **+ Add > Add role assignment**
5. In the Role dropdown, select **Network Contributor**
6. In the Assign access to section, choose **Managed identity**
7. Click **Select members**, then search for and select the managed identity (the name will be displayed in the interface)
8. Click **Select**, then **Review + assign** to complete the role assignment
9. Verify the assignment by checking the **role assignments** tab in the Access control (IAM) section
**For Managed Instances:**
To allow Entegrata to establish a virtual network peering to your Azure environment, you need to download and apply a Lighthouse template that grants the necessary permissions.
Example format:
```
/subscriptions/12345678-1234-1234-1234-123456789012/resourceGroups/myResourceGroup/providers/Microsoft.Network/virtualNetworks/myVNet
```
After submitting, Entegrata will initiate the peering connection. You'll need to accept it on your side in the next step.
After Entegrata initiates the peering, you need to accept it in your Azure environment.
**For Self-Hosted Instances:**
To allow Entegrata to establish a virtual network peering to your Azure environment, you need to grant the Network Contributor role to the managed identity created for your subscription. The managed identity name will be dynamically generated and resides within the Entegrata subscription in a corresponding resource group.
**Steps to grant Network Contributor role:**
1. Sign in to the **Azure Portal**
2. Navigate to Subscriptions or Resource Groups, depending on where you want to assign the role. Make sure the virtual network you want to peer is within the source group or subscription:
* For the entire subscription, select Subscriptions > Your subscription
* For a specific resource group, select Resource Groups > Your resource group
3. In the left-hand menu, click **Access control (IAM)**
4. Click **+ Add > Add role assignment**
5. In the Role dropdown, select **Network Contributor**
6. In the Assign access to section, choose **Managed identity**
7. Click **Select members**, then search for and select the managed identity (the name will be displayed in the interface)
8. Click **Select**, then **Review + assign** to complete the role assignment
9. Verify the assignment by checking the **role assignments** tab in the Access control (IAM) section
**For Managed Instances:**
To allow Entegrata to establish a virtual network peering to your Azure environment, you need to download and apply a Lighthouse template that grants the necessary permissions.
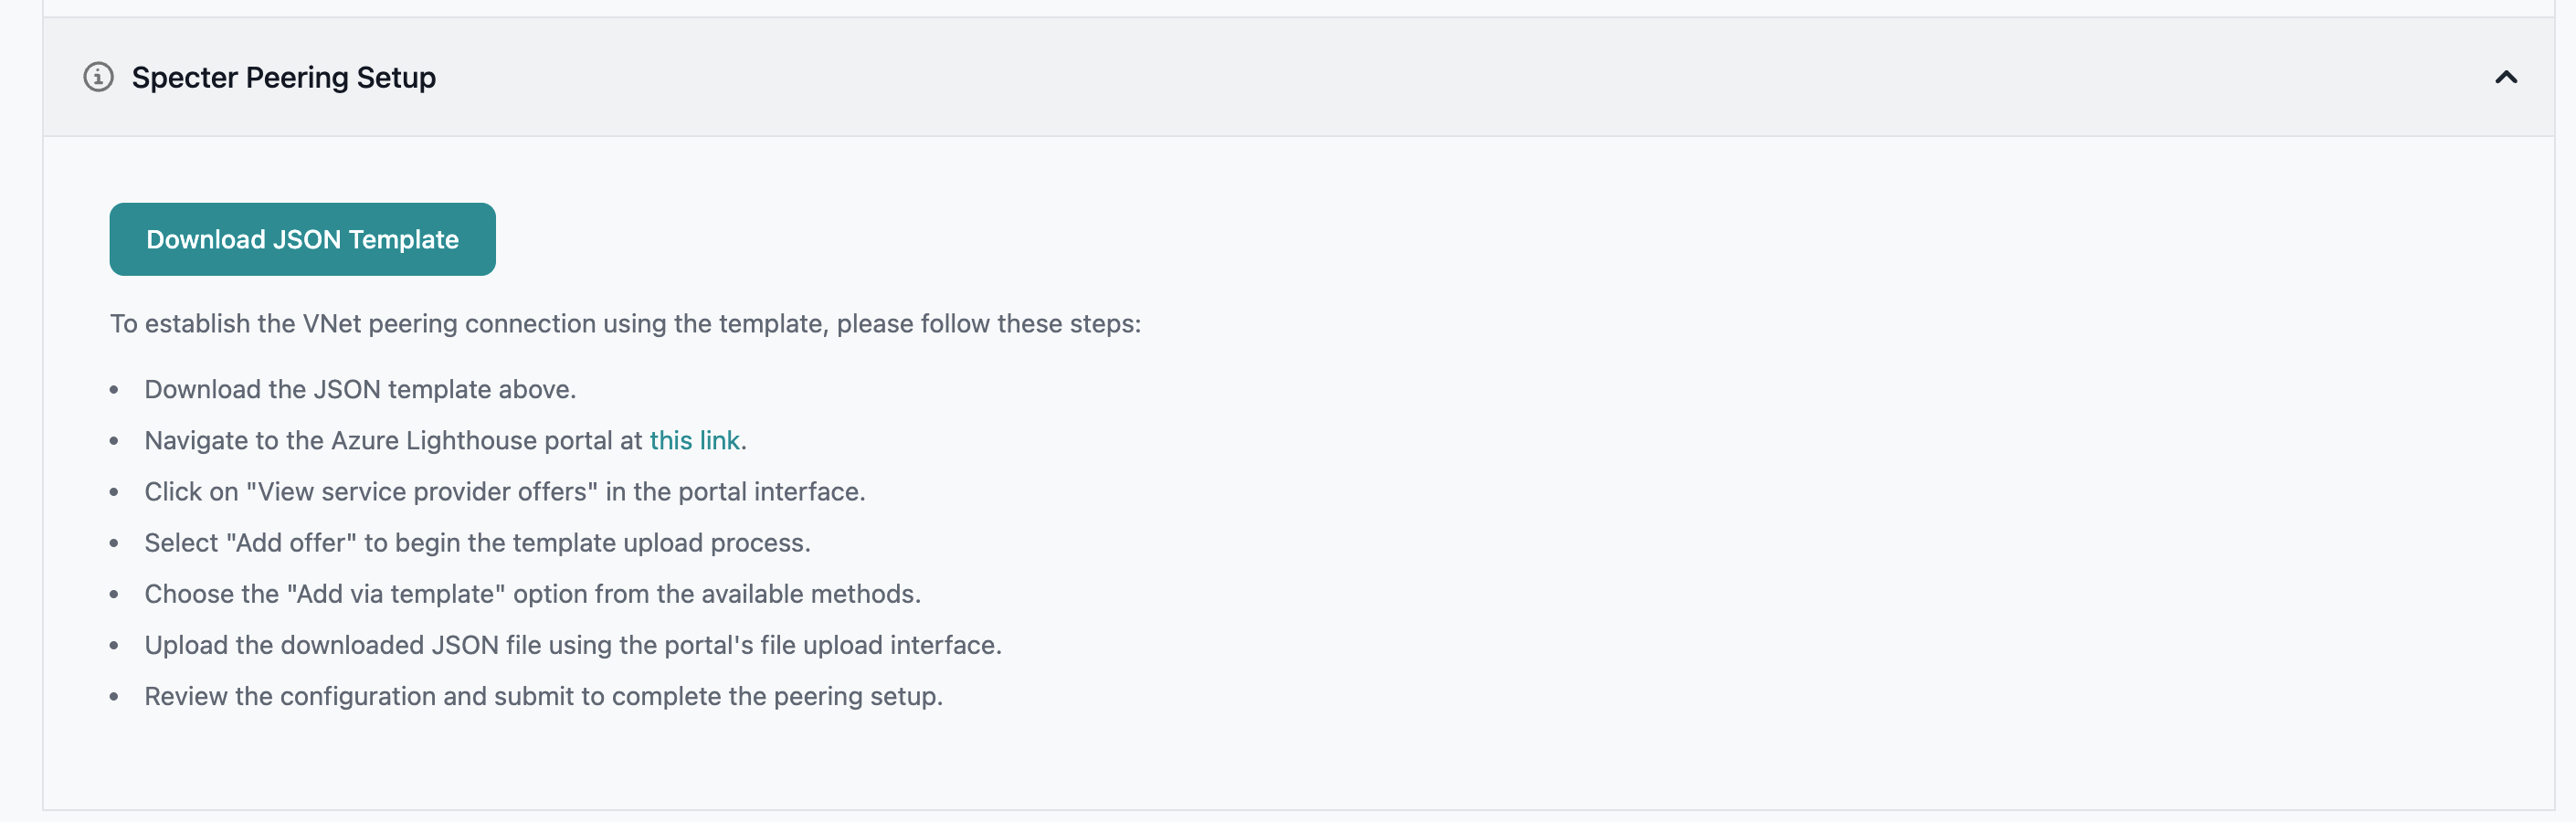 **Steps to apply the Lighthouse template:**
1. Download the Lighthouse template provided in the interface
2. Follow the instructions shown in the interface for where to apply this template in your Azure portal
3. The template will automatically configure the necessary permissions for the peering connection
The peering connection will show as "Connected" once both sides have completed configuration.
## Validation
After configuration, Entegrata will automatically:
* Verify the peering connection is established
* Test network connectivity
* Validate routing configuration
* Confirm DNS resolution
## Troubleshooting
**This appears when:** The VNet Resource ID format is incorrect
**Solutions:**
* Ensure the ID starts with `/subscriptions/`
* Verify all required path segments are present
* Check for typos in the resource group or VNet name
* Copy the exact Resource ID from Azure Portal → Virtual Networks → Properties
**This appears when:** CIDR ranges don't meet requirements
**Solutions:**
* Ensure all three ranges use `/23` subnet mask (not /24, /22, etc.)
* Format must be `X.X.X.X/23` (e.g., `10.0.0.0/23`)
* Check for typos in IP addresses
* Verify ranges don't overlap with your existing networks
**This appears when:** You've entered the same CIDR range twice
**Solutions:**
* Use three different /23 ranges
* Example: `10.0.0.0/23`, `10.0.2.0/23`, `10.0.4.0/23`
* Ranges must not overlap or be identical
**This means:** The peering hasn't been established yet
**Next steps:**
* Check Azure Portal for pending peering request
* Accept the peering on your VNet side
* Verify Network Security Group rules
* Wait a few minutes for propagation, then refresh the status
## When to Use S2S VPN
Choose Site-to-Site (S2S) VPN if:
* Your data sources are on-premises
* You have a hybrid cloud environment
* You have existing VPN infrastructure
* You cannot use VNet peering due to policy restrictions
## Configuration Steps
*This section is only shown for self-hosted instances.*
Configure your Databricks workspace connection details.
**Required fields:**
* **Databricks SPN Application ID** - The Application (Client) ID of your Databricks Service Principal
* **Databricks SPN Object ID** - The Object (Principal) ID of your Databricks Service Principal
* **Databricks Account ID** - Your Databricks Account ID (UUID format)
These fields will be disabled after the external configuration is complete and cannot be modified later.
Ensure you have the following information from your VPN device:
**Required Information:**
* Public IP address of your VPN device
* Local network address spaces
* Preferred encryption and authentication methods
* Pre-shared key (PSK) for authentication
Specify **three non-overlapping /23 CIDR ranges** reserved exclusively for Entegrata.
**Required fields:**
* **CIDR Range 1** - First /23 CIDR block (e.g., 10.0.0.0/23)
* **CIDR Range 2** - Second /23 CIDR block (e.g., 10.0.2.0/23)
* **CIDR Range 3** - Third /23 CIDR block (e.g., 10.0.4.0/23)
**Steps to apply the Lighthouse template:**
1. Download the Lighthouse template provided in the interface
2. Follow the instructions shown in the interface for where to apply this template in your Azure portal
3. The template will automatically configure the necessary permissions for the peering connection
The peering connection will show as "Connected" once both sides have completed configuration.
## Validation
After configuration, Entegrata will automatically:
* Verify the peering connection is established
* Test network connectivity
* Validate routing configuration
* Confirm DNS resolution
## Troubleshooting
**This appears when:** The VNet Resource ID format is incorrect
**Solutions:**
* Ensure the ID starts with `/subscriptions/`
* Verify all required path segments are present
* Check for typos in the resource group or VNet name
* Copy the exact Resource ID from Azure Portal → Virtual Networks → Properties
**This appears when:** CIDR ranges don't meet requirements
**Solutions:**
* Ensure all three ranges use `/23` subnet mask (not /24, /22, etc.)
* Format must be `X.X.X.X/23` (e.g., `10.0.0.0/23`)
* Check for typos in IP addresses
* Verify ranges don't overlap with your existing networks
**This appears when:** You've entered the same CIDR range twice
**Solutions:**
* Use three different /23 ranges
* Example: `10.0.0.0/23`, `10.0.2.0/23`, `10.0.4.0/23`
* Ranges must not overlap or be identical
**This means:** The peering hasn't been established yet
**Next steps:**
* Check Azure Portal for pending peering request
* Accept the peering on your VNet side
* Verify Network Security Group rules
* Wait a few minutes for propagation, then refresh the status
## When to Use S2S VPN
Choose Site-to-Site (S2S) VPN if:
* Your data sources are on-premises
* You have a hybrid cloud environment
* You have existing VPN infrastructure
* You cannot use VNet peering due to policy restrictions
## Configuration Steps
*This section is only shown for self-hosted instances.*
Configure your Databricks workspace connection details.
**Required fields:**
* **Databricks SPN Application ID** - The Application (Client) ID of your Databricks Service Principal
* **Databricks SPN Object ID** - The Object (Principal) ID of your Databricks Service Principal
* **Databricks Account ID** - Your Databricks Account ID (UUID format)
These fields will be disabled after the external configuration is complete and cannot be modified later.
Ensure you have the following information from your VPN device:
**Required Information:**
* Public IP address of your VPN device
* Local network address spaces
* Preferred encryption and authentication methods
* Pre-shared key (PSK) for authentication
Specify **three non-overlapping /23 CIDR ranges** reserved exclusively for Entegrata.
**Required fields:**
* **CIDR Range 1** - First /23 CIDR block (e.g., 10.0.0.0/23)
* **CIDR Range 2** - Second /23 CIDR block (e.g., 10.0.2.0/23)
* **CIDR Range 3** - Third /23 CIDR block (e.g., 10.0.4.0/23)
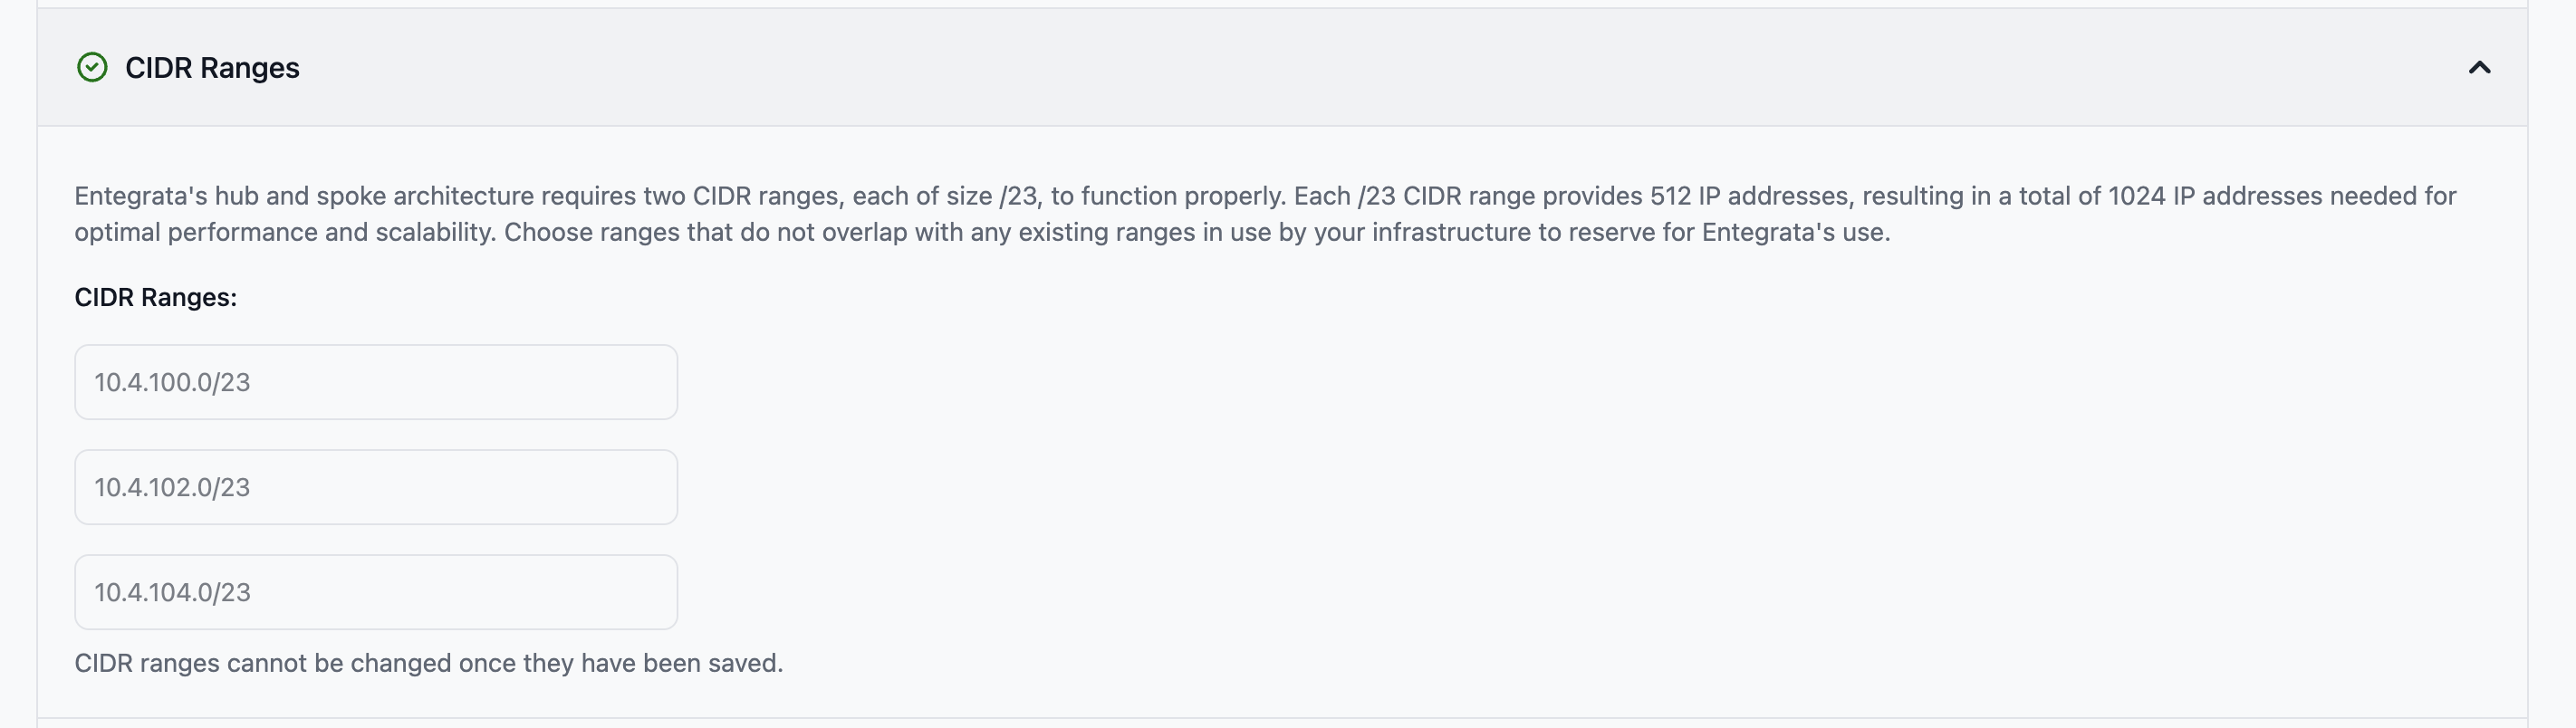 CIDR ranges must not overlap with each other or with your existing network. Once saved, they cannot be changed.
Configure the pre-shared key for VPN authentication.
**Shared Key** - Pre-shared key (minimum 25 characters if provided). Used for mutual authentication between VPN endpoints.
CIDR ranges must not overlap with each other or with your existing network. Once saved, they cannot be changed.
Configure the pre-shared key for VPN authentication.
**Shared Key** - Pre-shared key (minimum 25 characters if provided). Used for mutual authentication between VPN endpoints.
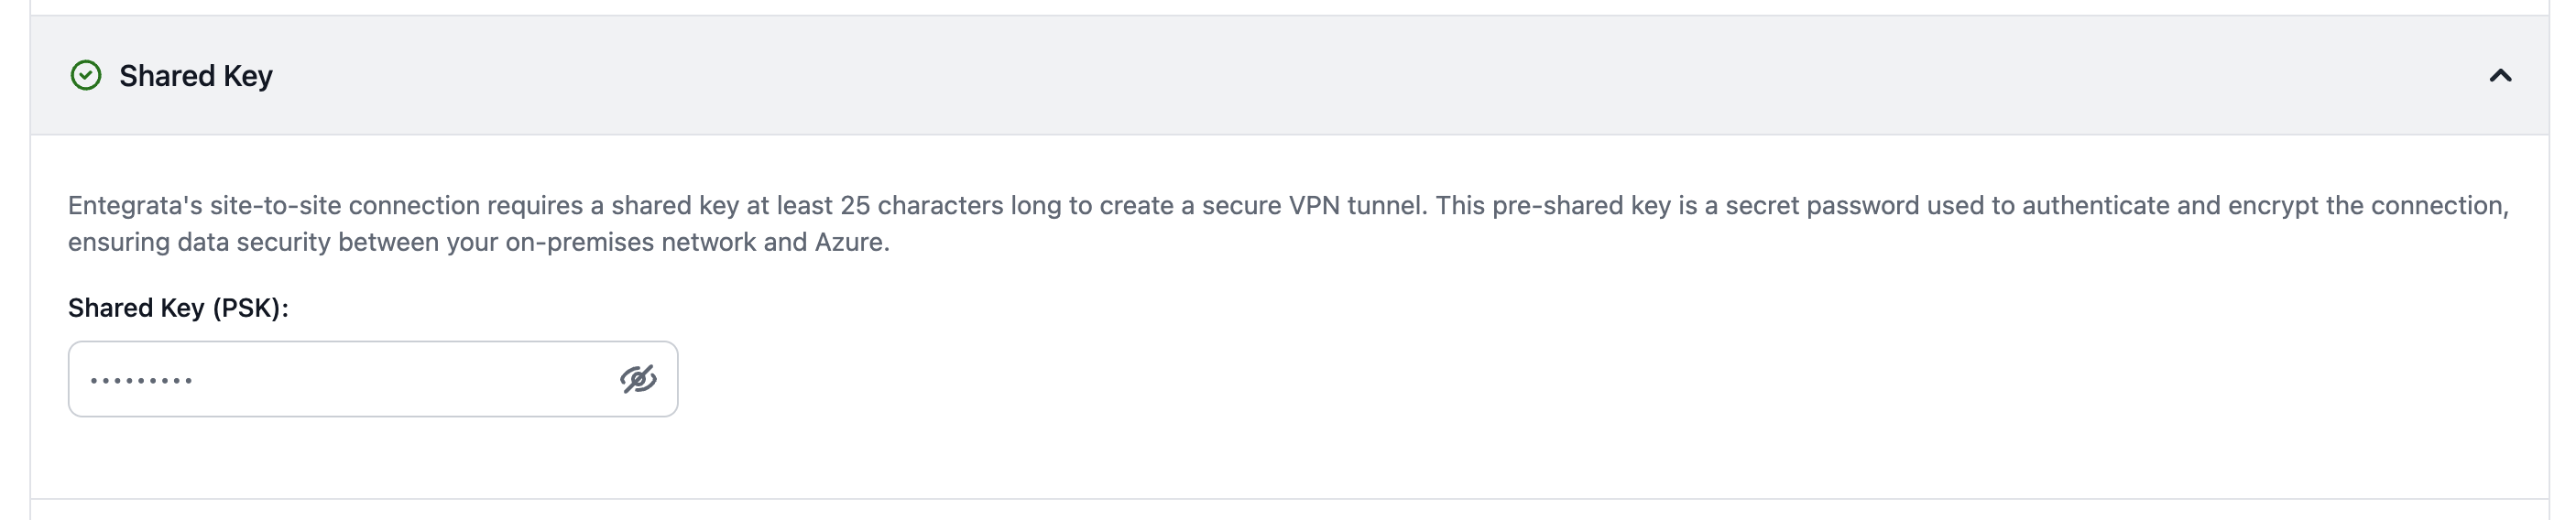 **PSK Best Practices:**
* Use at least 25 random characters
* Include uppercase, lowercase, numbers, and symbols
* Store securely and rotate periodically
* Never share over insecure channels
**Generate a Strong PSK:**
```bash theme={null}
openssl rand -base64 32
```
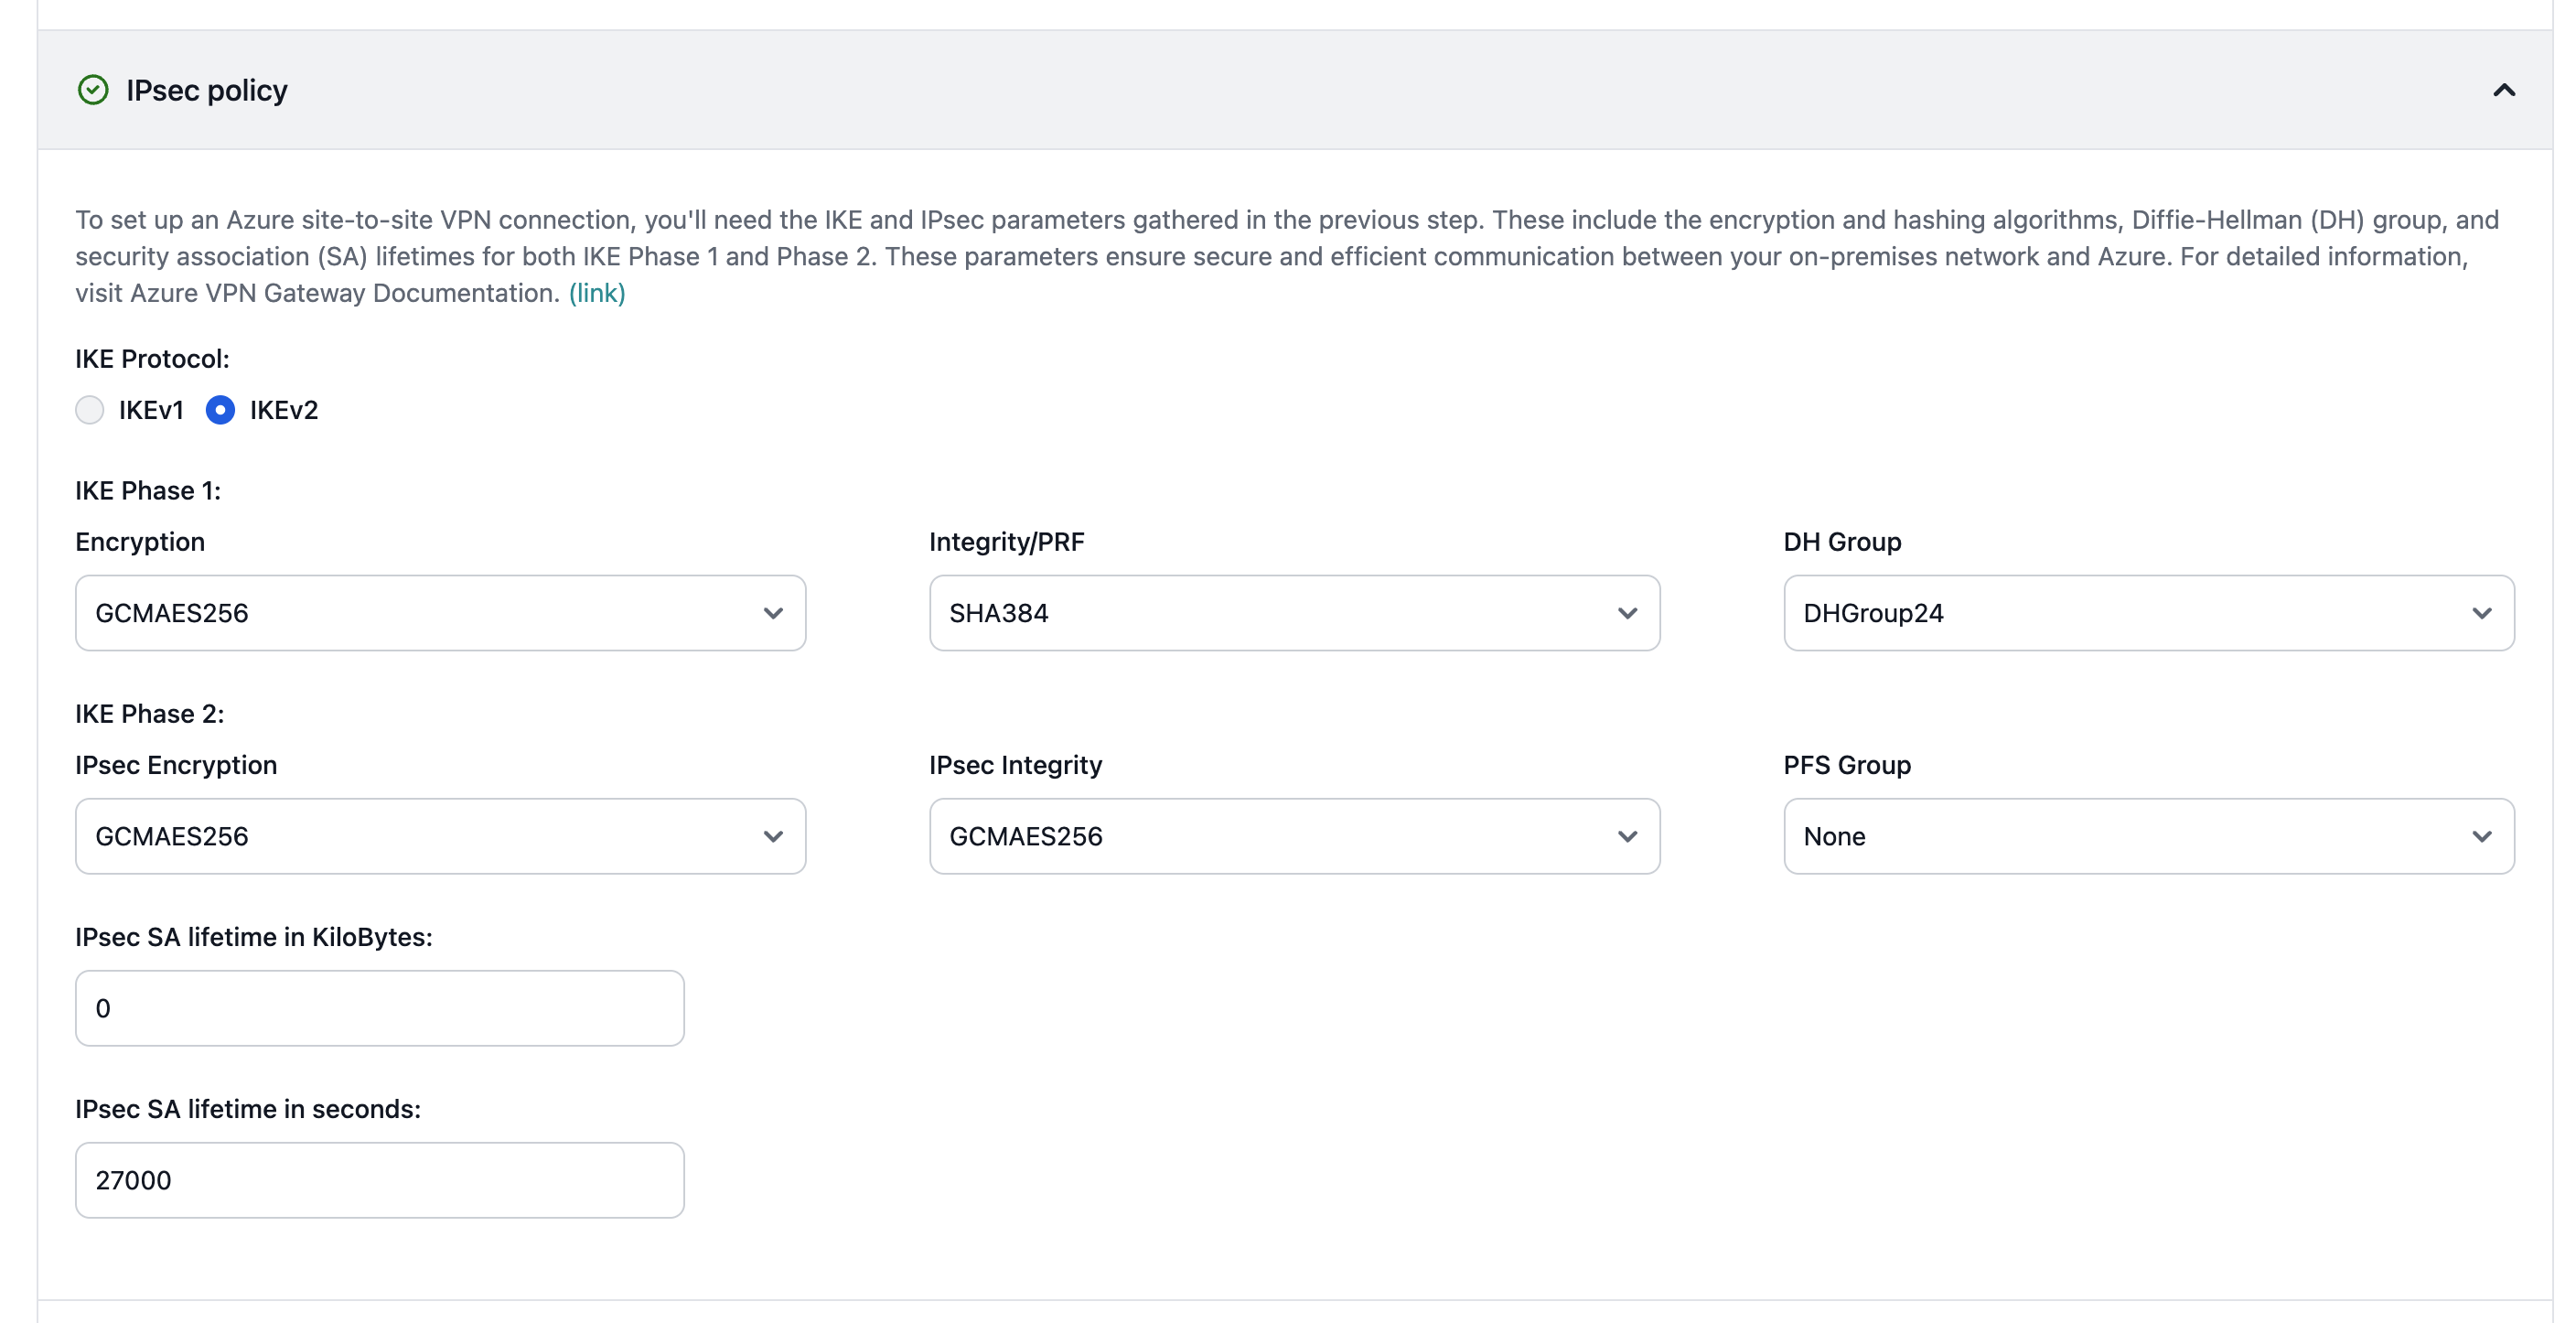
Configure the IPsec/IKE parameters to match your VPN device.
### IKE Version
* **IKE Protocol** (Required) - Select IKEv1 or IKEv2 (IKEv2 recommended)
### Phase 1 (IKE) Settings
* **IKE Encryption** (Required) - Encryption algorithm: AES128, AES192, AES256, GCMAES128, GCMAES256
* **IKE Integrity** (Required) - Integrity algorithm: SHA1, SHA256, SHA384, MD5
* **DH Group** (Required) - Diffie-Hellman group: DHGroup1, DHGroup14, DHGroup2, DHGroup2048, DHGroup24, ECP256, ECP384, None
### Phase 2 (IPsec) Settings
* **IPsec Encryption** (Required) - IPsec encryption: None, AES128, AES192, AES256, DES, DES3, GCMAES128, GCMAES192, GCMAES256
* **IPsec Integrity** (Required) - IPsec integrity: GCMAES128, GCMAES192, GCMAES256, MD5, SHA1, SHA256
* **PFS Group** (Required) - Perfect Forward Secrecy group: None, PFS1, PFS2, PFS14, PFS24, PFS2048, ECP256, ECP384
* **SA Lifetime (Seconds)** (Required) - SA lifetime in seconds (300-2147483647, default: 27000)
* **SA Lifetime (Kilobytes)** (Optional) - SA lifetime in kilobytes (0 or 1024-2147483647, default: 0)
**PSK Best Practices:**
* Use at least 25 random characters
* Include uppercase, lowercase, numbers, and symbols
* Store securely and rotate periodically
* Never share over insecure channels
**Generate a Strong PSK:**
```bash theme={null}
openssl rand -base64 32
```
Configure the IPsec/IKE parameters to match your VPN device.
### IKE Version
* **IKE Protocol** (Required) - Select IKEv1 or IKEv2 (IKEv2 recommended)
### Phase 1 (IKE) Settings
* **IKE Encryption** (Required) - Encryption algorithm: AES128, AES192, AES256, GCMAES128, GCMAES256
* **IKE Integrity** (Required) - Integrity algorithm: SHA1, SHA256, SHA384, MD5
* **DH Group** (Required) - Diffie-Hellman group: DHGroup1, DHGroup14, DHGroup2, DHGroup2048, DHGroup24, ECP256, ECP384, None
### Phase 2 (IPsec) Settings
* **IPsec Encryption** (Required) - IPsec encryption: None, AES128, AES192, AES256, DES, DES3, GCMAES128, GCMAES192, GCMAES256
* **IPsec Integrity** (Required) - IPsec integrity: GCMAES128, GCMAES192, GCMAES256, MD5, SHA1, SHA256
* **PFS Group** (Required) - Perfect Forward Secrecy group: None, PFS1, PFS2, PFS14, PFS24, PFS2048, ECP256, ECP384
* **SA Lifetime (Seconds)** (Required) - SA lifetime in seconds (300-2147483647, default: 27000)
* **SA Lifetime (Kilobytes)** (Optional) - SA lifetime in kilobytes (0 or 1024-2147483647, default: 0)
 **Recommended Configuration:**
* IKE Version: IKEv2
* Encryption: AES256
* Integrity: SHA256
* DH Group: DHGroup14
* PFS: PFS2048
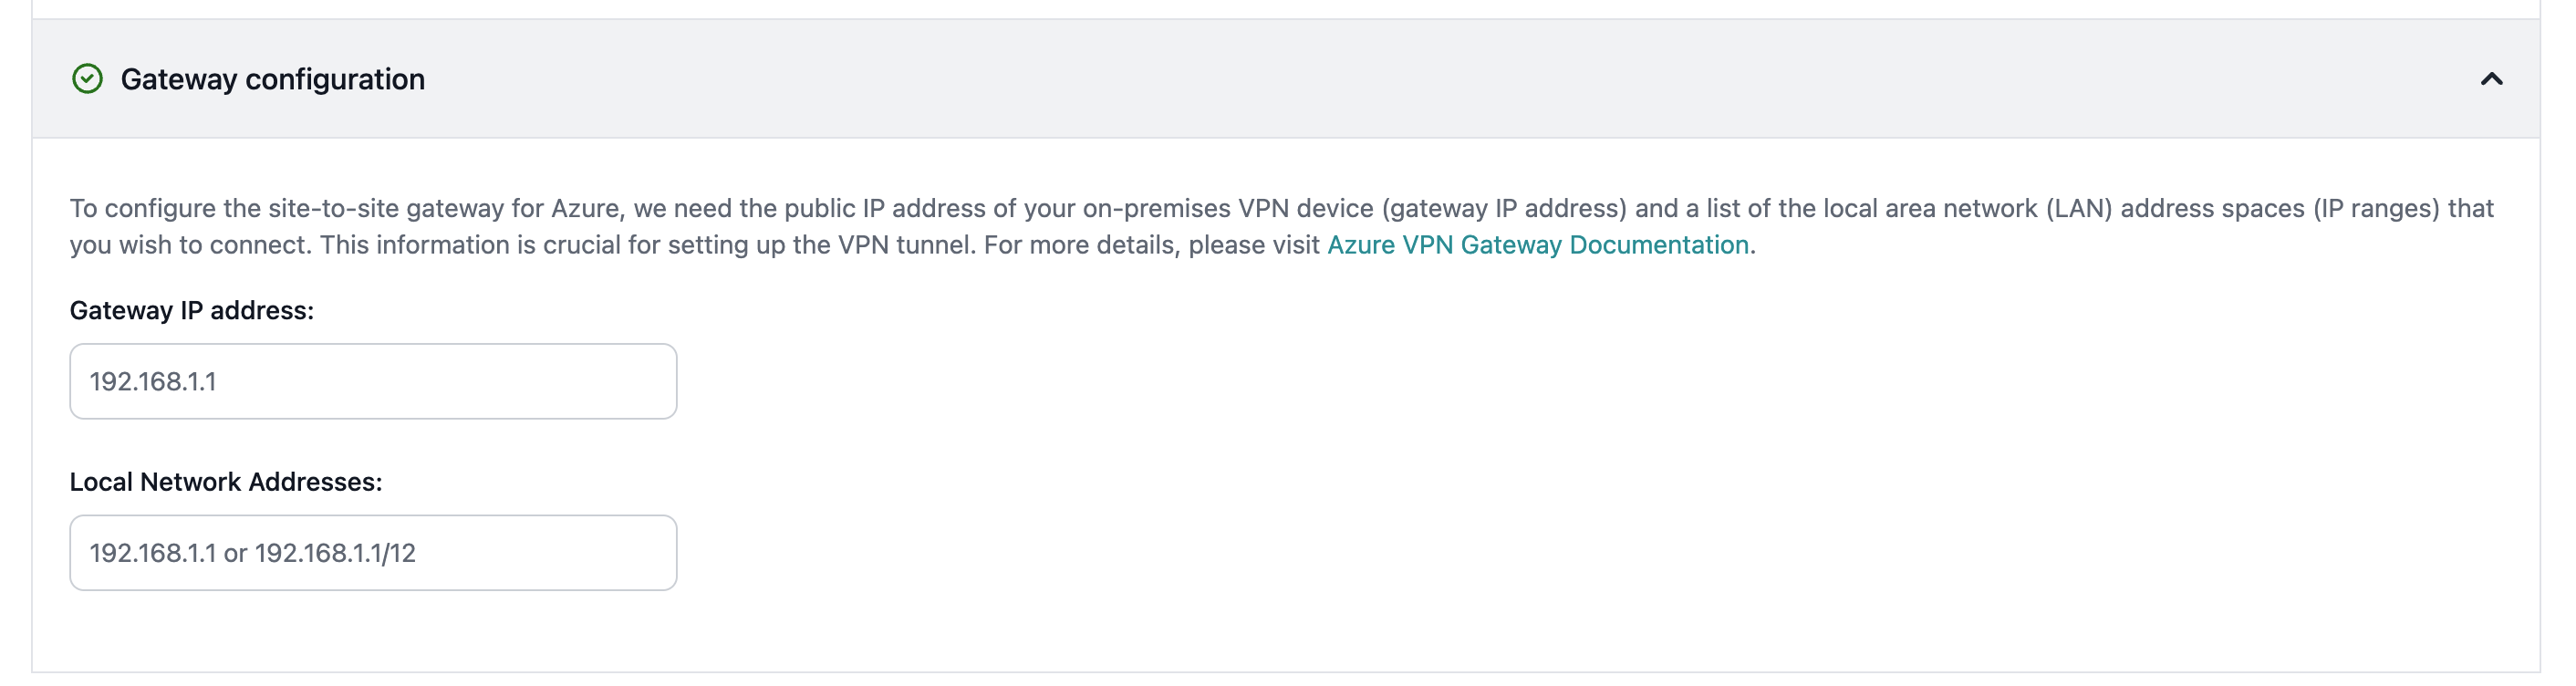
Configure your VPN gateway connection details.
**Required fields:**
* **Gateway IP Address** - Public IP address of your VPN device (must be static)
* **Local Network Addresses** - List of on-premises network address spaces (CIDR format)
**Recommended Configuration:**
* IKE Version: IKEv2
* Encryption: AES256
* Integrity: SHA256
* DH Group: DHGroup14
* PFS: PFS2048
Configure your VPN gateway connection details.
**Required fields:**
* **Gateway IP Address** - Public IP address of your VPN device (must be static)
* **Local Network Addresses** - List of on-premises network address spaces (CIDR format)
 **Examples:**
* Single network: `192.168.1.0/24`
* Multiple networks: `192.168.1.0/24`, `192.168.2.0/24`, `10.0.0.0/16`
* Host addresses: `192.168.1.10/32`
Ensure your firewall allows IPsec traffic (UDP 500, UDP 4500, ESP) from Entegrata's public IPs.
## VPN Tunnel Establishment
After saving, Entegrata will:
1. Provision Azure VPN Gateway (15-30 minutes)
2. Configure IPsec policies
3. Initiate VPN connection
4. Validate tunnel establishment and connectivity
**Examples:**
* Single network: `192.168.1.0/24`
* Multiple networks: `192.168.1.0/24`, `192.168.2.0/24`, `10.0.0.0/16`
* Host addresses: `192.168.1.10/32`
Ensure your firewall allows IPsec traffic (UDP 500, UDP 4500, ESP) from Entegrata's public IPs.
## VPN Tunnel Establishment
After saving, Entegrata will:
1. Provision Azure VPN Gateway (15-30 minutes)
2. Configure IPsec policies
3. Initiate VPN connection
4. Validate tunnel establishment and connectivity
 ## Post-Configuration
Once the VPN tunnel is established:
1. Configure your on-premises VPN device with the provided settings
2. Ensure routing is properly configured on both sides
3. Update firewall rules to allow required traffic
4. Test connectivity from both directions
## Post-Configuration
Once the VPN tunnel is established:
1. Configure your on-premises VPN device with the provided settings
2. Ensure routing is properly configured on both sides
3. Update firewall rules to allow required traffic
4. Test connectivity from both directions
 ## Troubleshooting Common VPN Issues
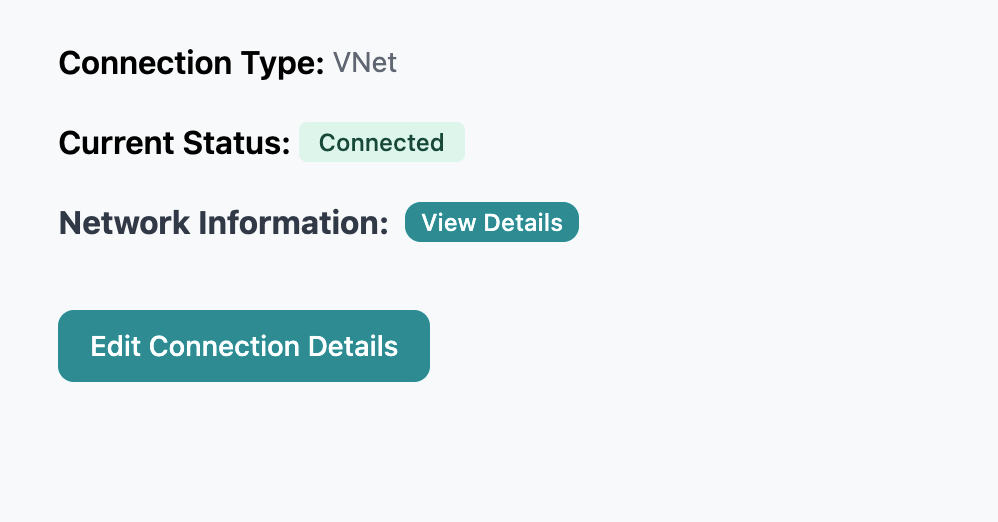
After configuration, check the connection status on this page and in your VPN device logs. The following are common VPN configuration issues and their solutions.
**Possible causes and solutions:**
* Verify the pre-shared key matches exactly on both sides
* Ensure all IPsec parameters are identical between devices
* Check that your gateway's public IP is correct and reachable
* Confirm your firewall allows IPsec traffic (UDP 500, UDP 4500, ESP)
**These settings must match on both sides:**
* IKE version (both using IKEv1 or both using IKEv2)
* Encryption and integrity algorithms
* Diffie-Hellman group
* Pre-shared key (check for extra spaces or typos)
**These settings must match on both sides:**
* IPsec encryption and integrity algorithms
* PFS group setting
* Local and remote network address definitions
* SA lifetime settings (must be within compatible ranges)
**Check these common causes:**
* Routing tables on both sides have correct routes
* Network Security Group rules allow your application traffic
* No overlapping IP addresses between networks
* Test with ping in both directions to verify basic connectivity
## When to Use ExpressRoute
Choose ExpressRoute if:
* You require dedicated, private connectivity with guaranteed bandwidth
* You have an existing Azure ExpressRoute circuit provisioned by a connectivity provider
* You need lower latency than internet-based connections
* Your compliance requirements mandate private network paths
## Prerequisites
Before configuring an ExpressRoute connection, ensure you have:
* An **Azure ExpressRoute circuit** provisioned and in a "Provisioned" state
* An **Authorization Key** generated by the circuit owner (single-use)
* The **Circuit Resource ID** from the Azure portal
Authorization keys are single-use. Each new connection requires a new key from the circuit owner. If the connection needs to be recreated, a new authorization key must be generated.
## Configuration Steps
Specify **three non-overlapping /23 CIDR ranges** reserved exclusively for Entegrata.
**Required fields:**
* **CIDR Range 1** - First /23 CIDR block (e.g., 10.0.0.0/23)
* **CIDR Range 2** - Second /23 CIDR block (e.g., 10.0.2.0/23)
* **CIDR Range 3** - Third /23 CIDR block (e.g., 10.0.4.0/23)
CIDR ranges must not overlap with each other or with your existing network. Once saved, they cannot be changed.
Configure your ExpressRoute connection details.
**Required fields:**
* **Circuit Resource ID** - The full Azure Resource Manager ID of your ExpressRoute circuit
```
/subscriptions/{subscription-id}/resourceGroups/{resource-group}/providers/Microsoft.Network/expressRouteCircuits/{circuit-name}
```
You can find this in the Azure Portal under your ExpressRoute circuit's **Properties** page.
* **Authorization Key** - A single-use token from the circuit owner that grants permission to connect
## Troubleshooting Common VPN Issues
After configuration, check the connection status on this page and in your VPN device logs. The following are common VPN configuration issues and their solutions.
**Possible causes and solutions:**
* Verify the pre-shared key matches exactly on both sides
* Ensure all IPsec parameters are identical between devices
* Check that your gateway's public IP is correct and reachable
* Confirm your firewall allows IPsec traffic (UDP 500, UDP 4500, ESP)
**These settings must match on both sides:**
* IKE version (both using IKEv1 or both using IKEv2)
* Encryption and integrity algorithms
* Diffie-Hellman group
* Pre-shared key (check for extra spaces or typos)
**These settings must match on both sides:**
* IPsec encryption and integrity algorithms
* PFS group setting
* Local and remote network address definitions
* SA lifetime settings (must be within compatible ranges)
**Check these common causes:**
* Routing tables on both sides have correct routes
* Network Security Group rules allow your application traffic
* No overlapping IP addresses between networks
* Test with ping in both directions to verify basic connectivity
## When to Use ExpressRoute
Choose ExpressRoute if:
* You require dedicated, private connectivity with guaranteed bandwidth
* You have an existing Azure ExpressRoute circuit provisioned by a connectivity provider
* You need lower latency than internet-based connections
* Your compliance requirements mandate private network paths
## Prerequisites
Before configuring an ExpressRoute connection, ensure you have:
* An **Azure ExpressRoute circuit** provisioned and in a "Provisioned" state
* An **Authorization Key** generated by the circuit owner (single-use)
* The **Circuit Resource ID** from the Azure portal
Authorization keys are single-use. Each new connection requires a new key from the circuit owner. If the connection needs to be recreated, a new authorization key must be generated.
## Configuration Steps
Specify **three non-overlapping /23 CIDR ranges** reserved exclusively for Entegrata.
**Required fields:**
* **CIDR Range 1** - First /23 CIDR block (e.g., 10.0.0.0/23)
* **CIDR Range 2** - Second /23 CIDR block (e.g., 10.0.2.0/23)
* **CIDR Range 3** - Third /23 CIDR block (e.g., 10.0.4.0/23)
CIDR ranges must not overlap with each other or with your existing network. Once saved, they cannot be changed.
Configure your ExpressRoute connection details.
**Required fields:**
* **Circuit Resource ID** - The full Azure Resource Manager ID of your ExpressRoute circuit
```
/subscriptions/{subscription-id}/resourceGroups/{resource-group}/providers/Microsoft.Network/expressRouteCircuits/{circuit-name}
```
You can find this in the Azure Portal under your ExpressRoute circuit's **Properties** page.
* **Authorization Key** - A single-use token from the circuit owner that grants permission to connect
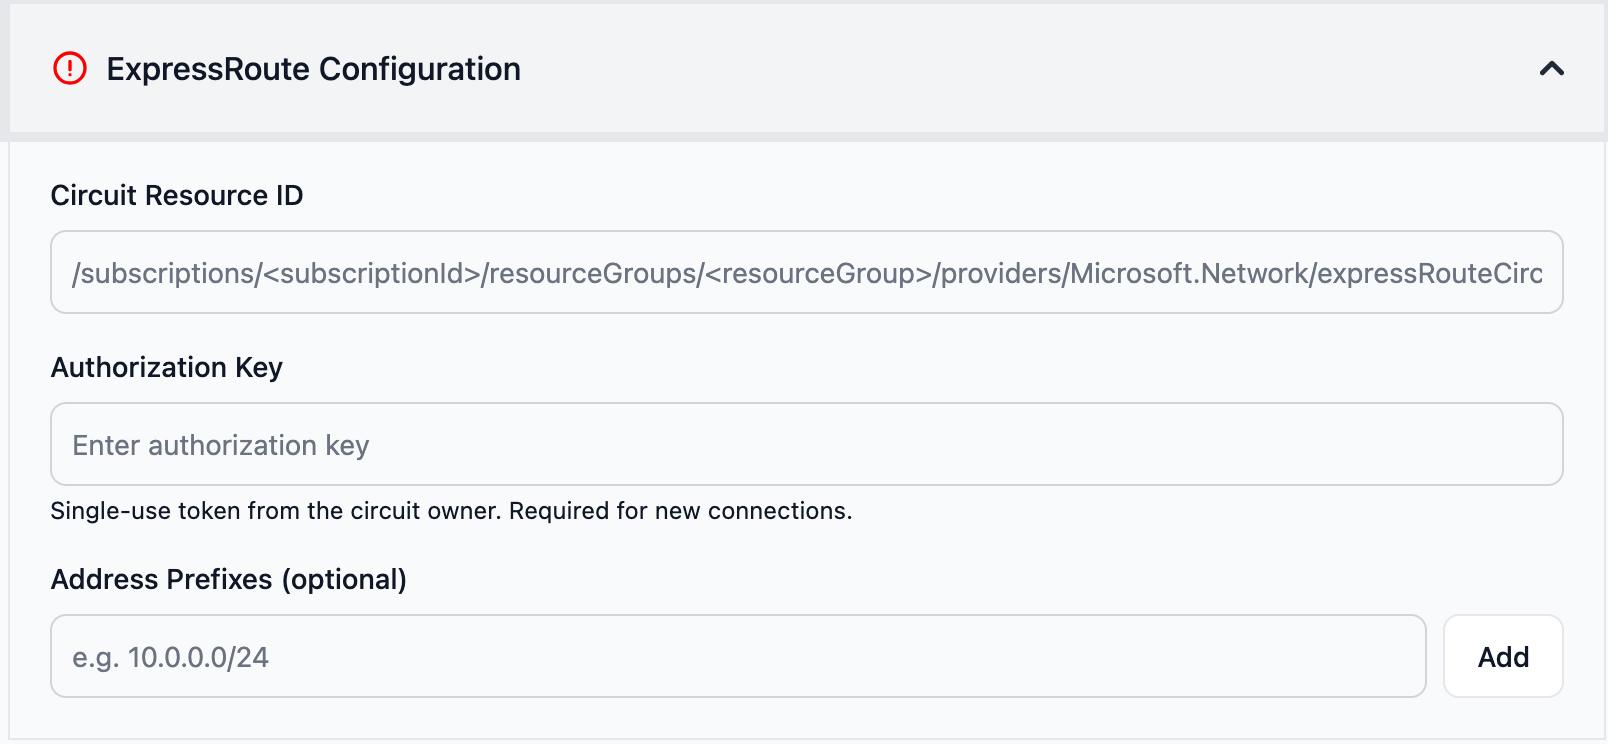 **Optional fields:**
* **Address Prefixes** - IP address ranges advertised over the circuit (e.g., `10.100.0.0/24`). These are used for CIDR overlap validation. ExpressRoute uses BGP for dynamic routing, so these are informational.
The Circuit Resource ID cannot be changed after the connection is created. To use a different circuit, delete the connection and create a new one.
## Connection Establishment
After saving, Entegrata will:
1. Provision an ExpressRoute Virtual Network Gateway (15-30 minutes)
2. Create the connection to your ExpressRoute circuit using the authorization key
3. Establish BGP peering
4. Validate connectivity
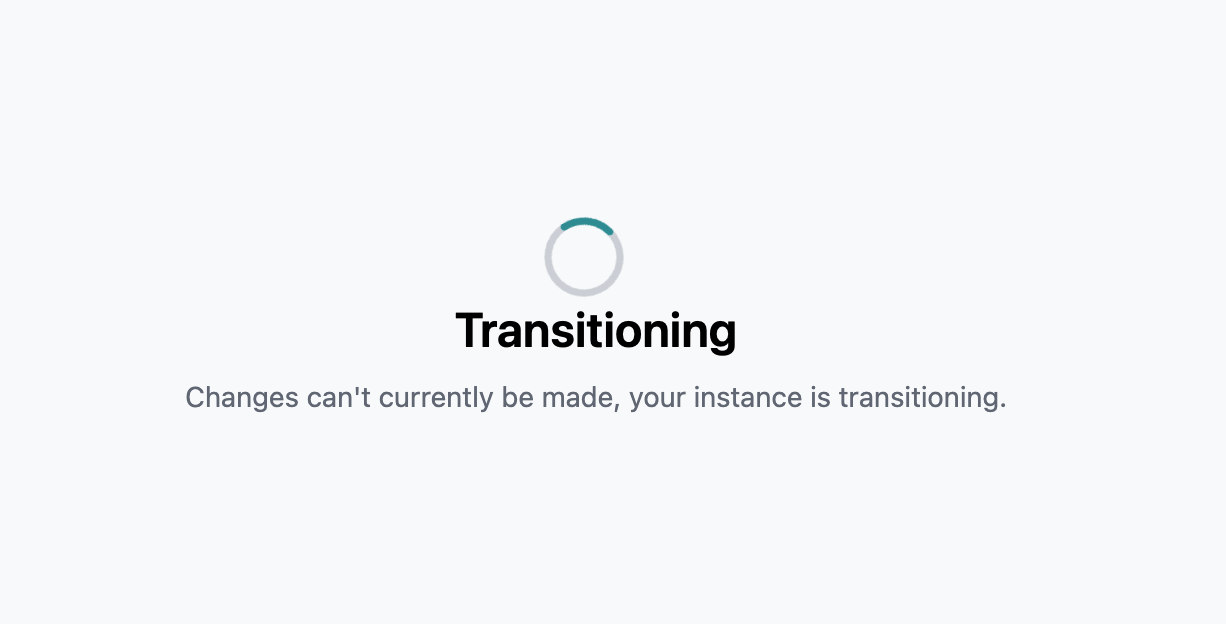
Gateway provisioning can take 15-30 minutes. The system will display a loading screen during this process. Do not refresh or navigate away.
## Troubleshooting
**This appears when:** The Circuit Resource ID doesn't match the expected format
**Solutions:**
* Ensure the ID starts with `/subscriptions/`
* Verify it contains `/providers/Microsoft.Network/expressRouteCircuits/`
* Copy the exact Resource ID from Azure Portal → ExpressRoute Circuits → Properties
* Check that the subscription ID is a valid GUID
**This appears when:** No authorization key was provided for a new connection
**Solutions:**
* Generate a new authorization key from the ExpressRoute circuit in the Azure Portal
* Navigate to your circuit → Authorizations → Add
* Copy the key and paste it into the form
**Possible causes:**
* ExpressRoute gateway is still provisioning (can take up to 30 minutes)
* The authorization key has already been used
* The ExpressRoute circuit is not in a "Provisioned" state
**Solutions:**
* Wait up to 30 minutes for initial provisioning
* Verify your circuit status in the Azure Portal
* If the key was already used, generate a new one and recreate the connection
* Contact Entegrata support if the issue persists after 30 minutes
## Security Considerations
Regardless of connection type, Entegrata implements multiple security layers:
**All traffic is encrypted in transit - Network isolation between customers - Regular security audits and compliance certifications - Azure-native security features (NSG, Azure Firewall)**
## Save Configuration
Once you've entered all required information for your chosen connection type, click the **Save** button to apply your configuration. The system will validate your settings and begin establishing the network connection.
Network configuration changes can take 5-15 minutes to fully propagate. The system will display a loading screen during this process.
## Next Steps
Return to Subscription Activation
Proceed to Additional Settings
**Optional fields:**
* **Address Prefixes** - IP address ranges advertised over the circuit (e.g., `10.100.0.0/24`). These are used for CIDR overlap validation. ExpressRoute uses BGP for dynamic routing, so these are informational.
The Circuit Resource ID cannot be changed after the connection is created. To use a different circuit, delete the connection and create a new one.
## Connection Establishment
After saving, Entegrata will:
1. Provision an ExpressRoute Virtual Network Gateway (15-30 minutes)
2. Create the connection to your ExpressRoute circuit using the authorization key
3. Establish BGP peering
4. Validate connectivity
Gateway provisioning can take 15-30 minutes. The system will display a loading screen during this process. Do not refresh or navigate away.
## Troubleshooting
**This appears when:** The Circuit Resource ID doesn't match the expected format
**Solutions:**
* Ensure the ID starts with `/subscriptions/`
* Verify it contains `/providers/Microsoft.Network/expressRouteCircuits/`
* Copy the exact Resource ID from Azure Portal → ExpressRoute Circuits → Properties
* Check that the subscription ID is a valid GUID
**This appears when:** No authorization key was provided for a new connection
**Solutions:**
* Generate a new authorization key from the ExpressRoute circuit in the Azure Portal
* Navigate to your circuit → Authorizations → Add
* Copy the key and paste it into the form
**Possible causes:**
* ExpressRoute gateway is still provisioning (can take up to 30 minutes)
* The authorization key has already been used
* The ExpressRoute circuit is not in a "Provisioned" state
**Solutions:**
* Wait up to 30 minutes for initial provisioning
* Verify your circuit status in the Azure Portal
* If the key was already used, generate a new one and recreate the connection
* Contact Entegrata support if the issue persists after 30 minutes
## Security Considerations
Regardless of connection type, Entegrata implements multiple security layers:
**All traffic is encrypted in transit - Network isolation between customers - Regular security audits and compliance certifications - Azure-native security features (NSG, Azure Firewall)**
## Save Configuration
Once you've entered all required information for your chosen connection type, click the **Save** button to apply your configuration. The system will validate your settings and begin establishing the network connection.
Network configuration changes can take 5-15 minutes to fully propagate. The system will display a loading screen during this process.
## Next Steps
Return to Subscription Activation
Proceed to Additional Settings