> ## Documentation Index
> Fetch the complete documentation index at: https://support.entegrata.com/llms.txt
> Use this file to discover all available pages before exploring further.
# Managing Rules
> Create and manage granular access control rules for precise permission management
## Overview
Access control rules allow you to define specific permissions that override default settings for targeted subjects (users or groups) and objects (resources). Rules provide granular control over who can access what data, supporting both simple static assignments and complex dynamic filters for automatic permission management.
## Understanding Rules
### Rule Components
Every access control rule consists of four key components:
* **Name**: Descriptive identifier for the rule
* **Description**: Explanation of the rule's purpose
* **Permission**: Allow or Deny access
The users or groups that the rule applies to:
* **Specific Users**: Individual actors selected by name
* **Groups**: Access control groups containing multiple users
* **Dynamic Filters**: Attribute-based selection using filter conditions
The resources that the rule governs:
* **All Resources**: Rule applies to entire entity type
* **Specific Resources**: Individual records selected by ID
* **Filtered Resources**: Dynamically selected using attribute filters
* **Entity Type**: The canonical object type (Client, Matter, etc.)
* **Instance**: Applied within your Entegrata instance
## Creating a Rule
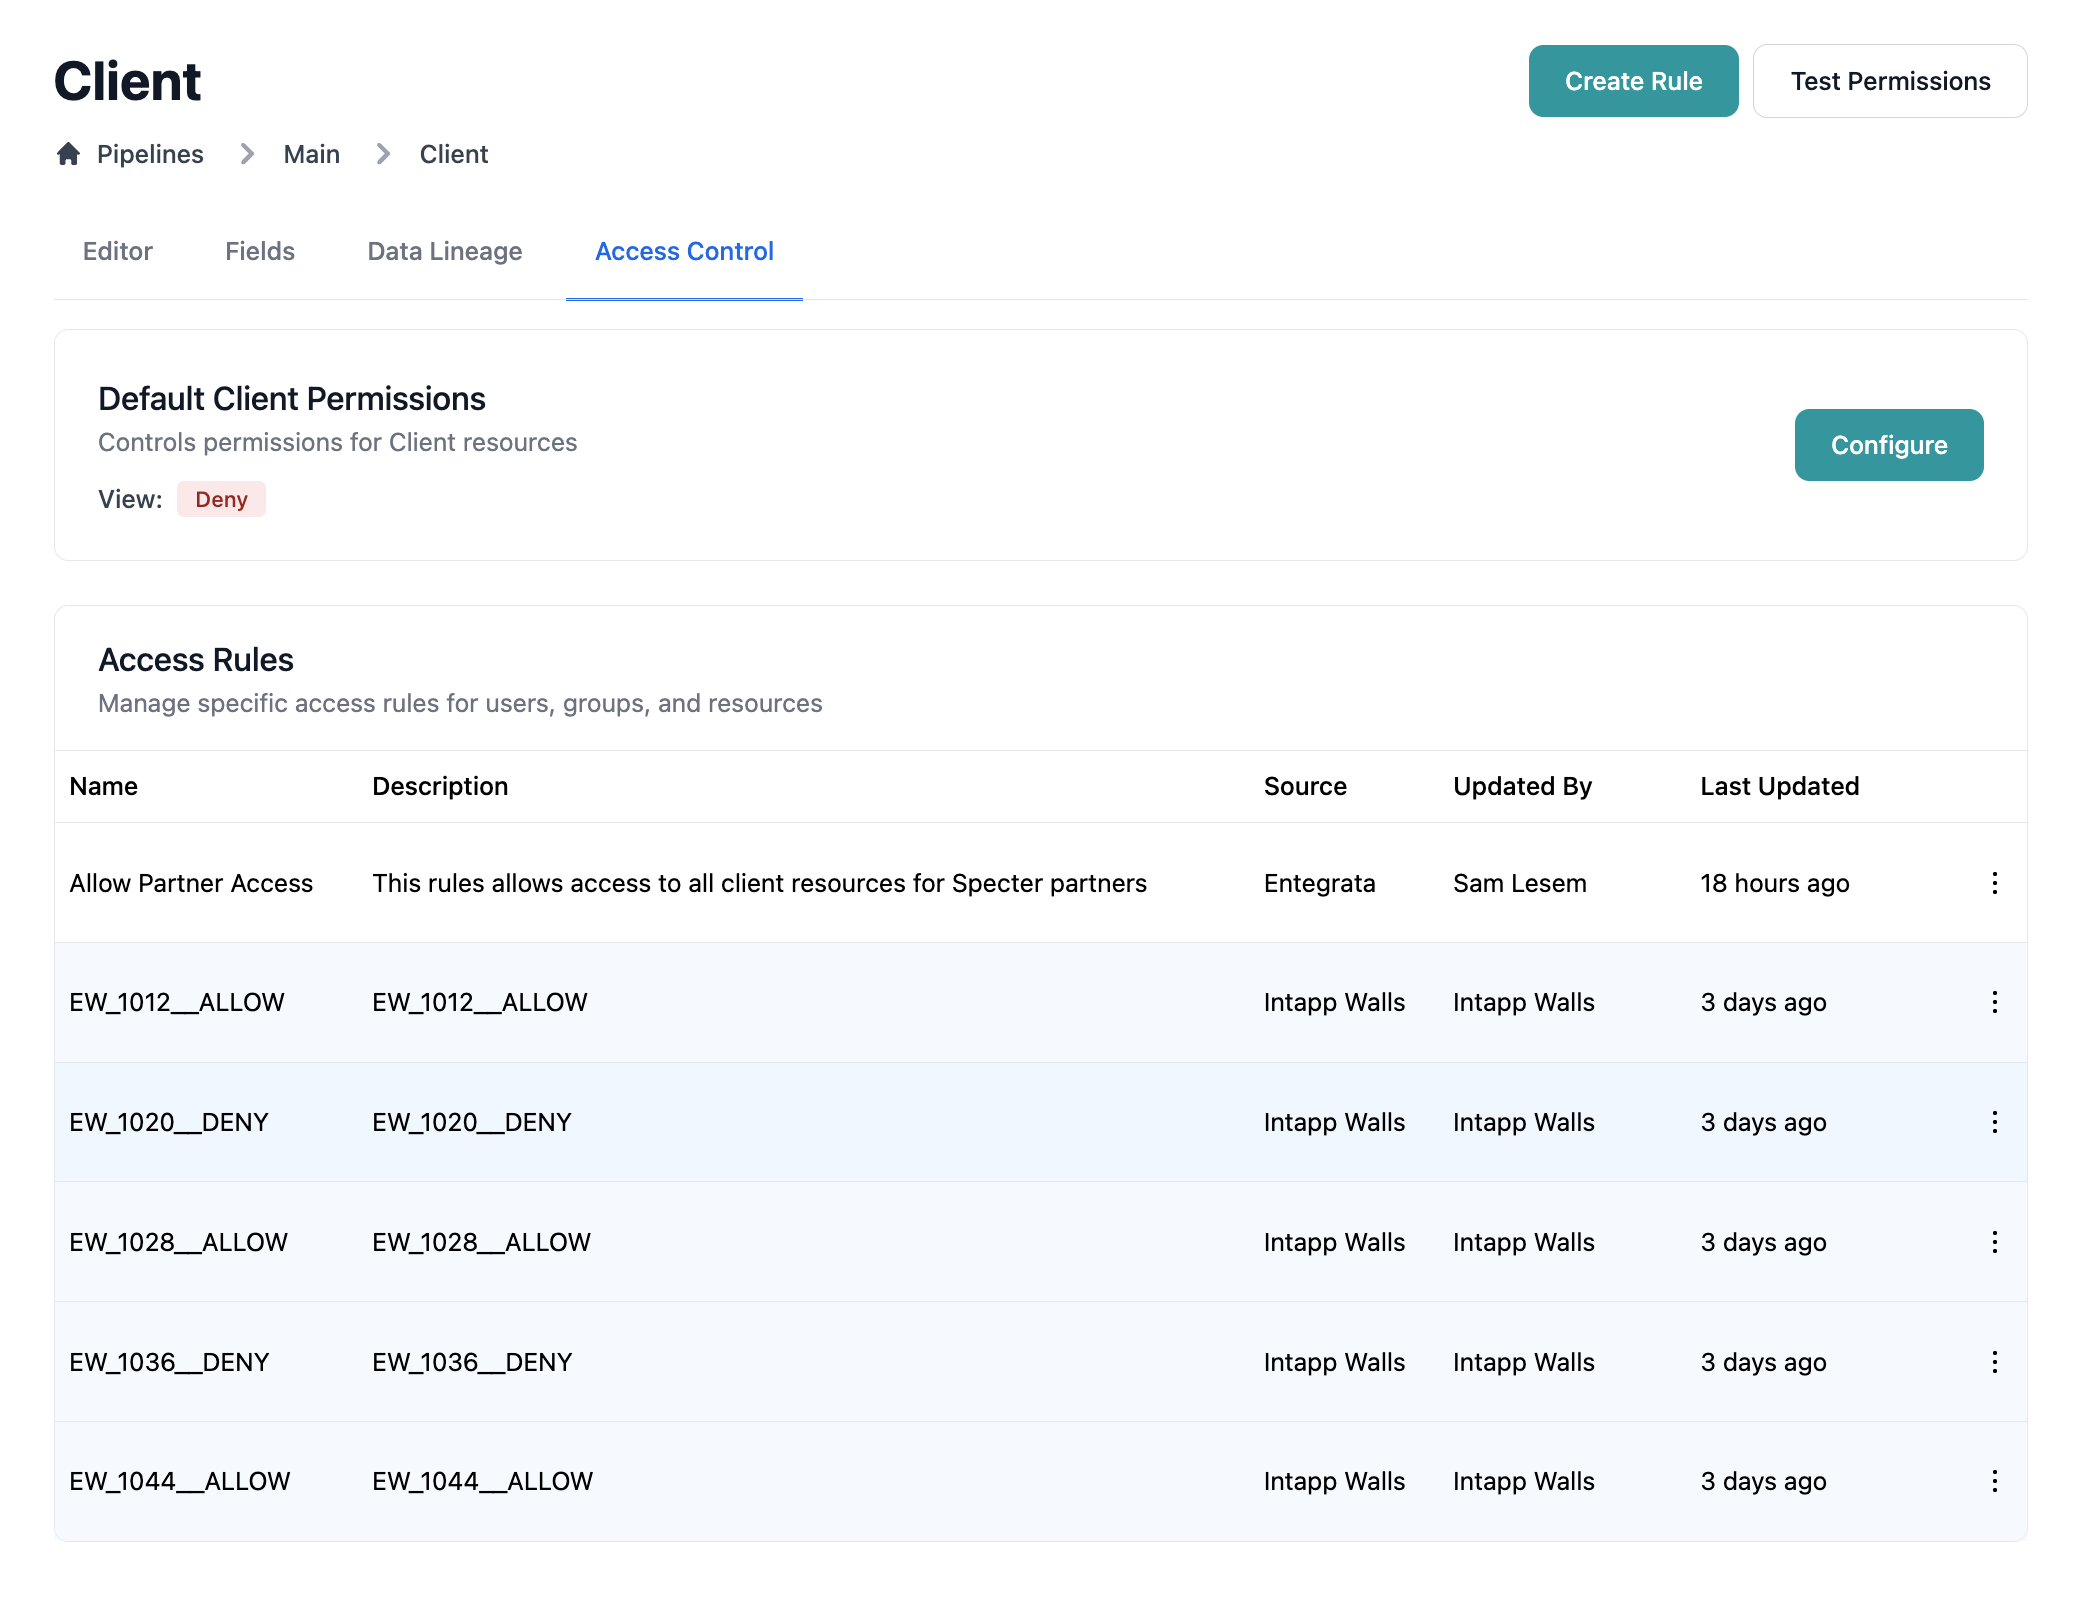
### Step 1: Navigate to Rule Creation
Rules can be created by following these steps:
1. Go to **Data** → **Mapping**
2. Click the **Access Control** tab
3. Click **Create Rule** in the toolbar
 ### Step 2: Configure General Settings
The Rule Modal opens with the General tab active:
### Step 2: Configure General Settings
The Rule Modal opens with the General tab active:
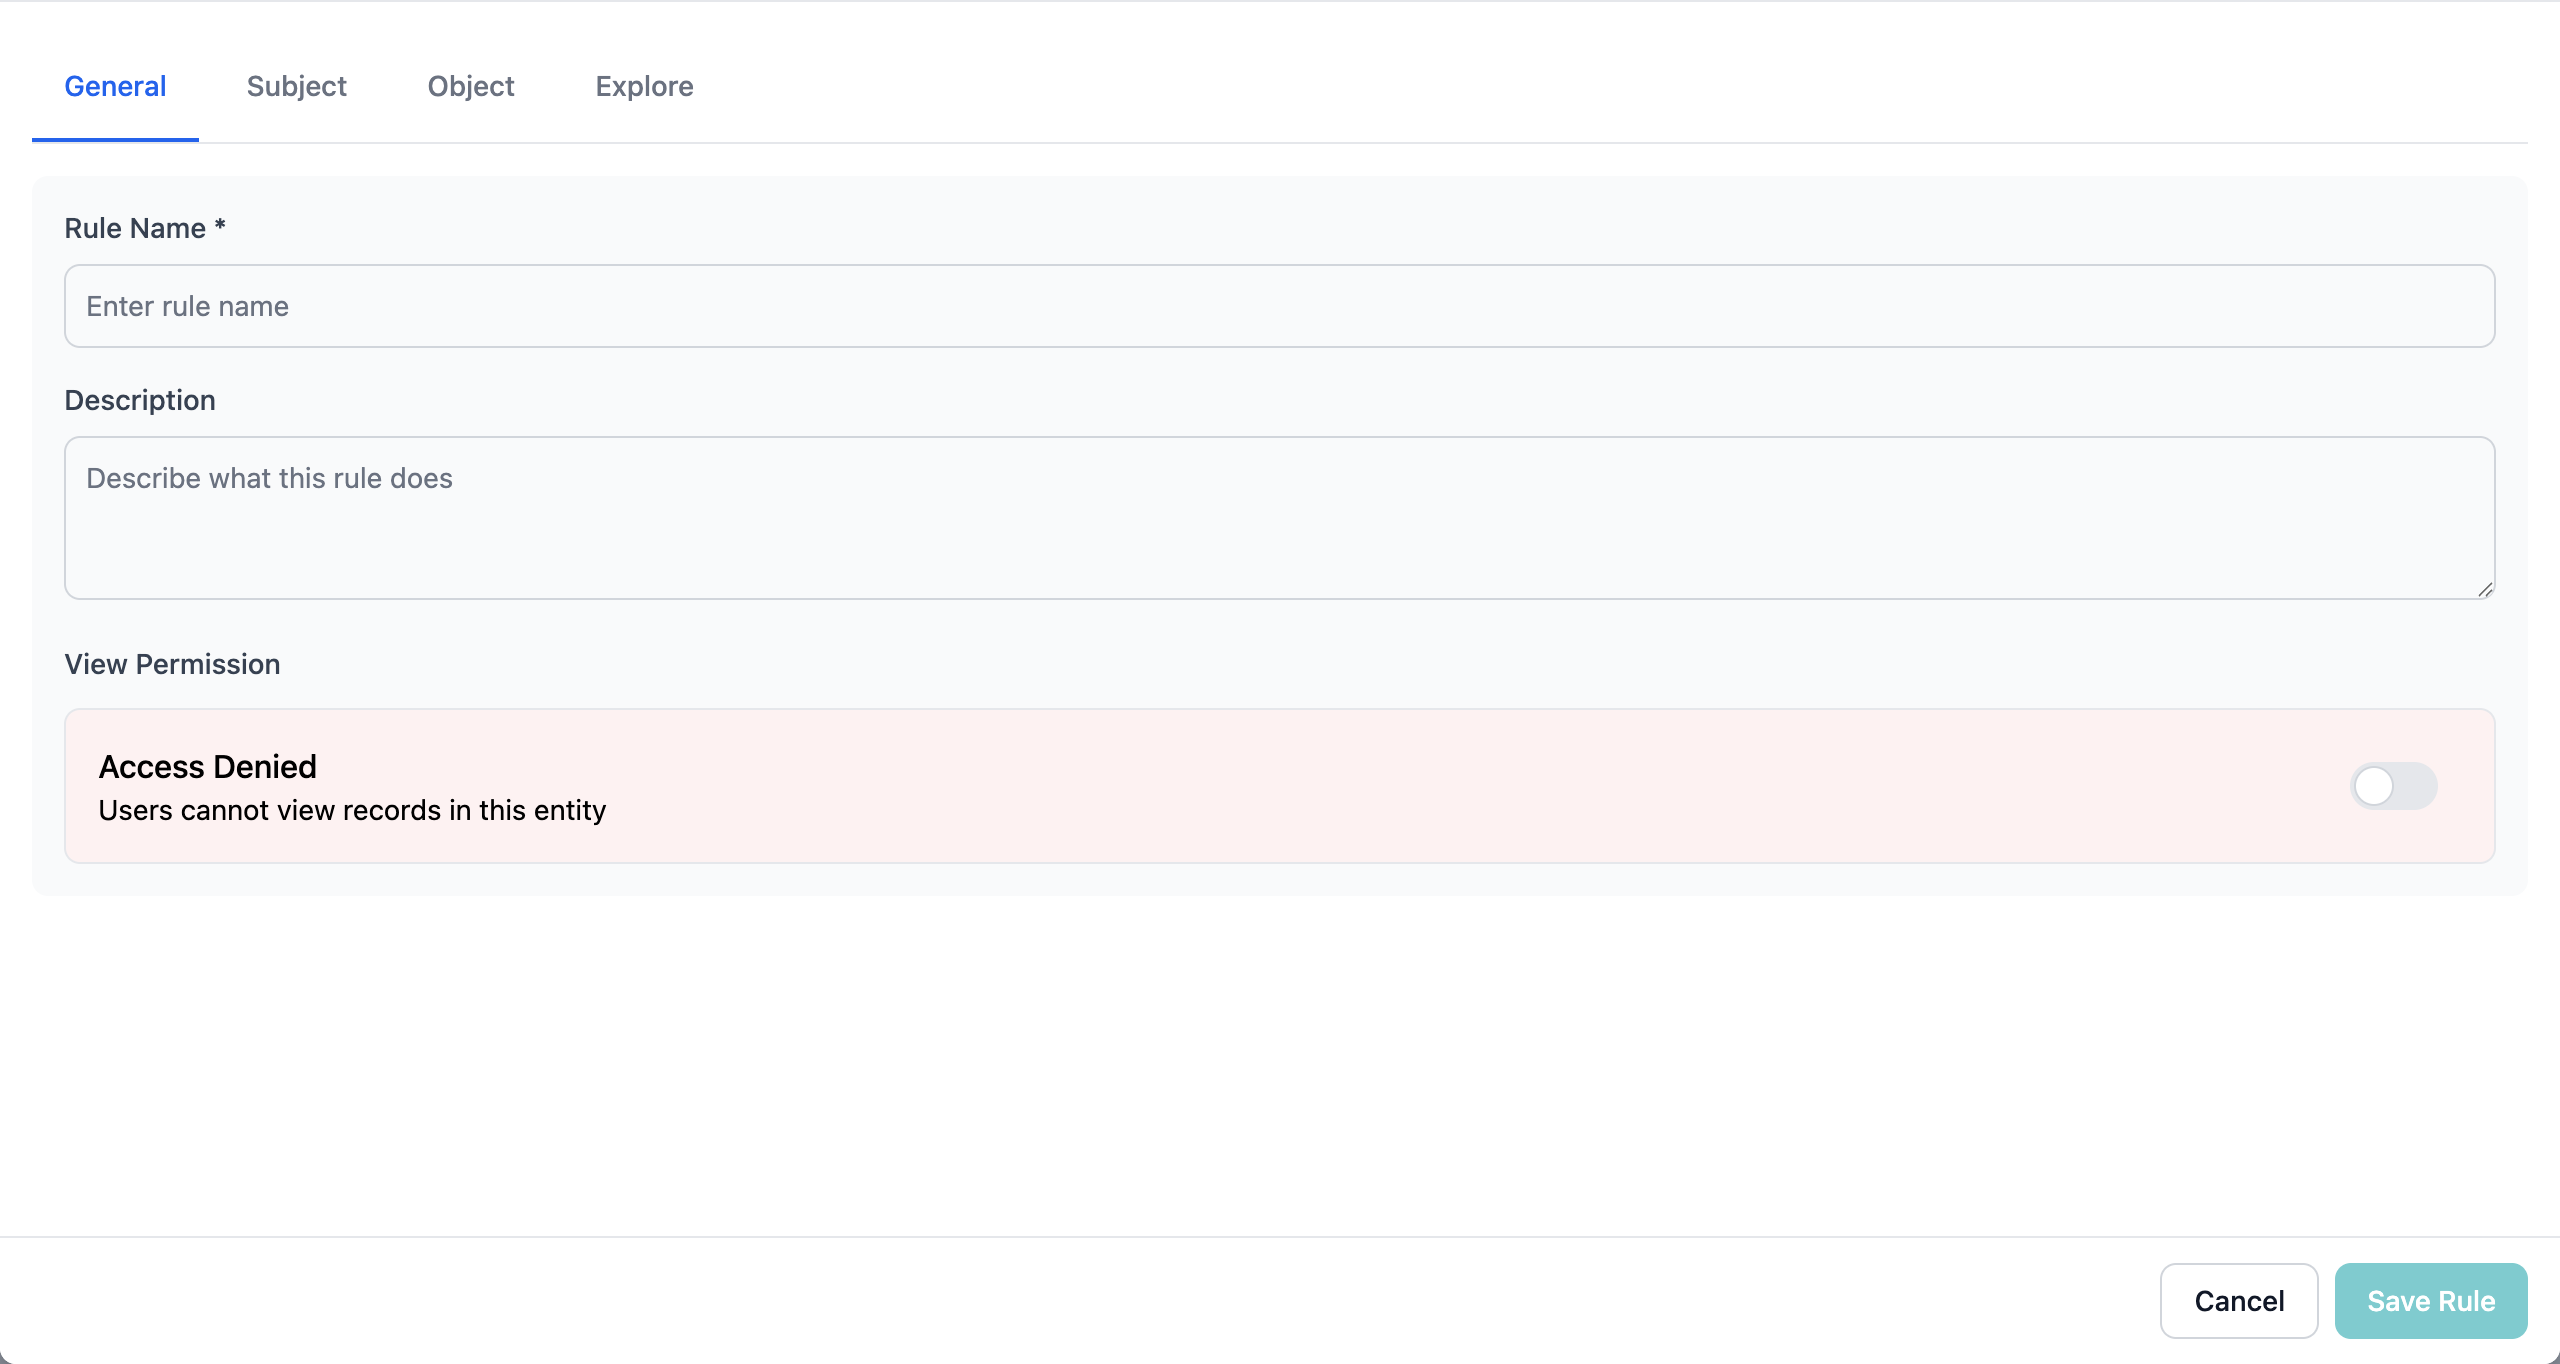 Provide a clear, descriptive name that explains the rule's purpose
* Good: "Finance Team - Budget Access"
* Poor: "Rule 1" or "Test"
Write a detailed explanation of why this rule exists and what it accomplishes
Toggle the permission setting:
* **Allow** (Green): Grants access to specified resources
* **Deny** (Red): Blocks access to specified resources
The modal background changes color (green for Allow, red for Deny) to provide visual confirmation of the permission setting.
### Step 3: Define Subjects (Who Has Access)
Click the **Subject** tab to specify who this rule applies to:
Provide a clear, descriptive name that explains the rule's purpose
* Good: "Finance Team - Budget Access"
* Poor: "Rule 1" or "Test"
Write a detailed explanation of why this rule exists and what it accomplishes
Toggle the permission setting:
* **Allow** (Green): Grants access to specified resources
* **Deny** (Red): Blocks access to specified resources
The modal background changes color (green for Allow, red for Deny) to provide visual confirmation of the permission setting.
### Step 3: Define Subjects (Who Has Access)
Click the **Subject** tab to specify who this rule applies to:
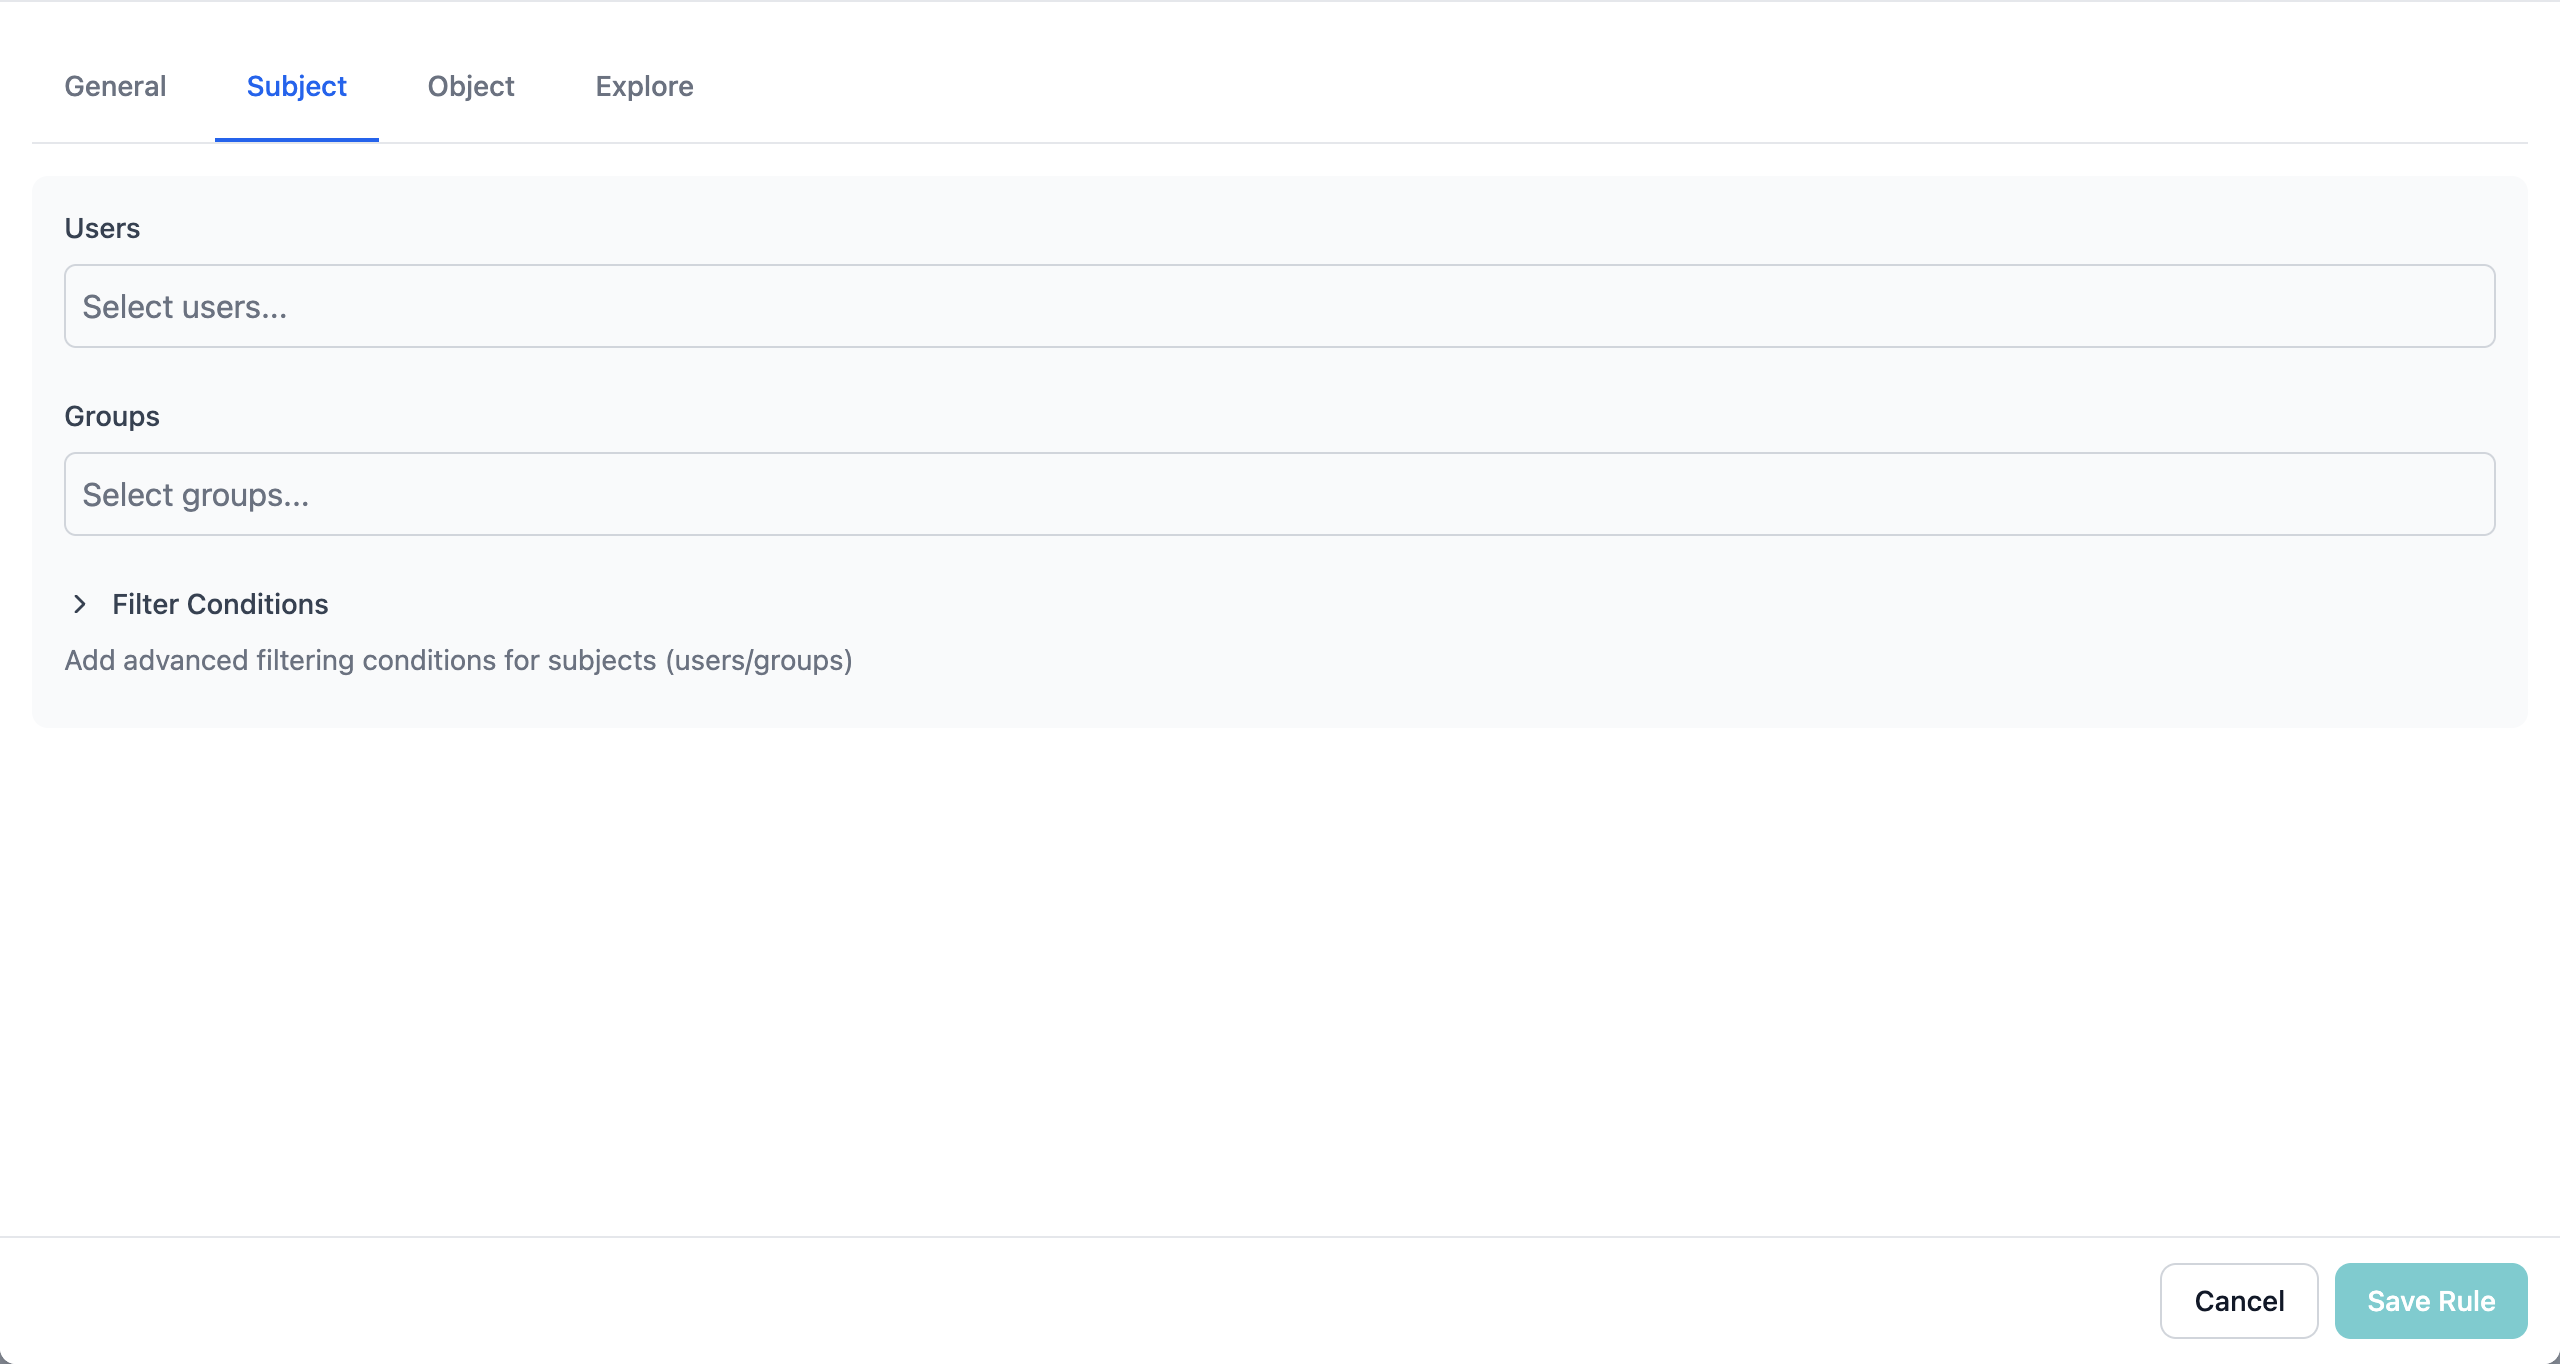 You can add users (actors) directly to rules without creating groups. Groups are optional but recommended for managing multiple users efficiently.
#### Option 1: Select Specific Users (Actors)
Add individual users directly to the rule:
1. Click the **Users** dropdown
2. Search for users by name
3. Select users as needed
4. Selected users appear as tags
This approach works well for:
* Small numbers of users
* Temporary or one-off access
* User-specific exceptions
You can add users (actors) directly to rules without creating groups. Groups are optional but recommended for managing multiple users efficiently.
#### Option 1: Select Specific Users (Actors)
Add individual users directly to the rule:
1. Click the **Users** dropdown
2. Search for users by name
3. Select users as needed
4. Selected users appear as tags
This approach works well for:
* Small numbers of users
* Temporary or one-off access
* User-specific exceptions
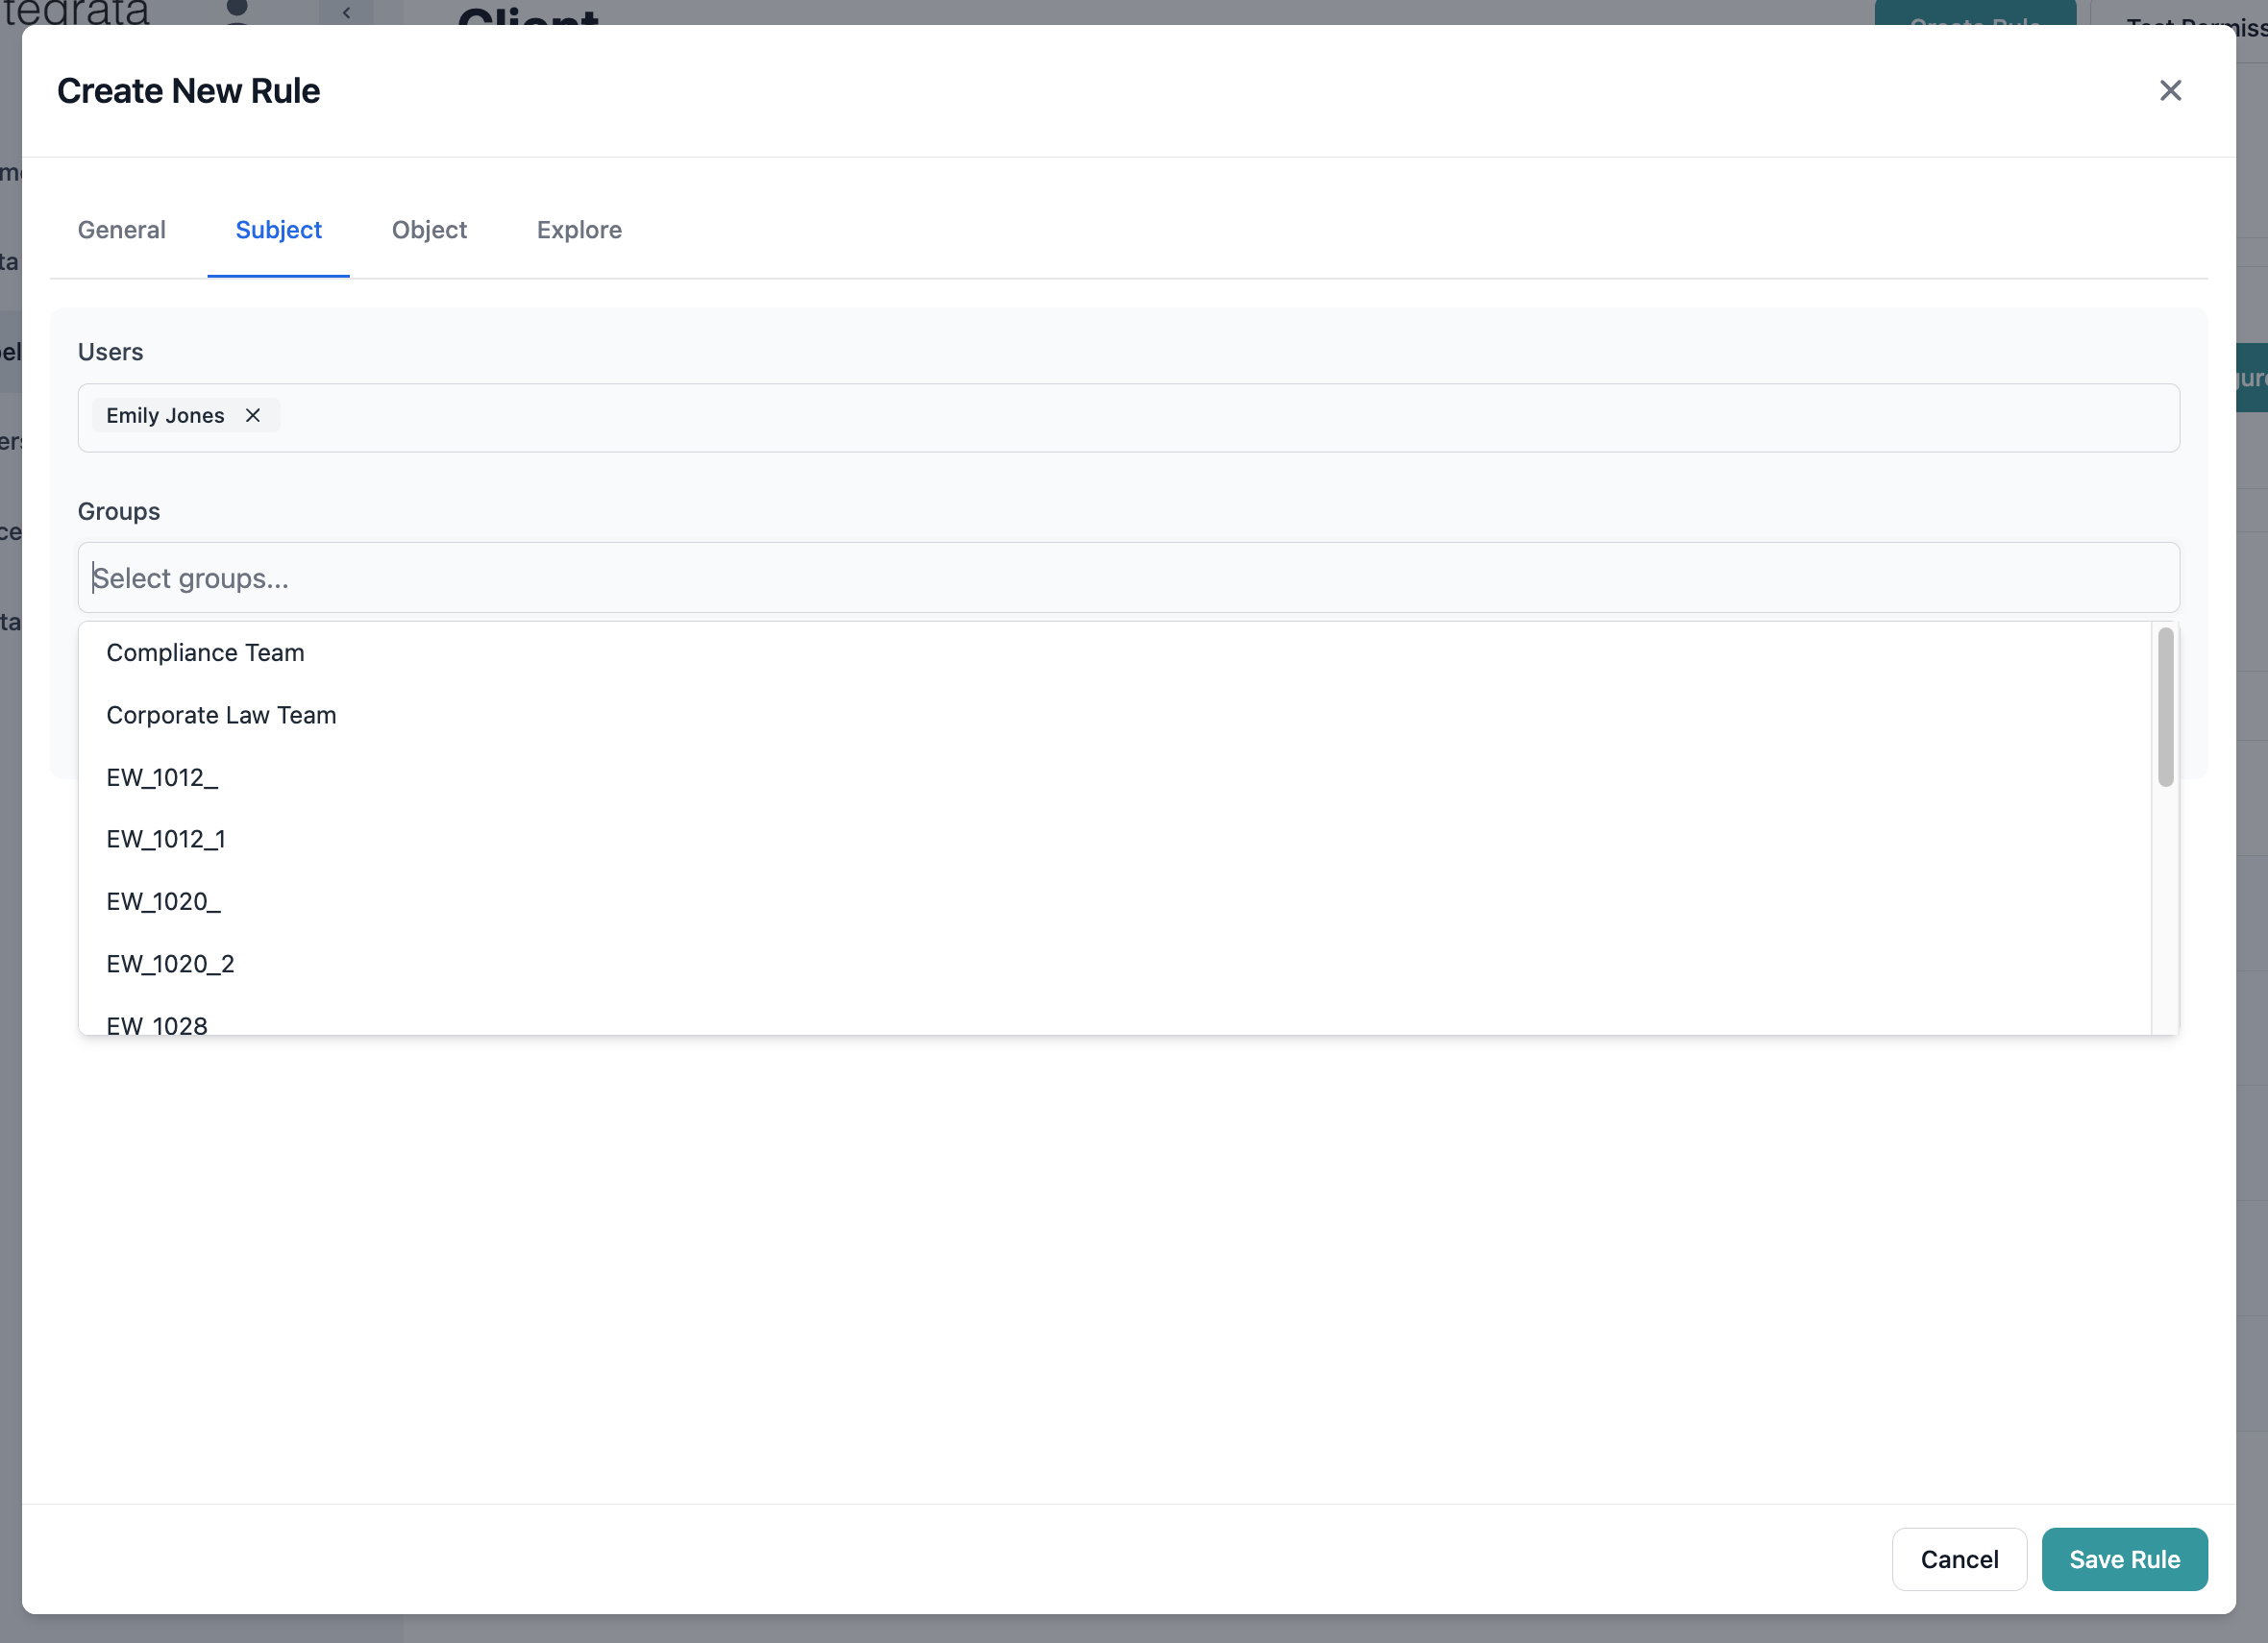
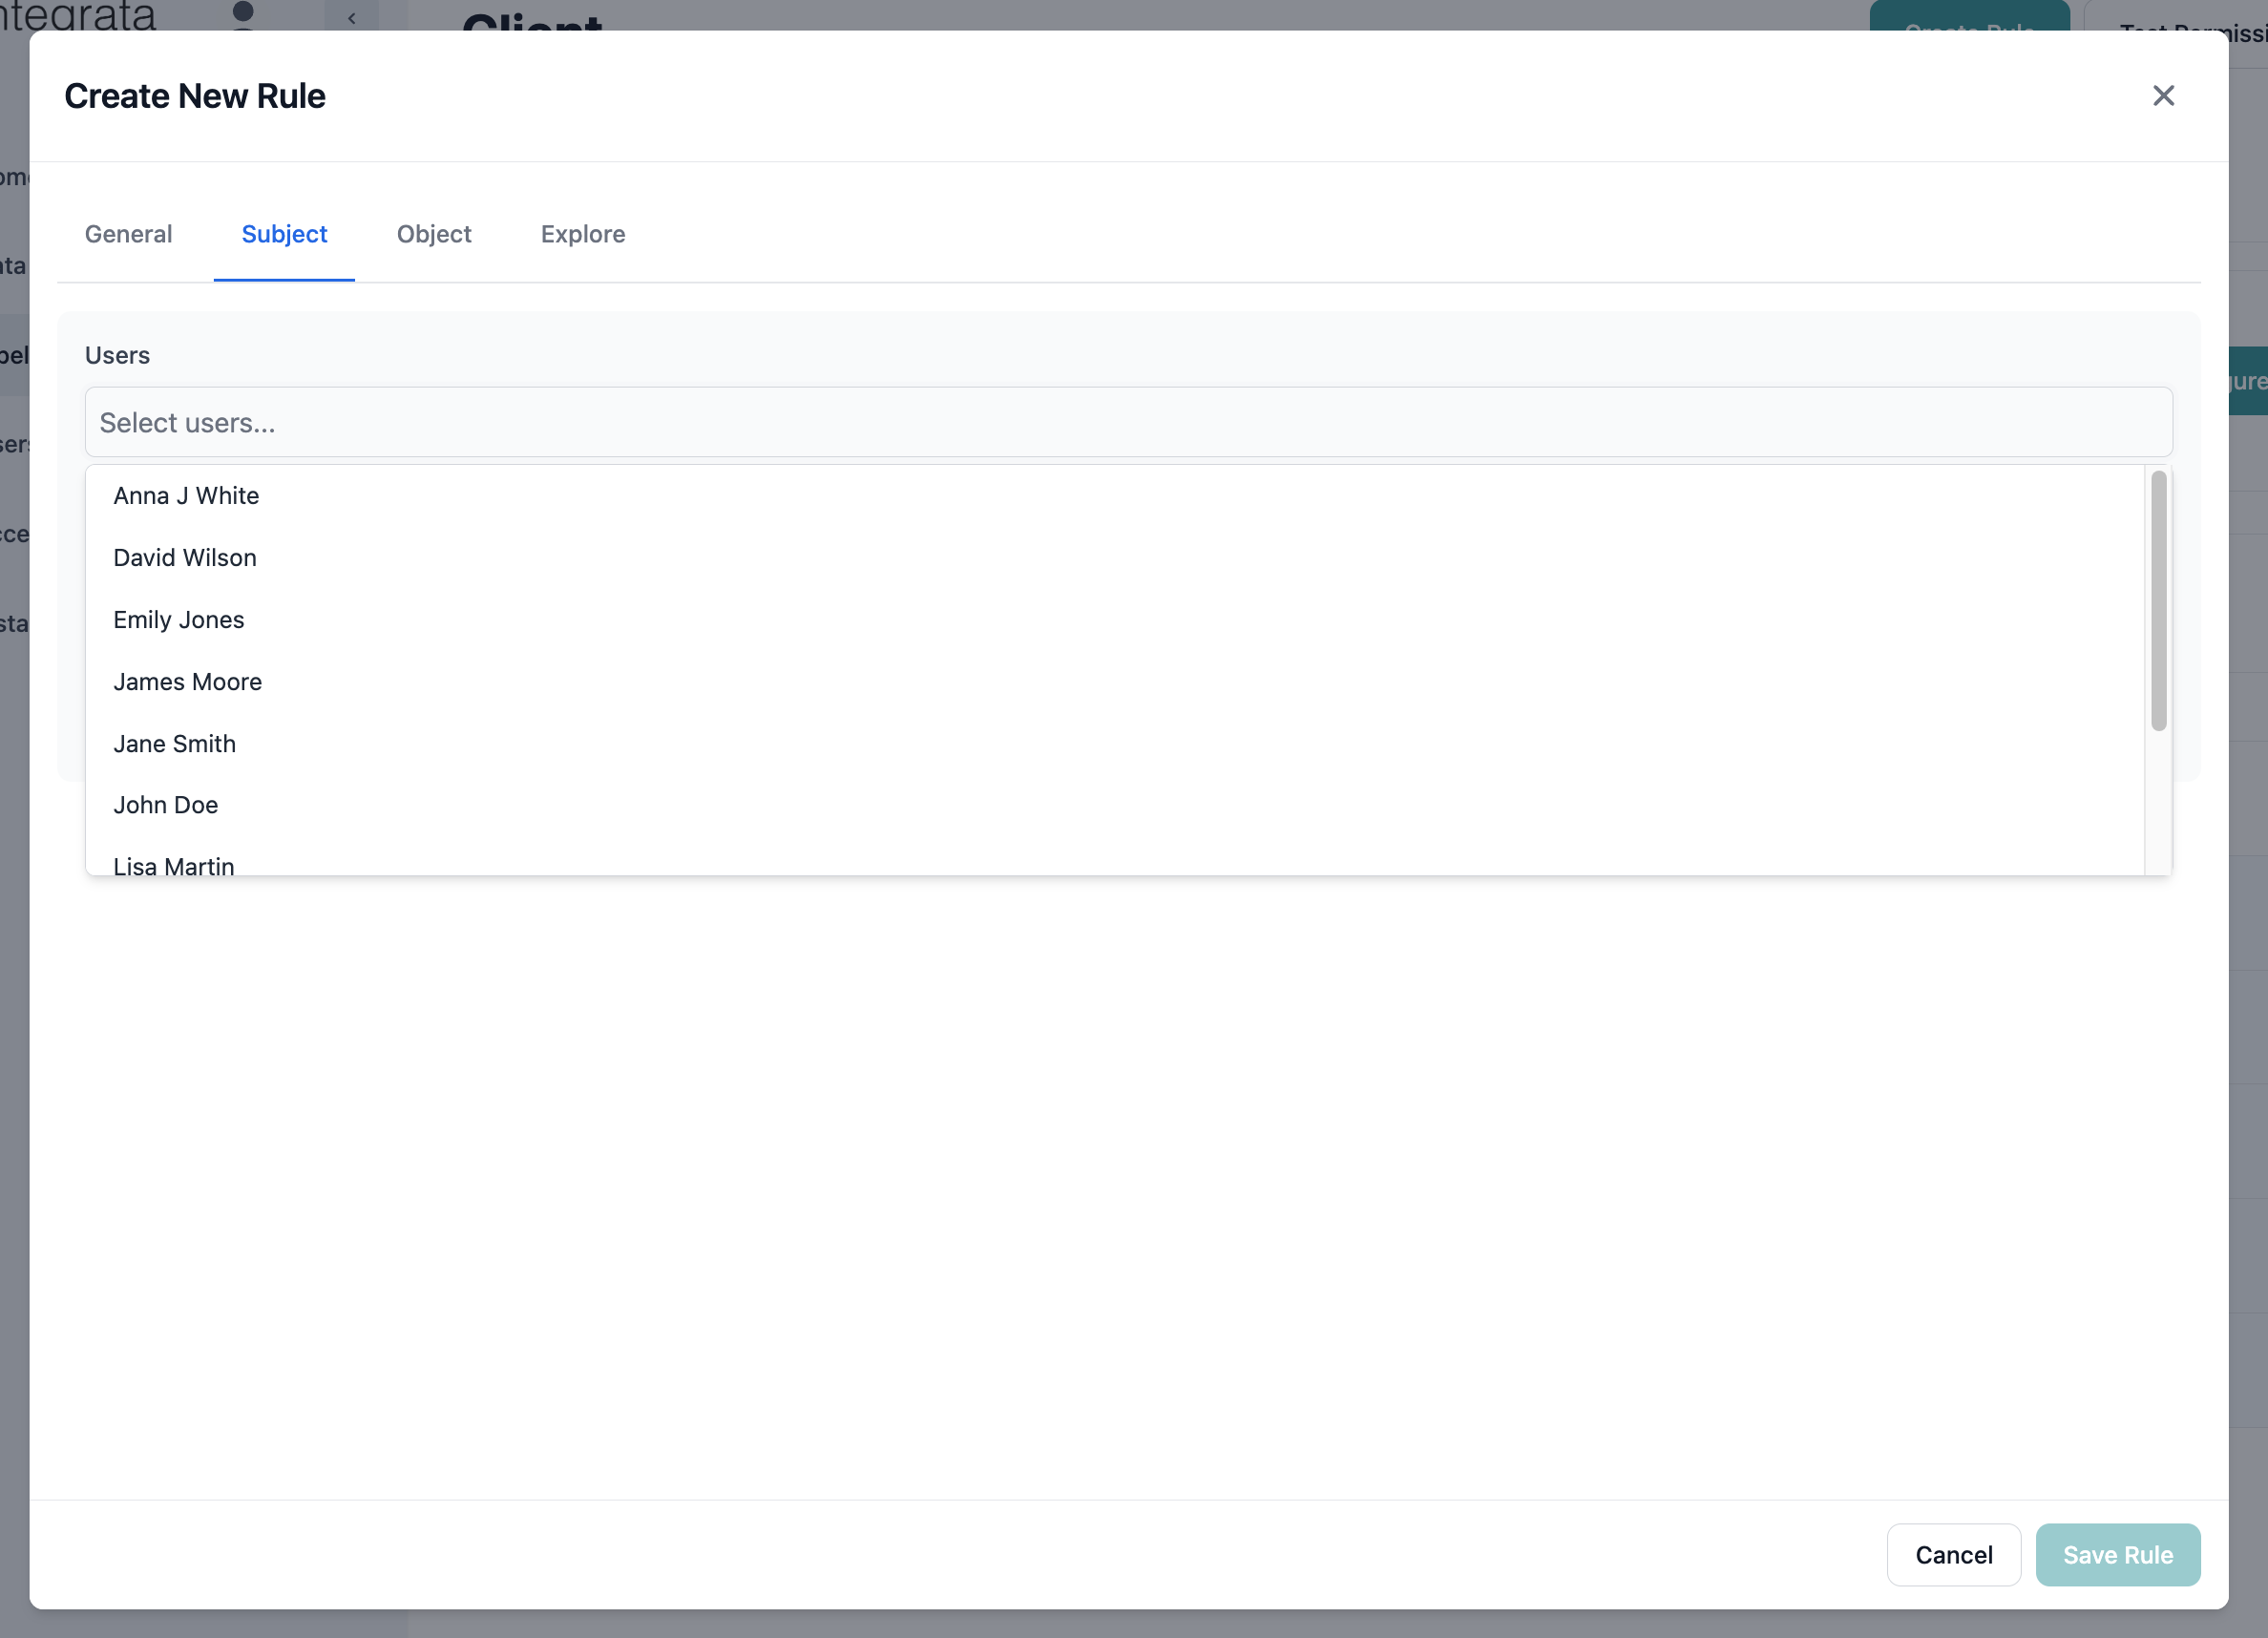 #### Option 2: Select Groups (Recommended for Multiple Users)
Use groups to manage multiple users more efficiently:
1. Click the **Groups** dropdown
2. Search for access control groups
3. Select groups as needed
4. All group members inherit the rule permissions
Benefits of using groups:
* Easier to manage multiple users
* Changes to group membership automatically update access
* Cleaner rule configuration
* Better organization of permissions
#### Option 2: Select Groups (Recommended for Multiple Users)
Use groups to manage multiple users more efficiently:
1. Click the **Groups** dropdown
2. Search for access control groups
3. Select groups as needed
4. All group members inherit the rule permissions
Benefits of using groups:
* Easier to manage multiple users
* Changes to group membership automatically update access
* Cleaner rule configuration
* Better organization of permissions
 #### Option 3: Use Dynamic Filters
For automatic subject selection based on attributes:
1. Click **Add Filter Condition**
2. Select the attribute to filter on
3. Choose the operator (equals, contains, etc.)
4. Enter the comparison value
5. Add additional conditions with AND/OR logic
#### Option 3: Use Dynamic Filters
For automatic subject selection based on attributes:
1. Click **Add Filter Condition**
2. Select the attribute to filter on
3. Choose the operator (equals, contains, etc.)
4. Enter the comparison value
5. Add additional conditions with AND/OR logic
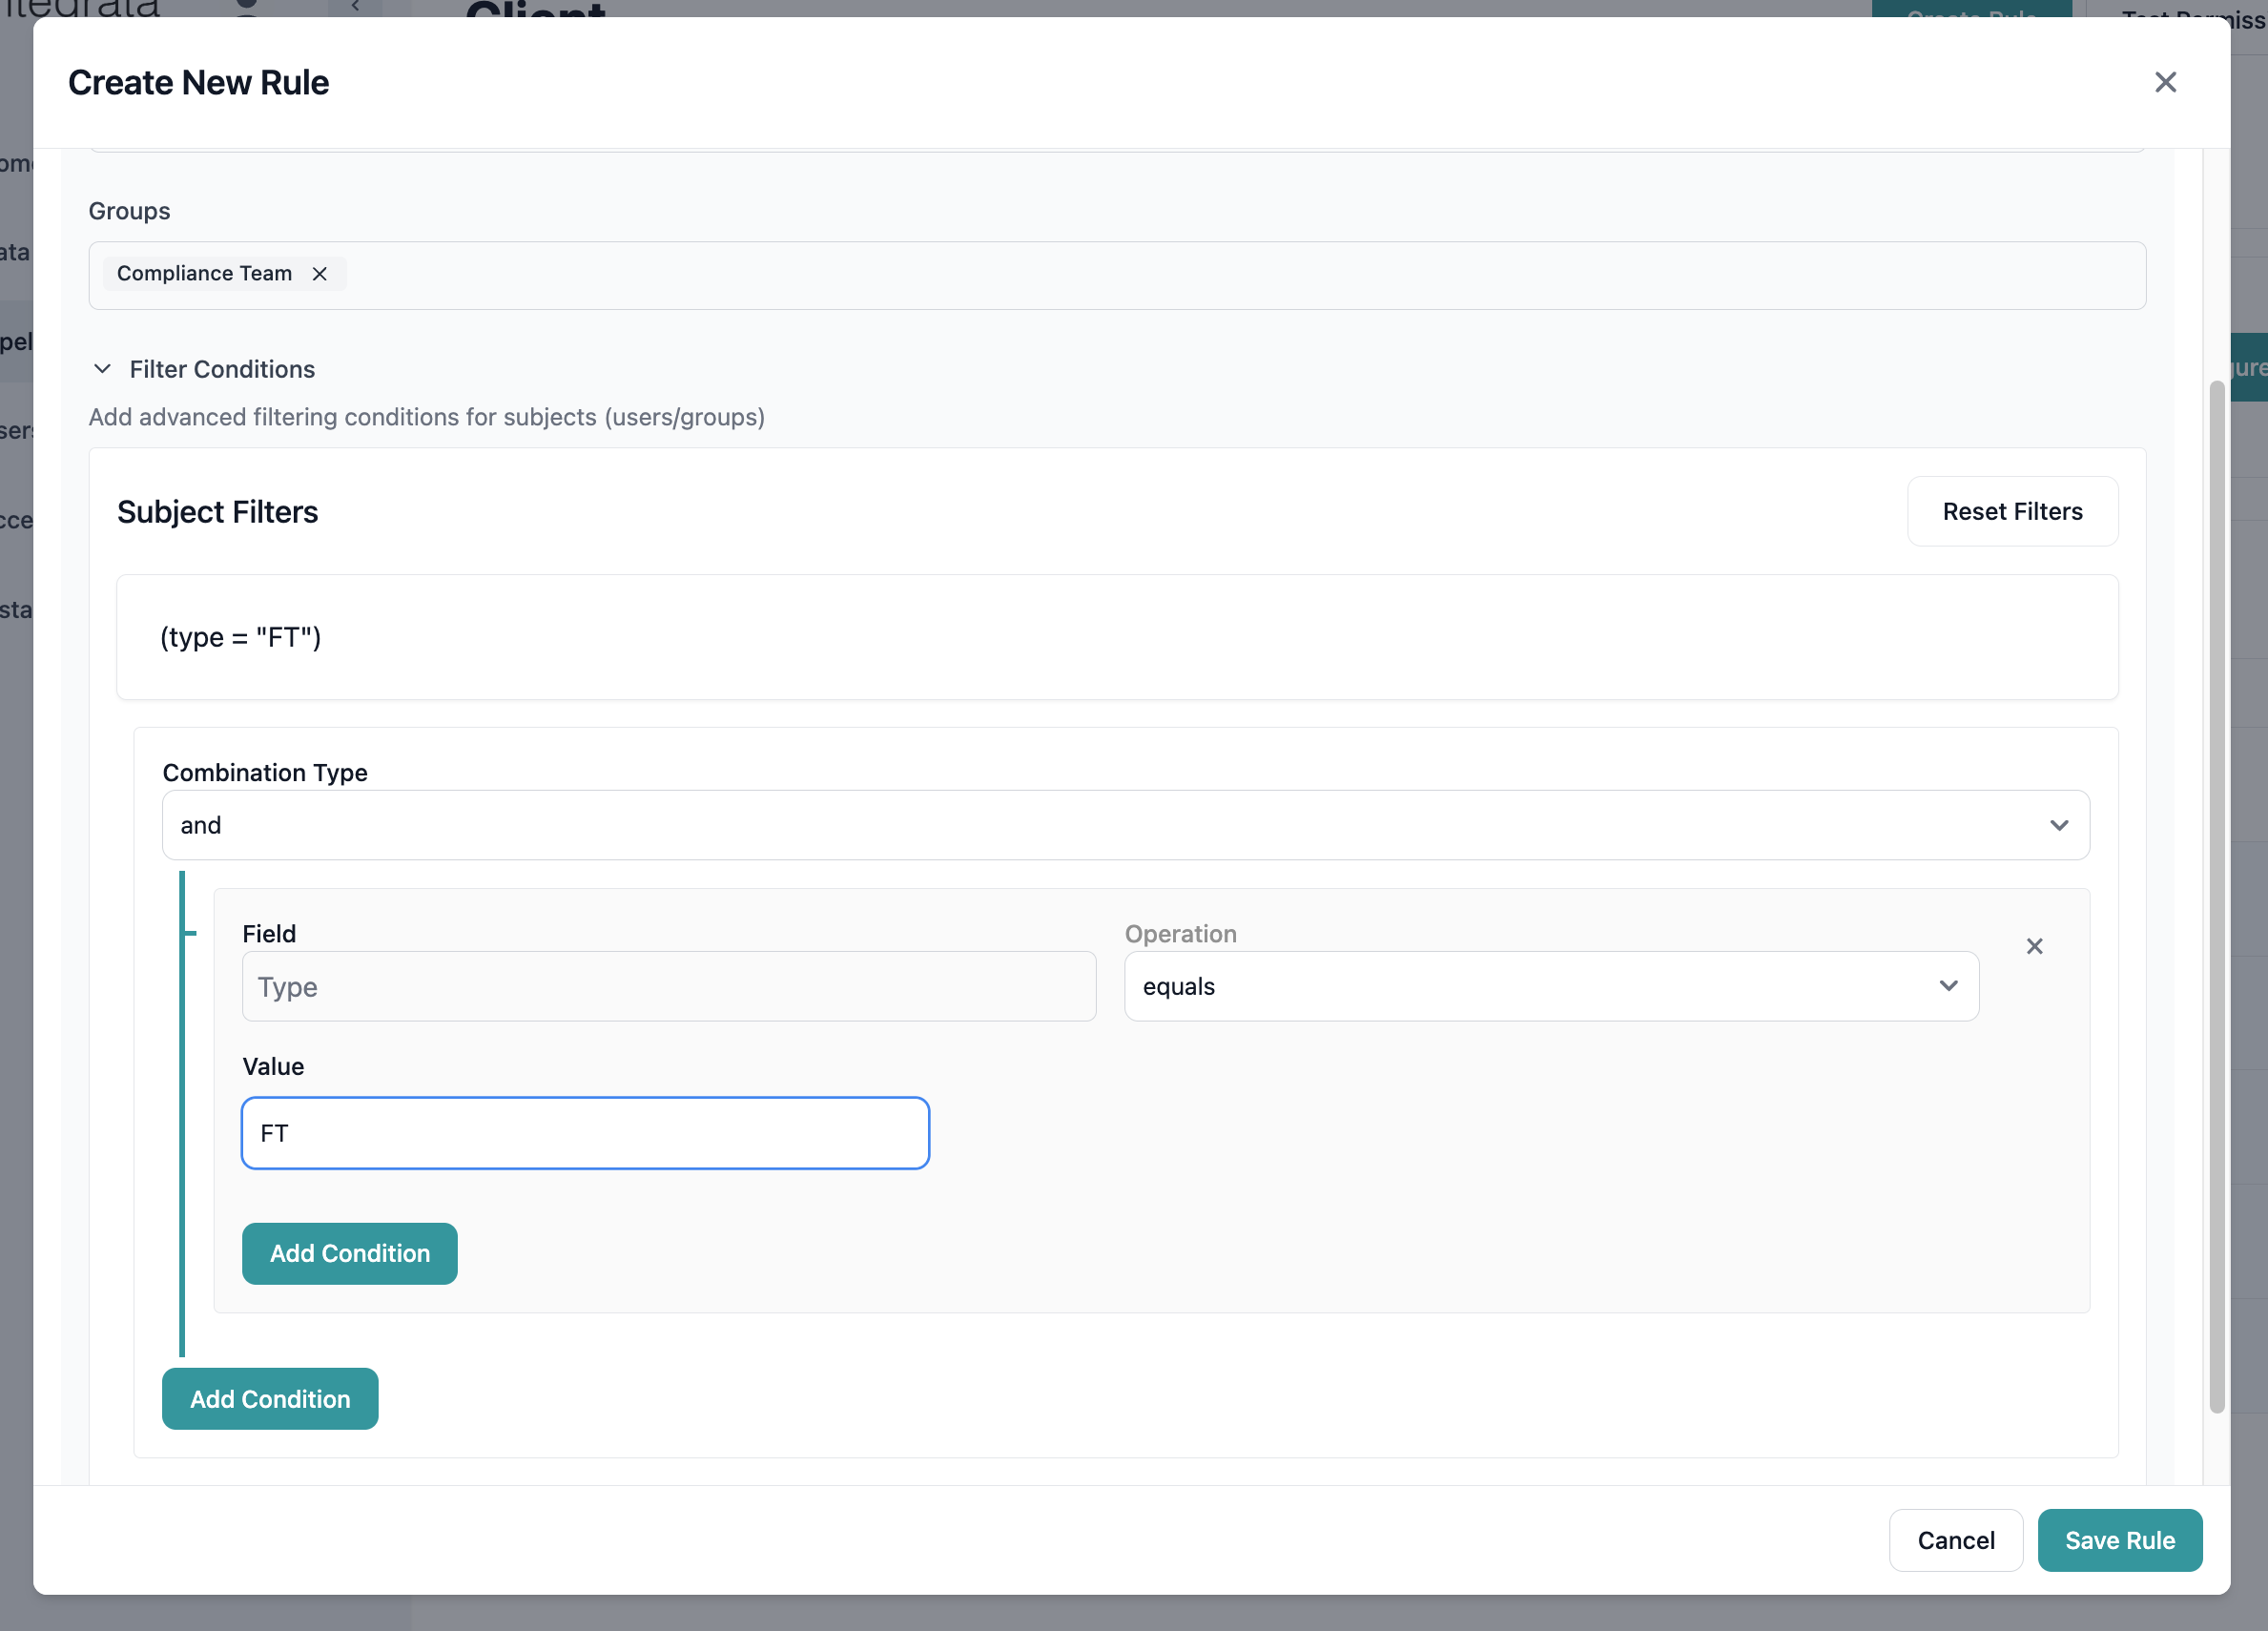 Dynamic filters automatically apply to new users matching the criteria, reducing maintenance overhead.
### Step 4: Define Objects (What They Can Access)
Click the **Object** tab to specify which resources the rule covers:
Dynamic filters automatically apply to new users matching the criteria, reducing maintenance overhead.
### Step 4: Define Objects (What They Can Access)
Click the **Object** tab to specify which resources the rule covers:
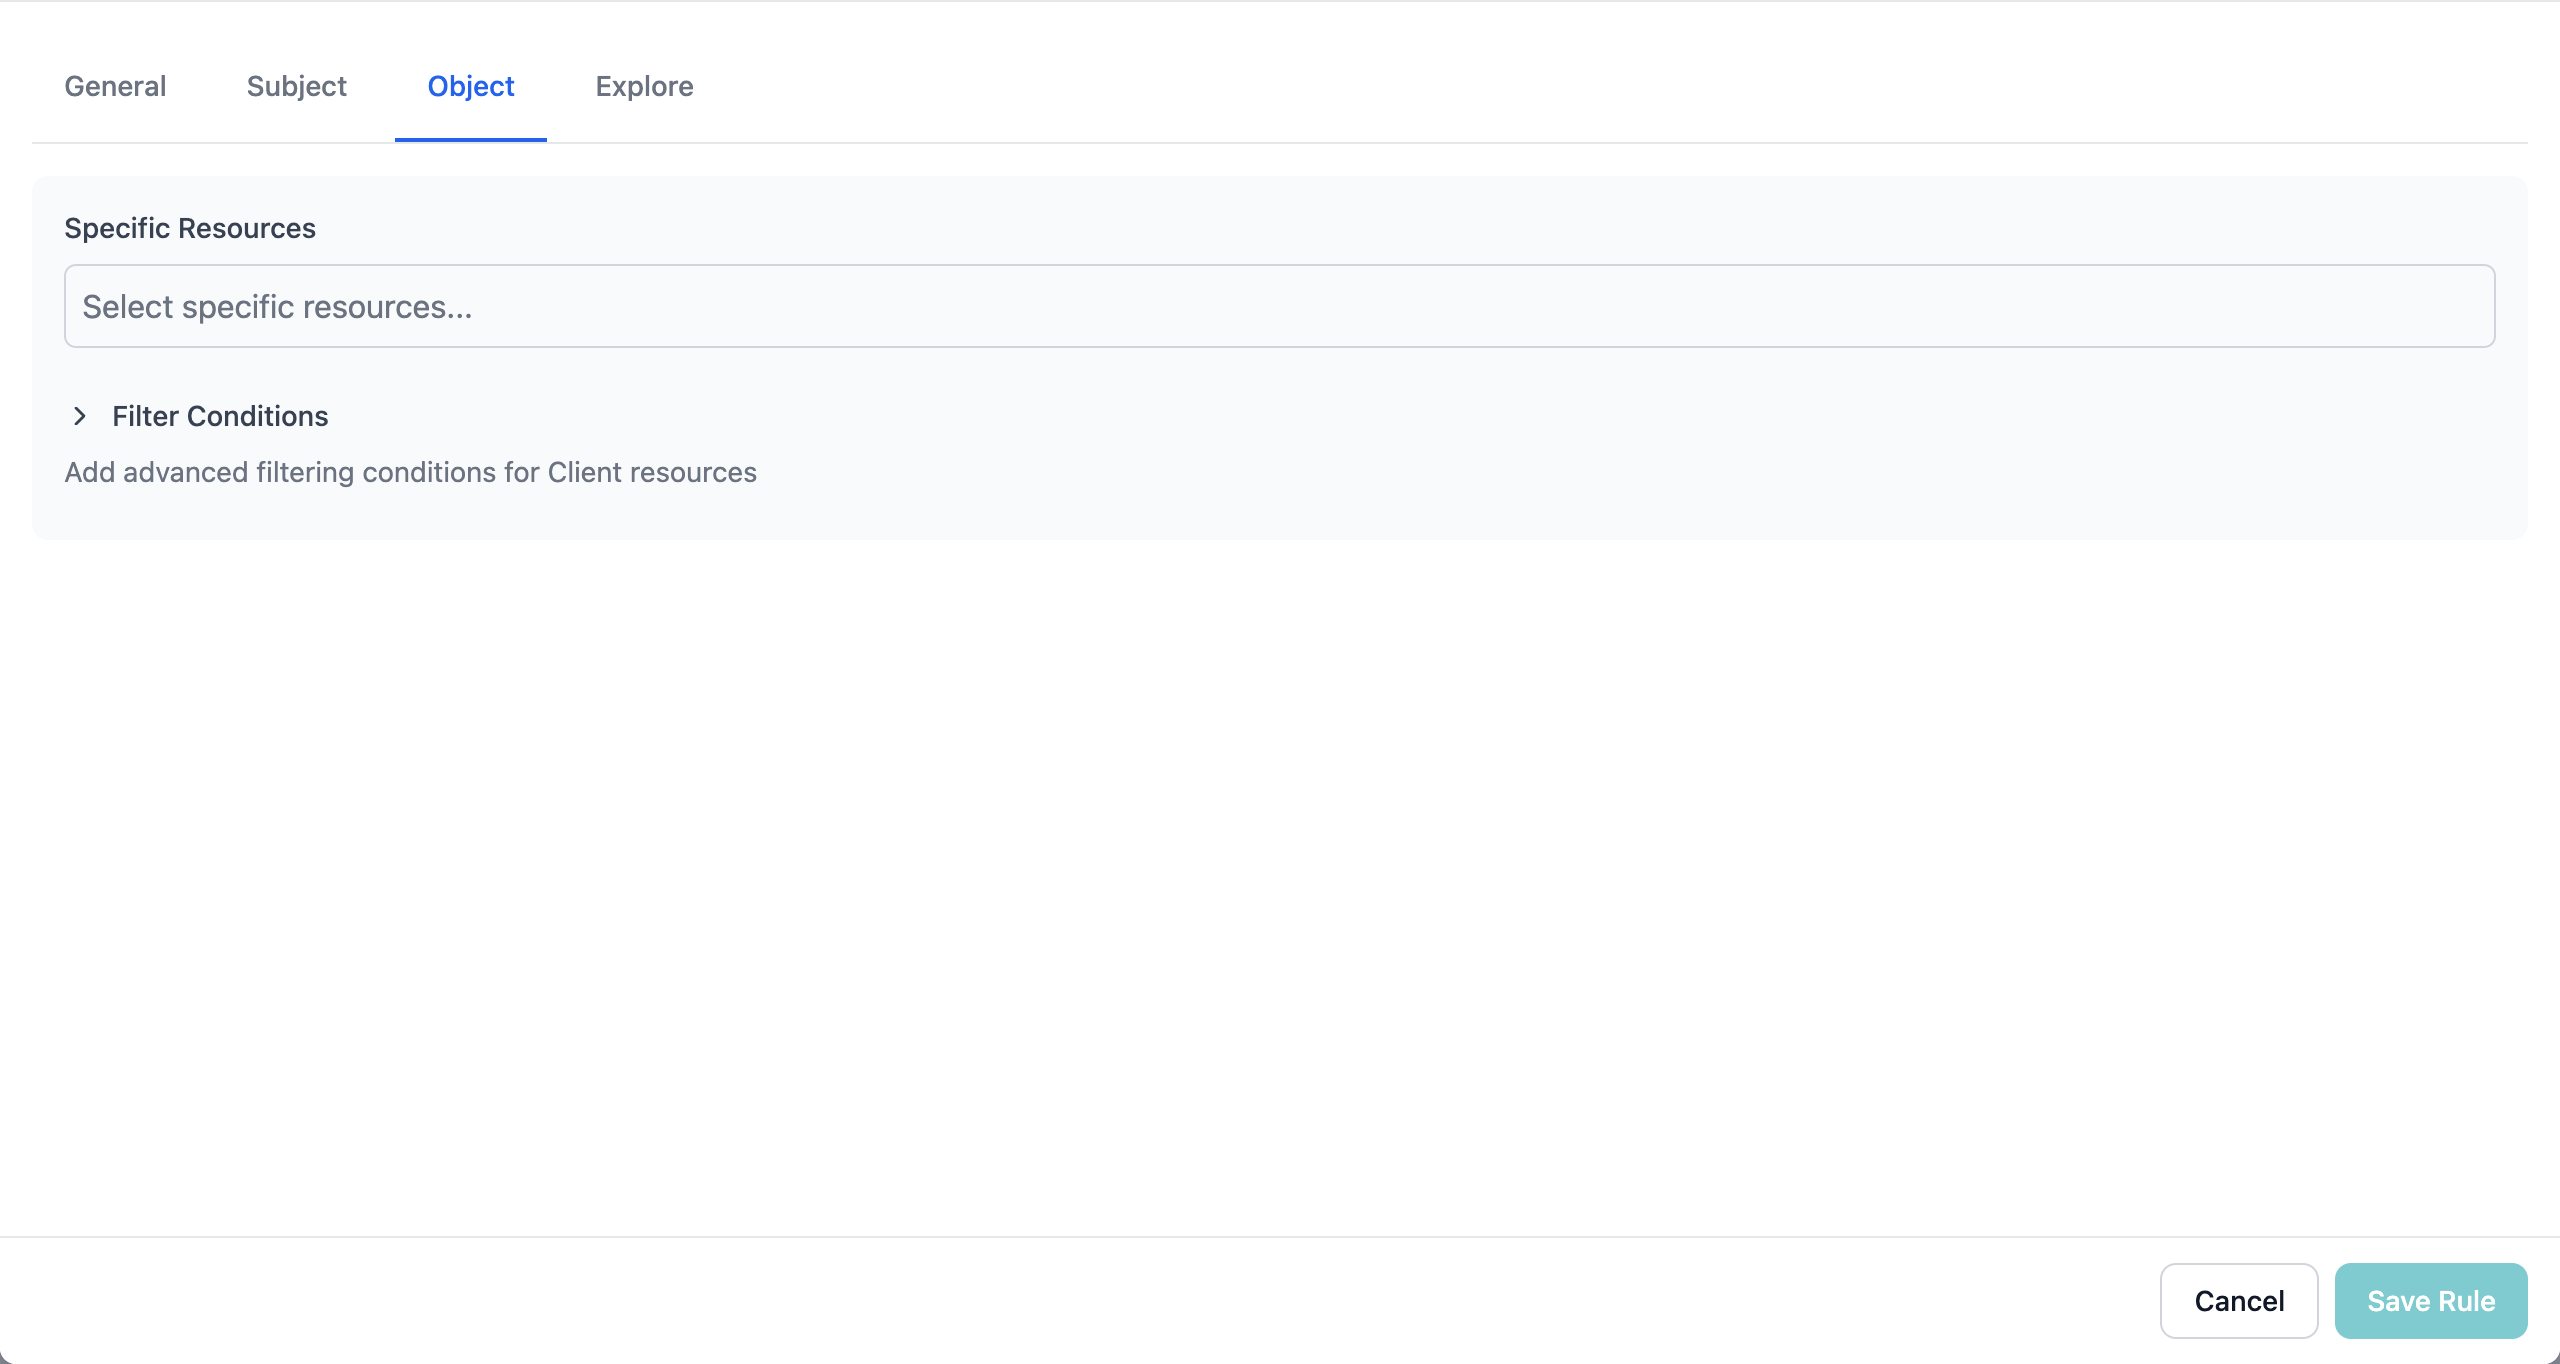 #### Option 1: All Resources
Leave the resource selection empty to apply the rule to all resources of the entity type.
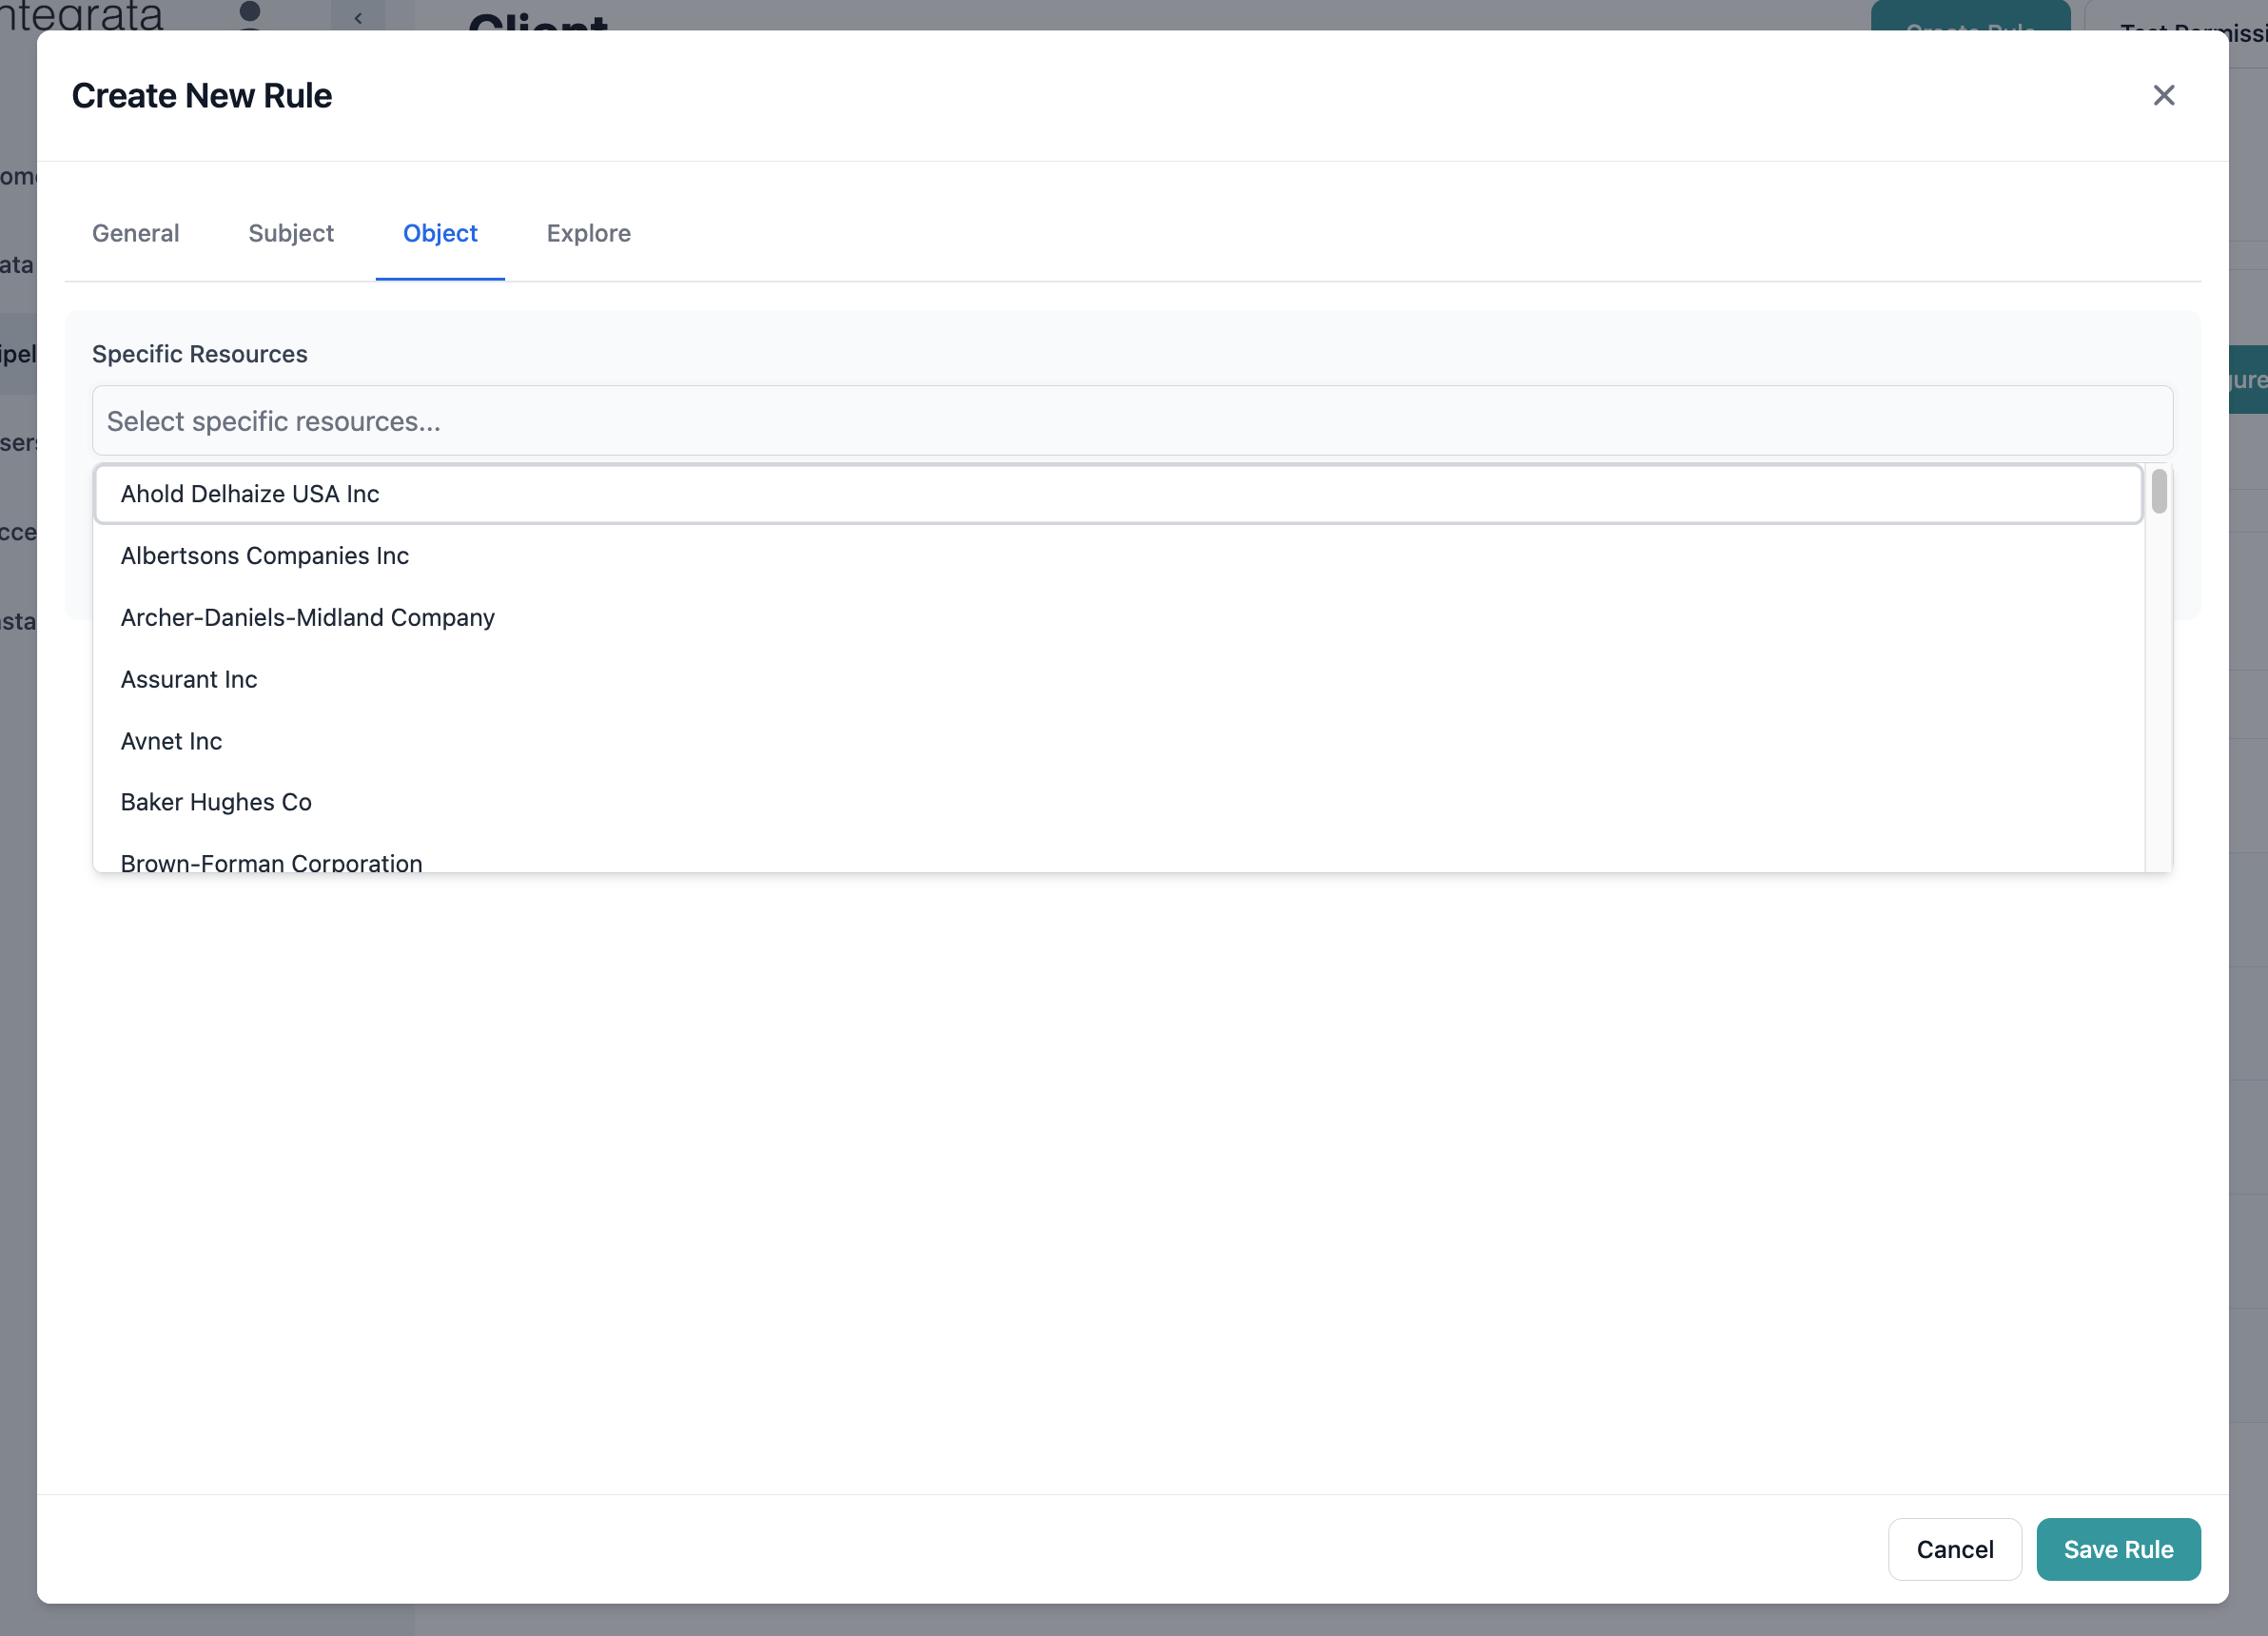
#### Option 2: Specific Resources
1. Click the **Resources** dropdown
2. Search for specific records by name
3. Select resources as needed
4. Selected resources appear as tags
#### Option 1: All Resources
Leave the resource selection empty to apply the rule to all resources of the entity type.
#### Option 2: Specific Resources
1. Click the **Resources** dropdown
2. Search for specific records by name
3. Select resources as needed
4. Selected resources appear as tags
 #### Option 3: Filtered Resources
For dynamic resource selection:
1. Click **Add Filter Condition**
2. Select the resource attribute
3. Choose the comparison operator
4. Enter the value to match
5. Combine conditions as needed
#### Option 3: Filtered Resources
For dynamic resource selection:
1. Click **Add Filter Condition**
2. Select the resource attribute
3. Choose the comparison operator
4. Enter the value to match
5. Combine conditions as needed
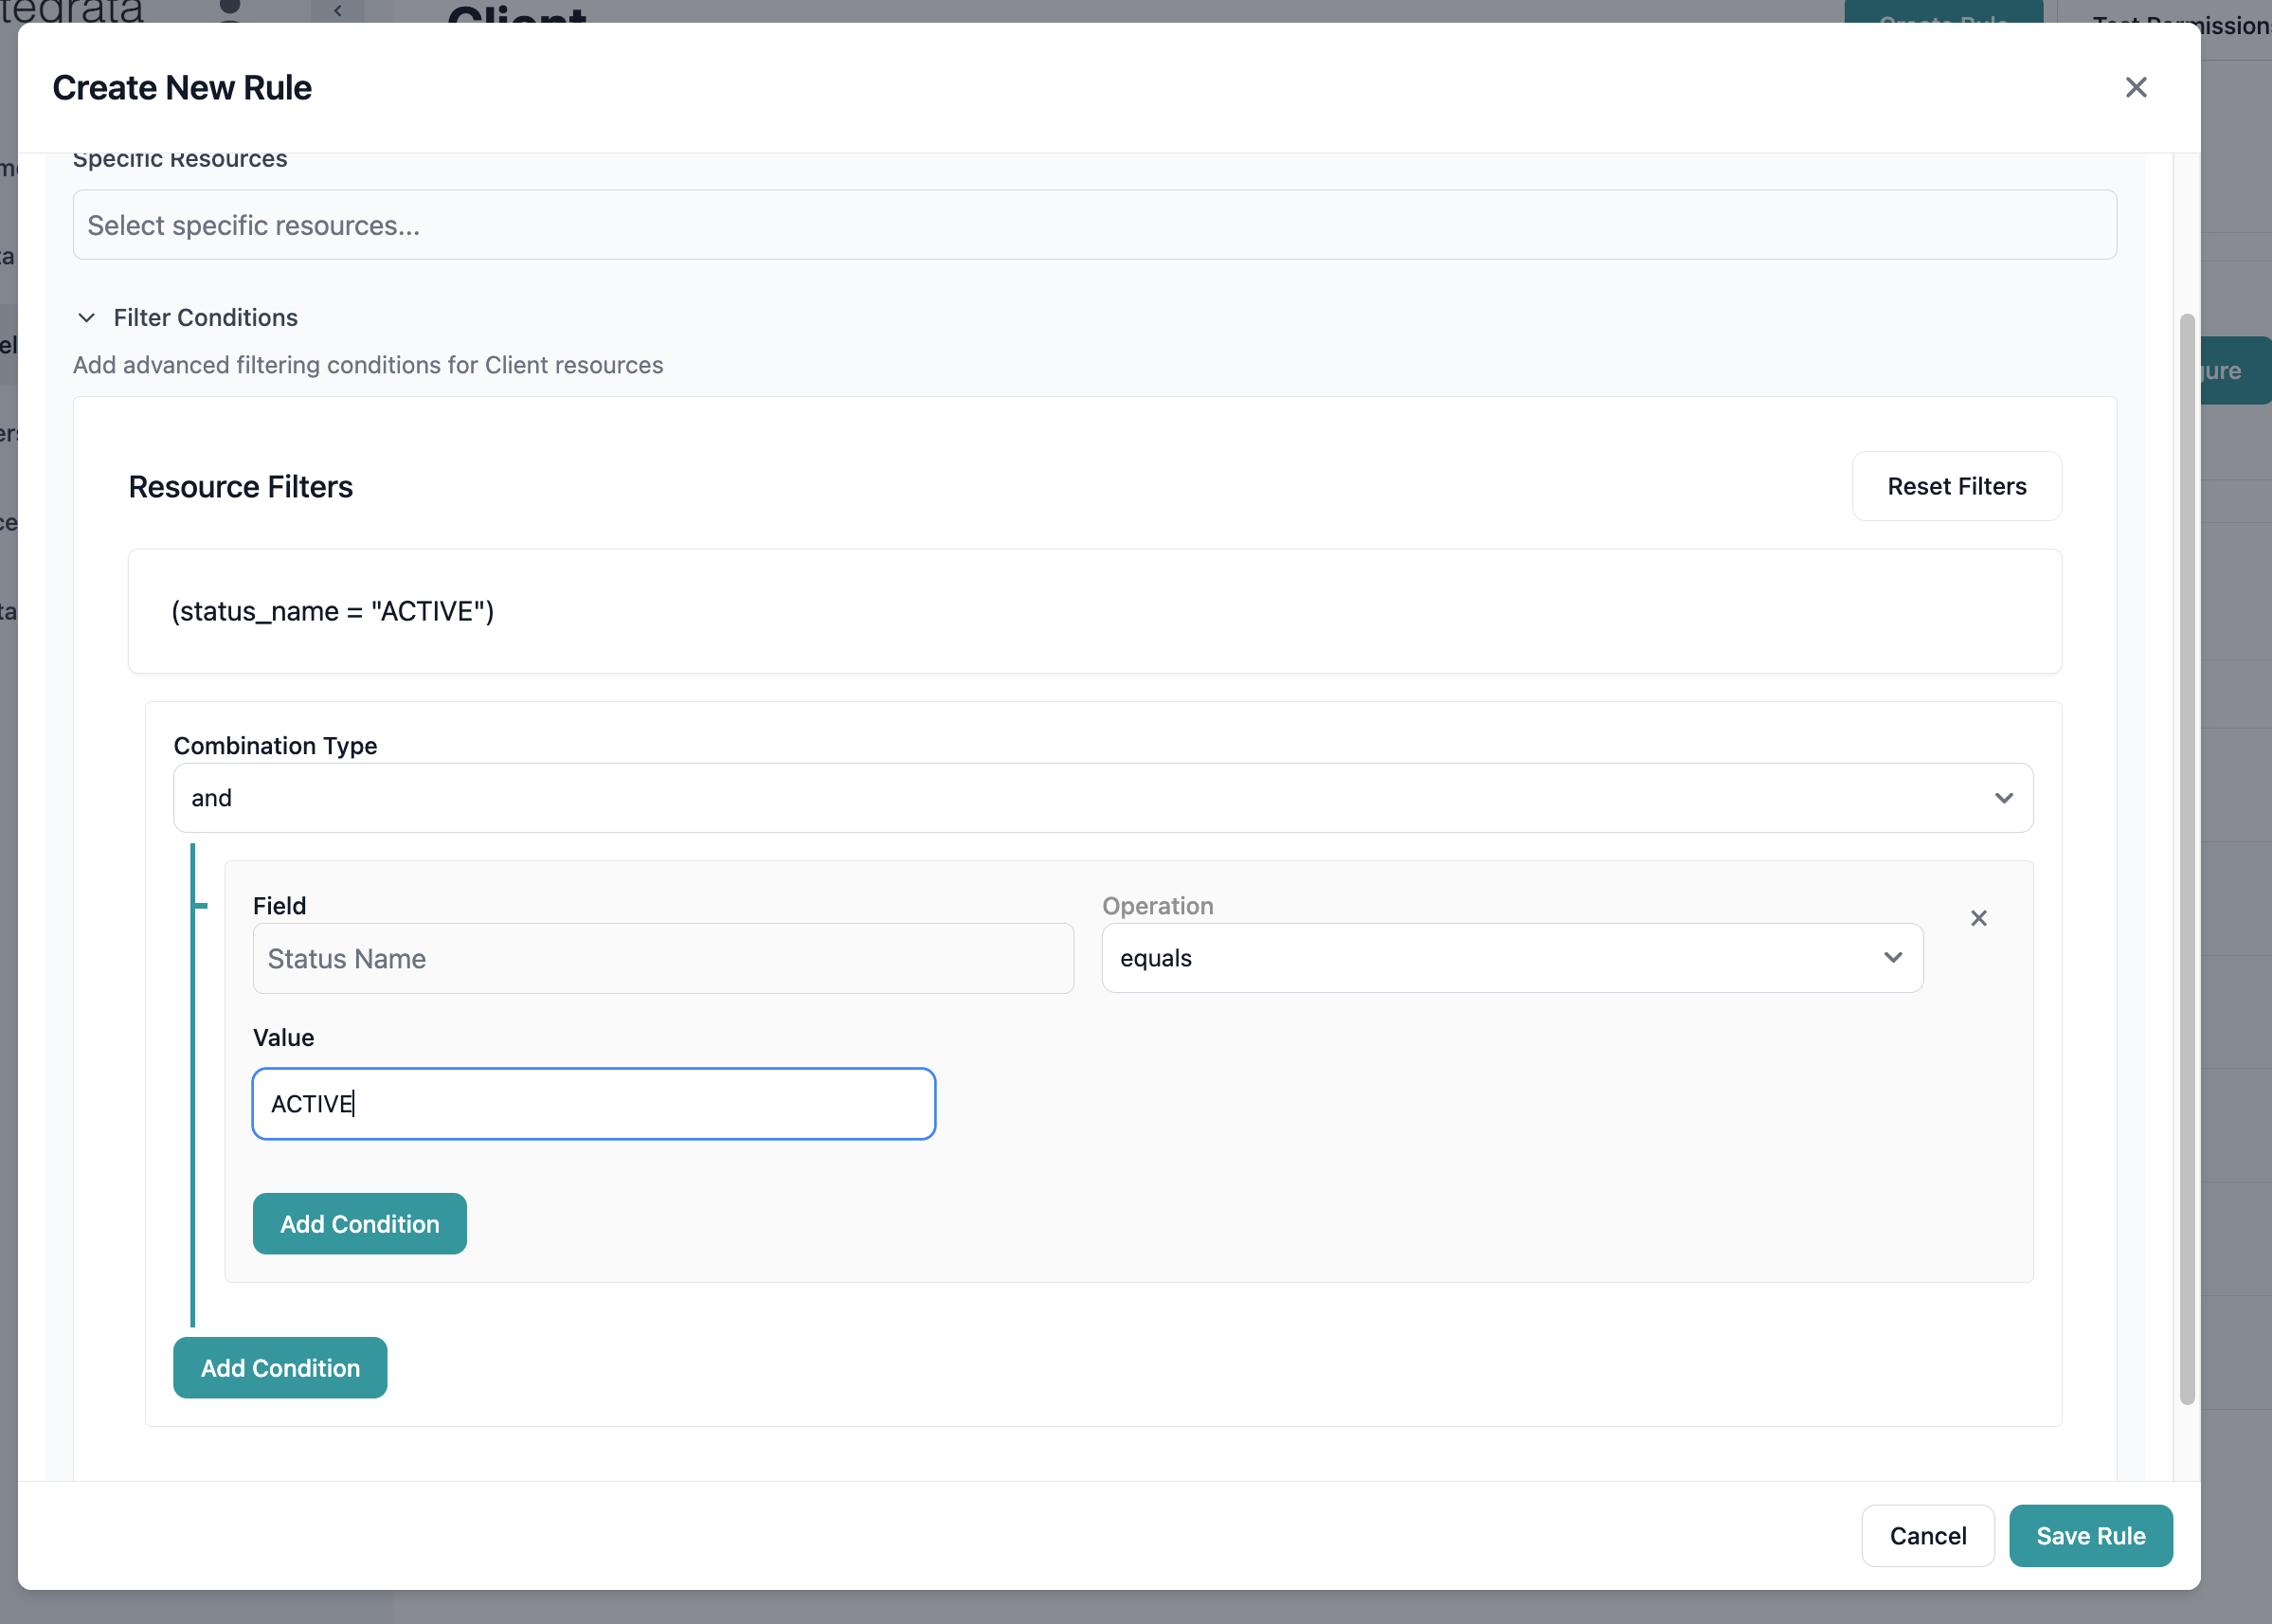 Example filters:
* `Status equals Active`
* `Department contains Legal`
* `CreatedDate after 2024-01-01`
### Step 5: Preview Rule Impact
Click the **Explore** tab to preview which subjects and objects will be affected:
The exploration shows:
* **Affected Subjects**: Count and list of users/groups
* **Affected Objects**: Count and list of resources
* **Effective Permissions**: Resulting access levels
Example filters:
* `Status equals Active`
* `Department contains Legal`
* `CreatedDate after 2024-01-01`
### Step 5: Preview Rule Impact
Click the **Explore** tab to preview which subjects and objects will be affected:
The exploration shows:
* **Affected Subjects**: Count and list of users/groups
* **Affected Objects**: Count and list of resources
* **Effective Permissions**: Resulting access levels
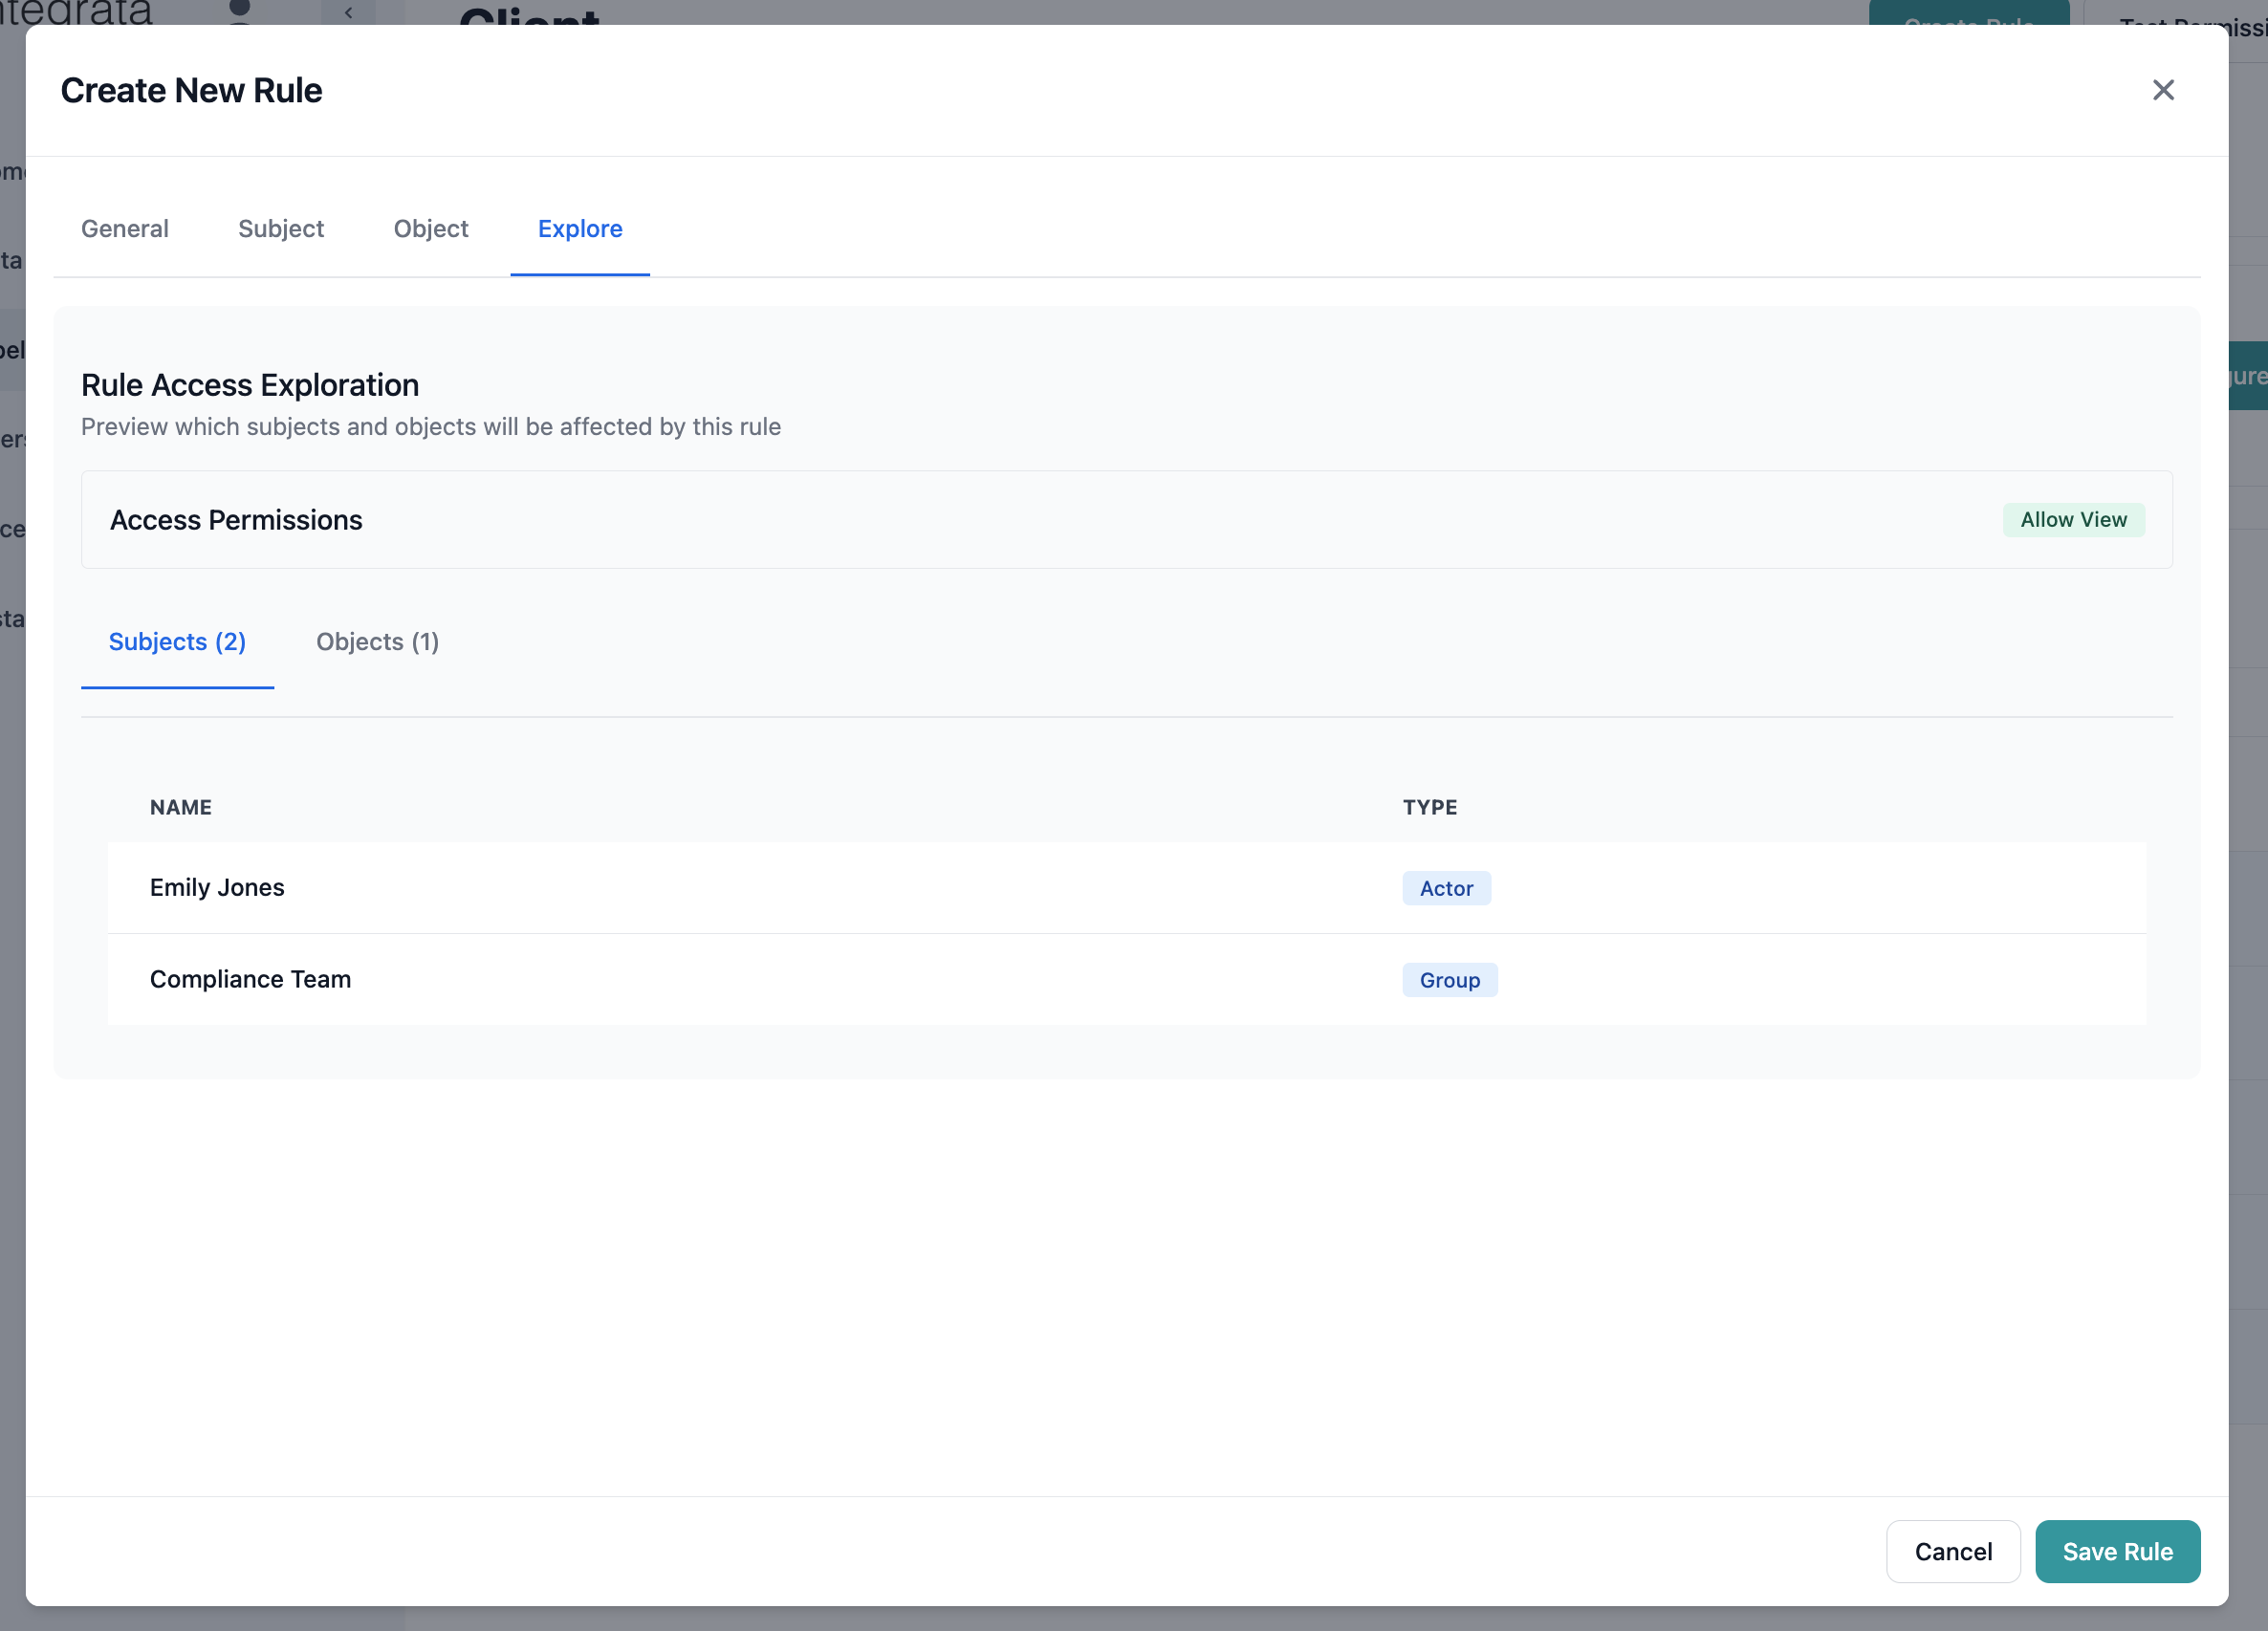
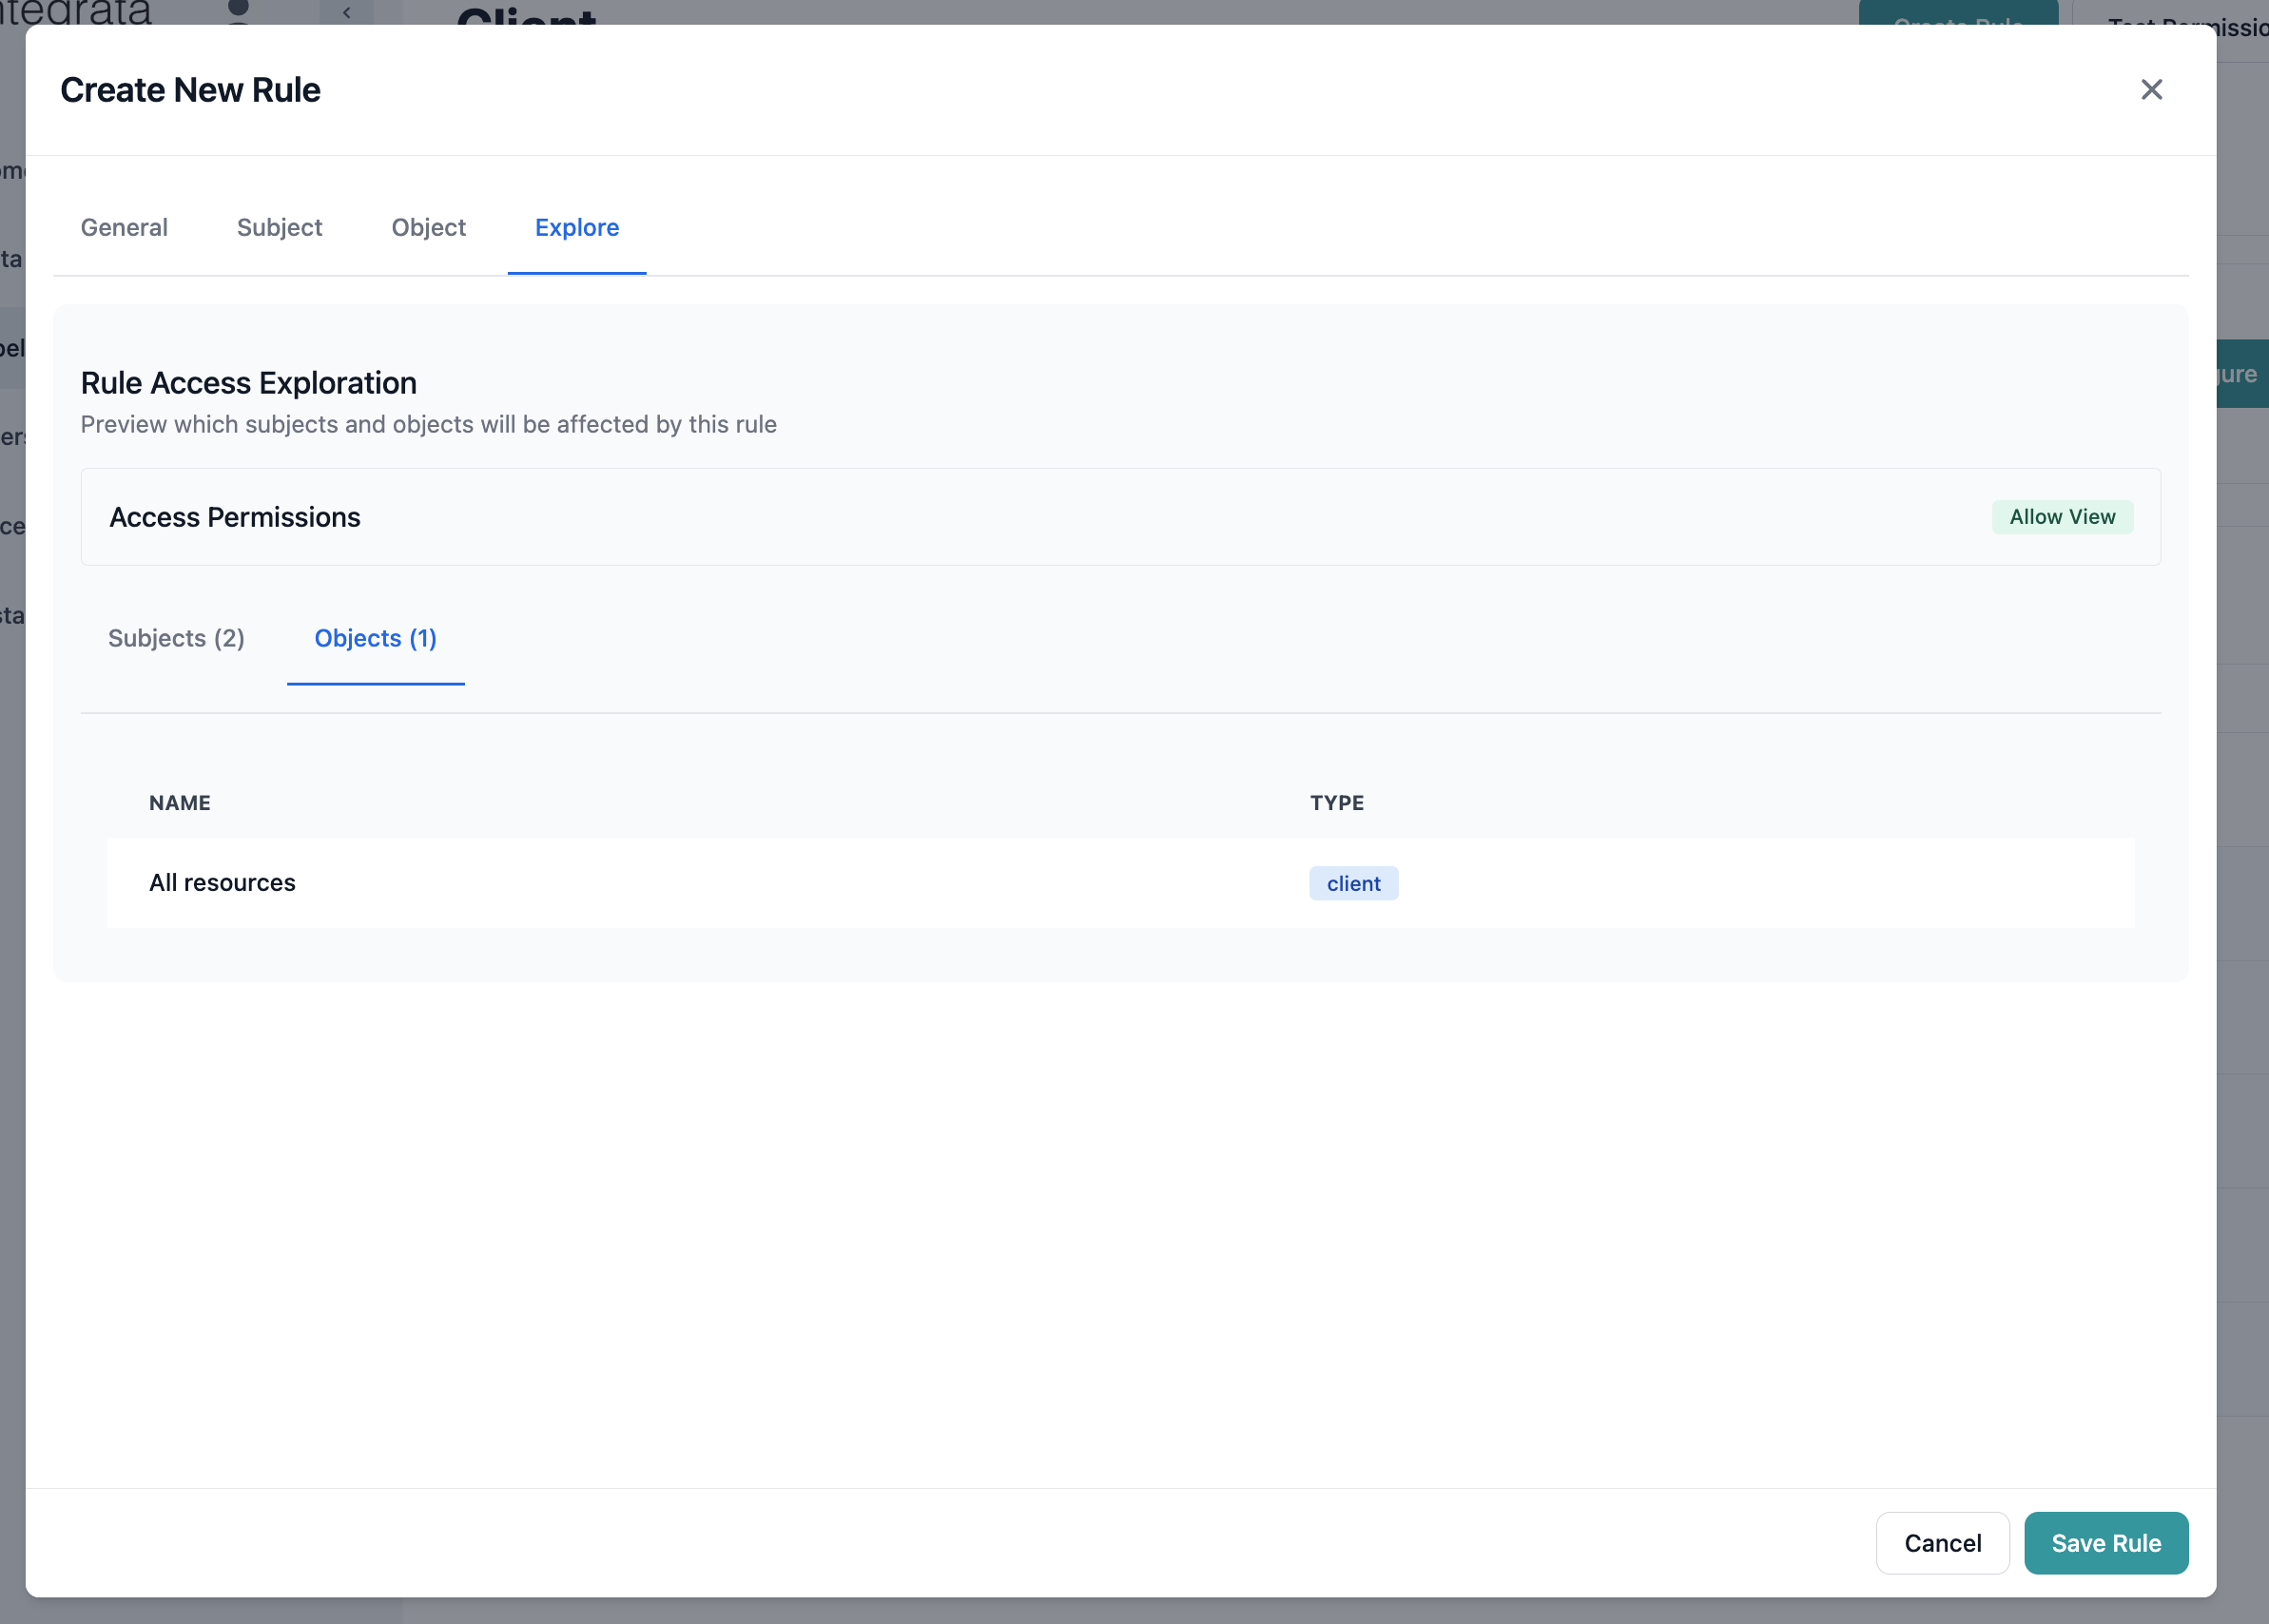 Always review the exploration results before saving to ensure the rule affects only the intended subjects and objects.
### Step 6: Save the Rule
1. Review all settings across tabs
2. Click **Save** to create the rule
3. Monitor the save progress:
* Compiling → Validating → Syncing
## Understanding Rule Types
### System (Native) vs Ingested Rules
Entegrata displays two types of rules in your access control configuration:
**What are System Rules?**
System rules are created directly by administrators within Entegrata. These are fully manageable and form your custom access control layer on top of any ingested permissions.
**Characteristics:**
* Created by administrators in Entegrata
* Fully editable and deletable
* Display with standard formatting (white background)
* Show "System" in the Source column
* Can be modified at any time
**Management:**
1. Click on the rule row to open for editing
2. Modify any settings as needed
3. Save changes or delete if no longer needed
4. Changes take effect immediately
**What are Ingested Rules?**
Ingested rules are imported from your connected data sources (Aderant, Intapp Walls) during access control synchronization. These represent the permissions configured in your source systems.
**Characteristics:**
* Imported from external data sources
* Read-only (cannot be edited in Entegrata)
* Display with blue background tint for easy identification
* Show source system name (e.g., "Aderant", "Intapp") in Source column
* Automatically updated during background sync operations
**Viewing:**
1. Click on the rule row to view details
2. Review the configuration (Only General (read only) and Explore tabs are available)
3. Close modal when done
4. To modify these rules, changes must be made in the source system
The visual distinction (blue background tint) helps you quickly identify which rules are managed in Entegrata versus those synchronized from external systems.
## Editing Rules
### Making Changes
To edit an existing system rule:
1. Navigate to the rule list
2. Click on the rule you want to edit
3. The Rule Modal opens with current settings
4. Make necessary changes
5. Click **Save** to apply updates
Changes to rules take effect immediately but may require 1-2 minutes to fully propagate across the system.
## Deleting Rules
To delete a system rule:
1. Find the rule in the rules table
2. Click the **Delete** action button
3. Confirm deletion in the dialog
4. The rule is removed immediately
Always review the exploration results before saving to ensure the rule affects only the intended subjects and objects.
### Step 6: Save the Rule
1. Review all settings across tabs
2. Click **Save** to create the rule
3. Monitor the save progress:
* Compiling → Validating → Syncing
## Understanding Rule Types
### System (Native) vs Ingested Rules
Entegrata displays two types of rules in your access control configuration:
**What are System Rules?**
System rules are created directly by administrators within Entegrata. These are fully manageable and form your custom access control layer on top of any ingested permissions.
**Characteristics:**
* Created by administrators in Entegrata
* Fully editable and deletable
* Display with standard formatting (white background)
* Show "System" in the Source column
* Can be modified at any time
**Management:**
1. Click on the rule row to open for editing
2. Modify any settings as needed
3. Save changes or delete if no longer needed
4. Changes take effect immediately
**What are Ingested Rules?**
Ingested rules are imported from your connected data sources (Aderant, Intapp Walls) during access control synchronization. These represent the permissions configured in your source systems.
**Characteristics:**
* Imported from external data sources
* Read-only (cannot be edited in Entegrata)
* Display with blue background tint for easy identification
* Show source system name (e.g., "Aderant", "Intapp") in Source column
* Automatically updated during background sync operations
**Viewing:**
1. Click on the rule row to view details
2. Review the configuration (Only General (read only) and Explore tabs are available)
3. Close modal when done
4. To modify these rules, changes must be made in the source system
The visual distinction (blue background tint) helps you quickly identify which rules are managed in Entegrata versus those synchronized from external systems.
## Editing Rules
### Making Changes
To edit an existing system rule:
1. Navigate to the rule list
2. Click on the rule you want to edit
3. The Rule Modal opens with current settings
4. Make necessary changes
5. Click **Save** to apply updates
Changes to rules take effect immediately but may require 1-2 minutes to fully propagate across the system.
## Deleting Rules
To delete a system rule:
1. Find the rule in the rules table
2. Click the **Delete** action button
3. Confirm deletion in the dialog
4. The rule is removed immediately
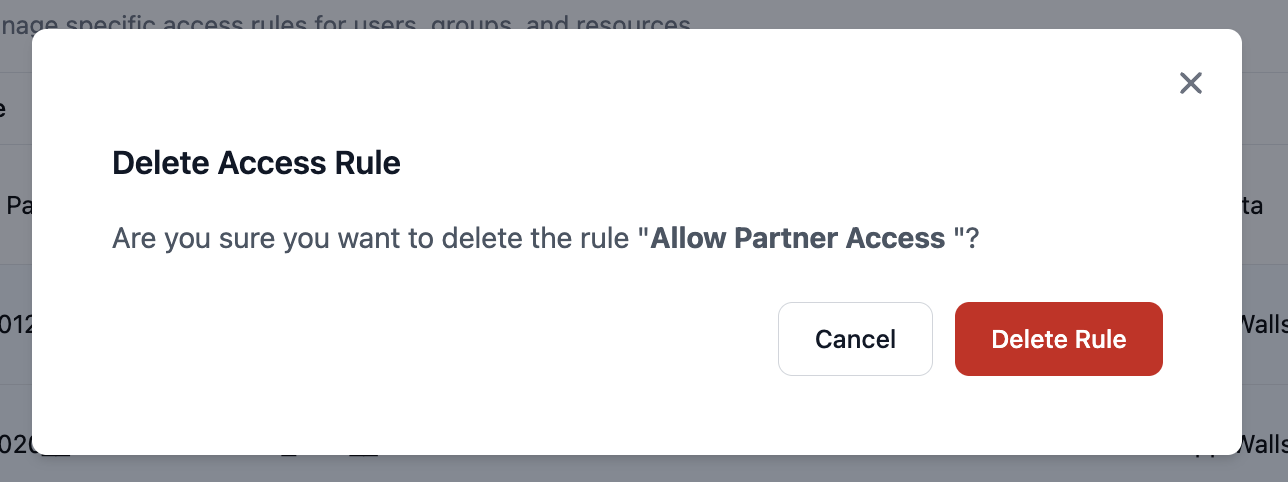 Deleting a rule immediately removes all permissions it granted. Ensure alternative access is available if needed.
## Rule Management Best Practices
### Naming Conventions
Establish consistent naming patterns:
* `[Department] - [Resource Type] - [Access Level]`
* `[Project] - [Team] - [Permission Type]`
* `[Compliance] - [Regulation] - [Restriction]`
Examples:
* "Legal - Active Matters - Full Access"
* "Project Alpha - Development Team - Read Only"
* "SOX - Financial Data - Restricted"
### Organization Strategies
**Use Groups**: Create rules for groups rather than individuals to simplify management and reduce rule count.
**Layer Rules**: Start with broad rules, then add specific exceptions. This creates a clear permission hierarchy.
**Document Purpose**: Always fill in the description field to explain why the rule exists and when it should be reviewed.
**Regular Reviews**: Schedule periodic reviews of rules to remove obsolete ones and update as needed.
### Filter Best Practices
When using dynamic filters:
1. **Test Thoroughly**: Use the Explore tab to verify filter results
2. **Avoid Over-Complexity**: Simple filters are easier to understand and maintain
3. **Consider Performance**: Very complex filters may impact evaluation speed
4. **Document Logic**: Explain filter conditions in the rule description
## Advanced Rule Patterns
### Pattern 1: Department-Based Access
**Scenario**: Grant department members access to their department's data
**Implementation**:
* Subject Filter: `Department equals "Finance"`
* Object Filter: `OwnerDepartment equals "Finance"`
* Permission: Allow
### Pattern 2: Time-Based Access
**Scenario**: Temporary access for consultants
**Implementation**:
* Subject: Specific consultant group
* Object Filter: `ProjectEndDate after TODAY`
* Permission: Allow
* Review regularly to remove expired access
### Pattern 3: Hierarchical Access
**Scenario**: Managers access their team's data
**Implementation**:
* Subject Filter: `Role contains "Manager"`
* Object Filter: `TeamId in [managed_teams]`
* Permission: Allow
### Pattern 4: Compliance Restrictions
**Scenario**: Implement ethical walls
**Implementation**:
* Subject: Restricted user group
* Object: Specific conflicted matters
* Permission: Deny
* Higher precedence than allow rules
## Rule Precedence and Conflicts
When multiple rules apply to the same subject and object:
Rules targeting specific users override group rules
Rules targeting specific resources override filtered resources
If both Allow and Deny rules apply at the same specificity level, Deny wins
Default permissions only apply when no specific rules match
### Conflict Resolution Example
Given these rules for User A accessing Resource X:
1. Default: Allow (entity level)
2. Rule 1: Deny for Group B (User A is member)
3. Rule 2: Allow for User A specifically
**Result**: User A has access (specific user rule overrides group rule)
## Troubleshooting Rules
### Common Issues
* Allow 1-2 minutes for propagation
* Verify subject and object selections
* Check for conflicting higher-precedence rules
* Test using permission explorer
* Review filter conditions carefully
* Check group membership if using groups
* Verify attribute values in source data
* Test filters with different operators
* Look for deny rules with higher precedence
* Check if default permissions changed
* Verify user group memberships
* Use permission testing to trace the denial source
* Simplify complex filter conditions
* Reduce number of OR conditions
* Consider splitting into multiple simpler rules
* Contact support for optimization assistance
## Next Steps
Use permission testing tools to verify rules work correctly
Create groups to simplify rule management
Set appropriate default permissions as rule foundation
Understand how rules affect overall access patterns
Deleting a rule immediately removes all permissions it granted. Ensure alternative access is available if needed.
## Rule Management Best Practices
### Naming Conventions
Establish consistent naming patterns:
* `[Department] - [Resource Type] - [Access Level]`
* `[Project] - [Team] - [Permission Type]`
* `[Compliance] - [Regulation] - [Restriction]`
Examples:
* "Legal - Active Matters - Full Access"
* "Project Alpha - Development Team - Read Only"
* "SOX - Financial Data - Restricted"
### Organization Strategies
**Use Groups**: Create rules for groups rather than individuals to simplify management and reduce rule count.
**Layer Rules**: Start with broad rules, then add specific exceptions. This creates a clear permission hierarchy.
**Document Purpose**: Always fill in the description field to explain why the rule exists and when it should be reviewed.
**Regular Reviews**: Schedule periodic reviews of rules to remove obsolete ones and update as needed.
### Filter Best Practices
When using dynamic filters:
1. **Test Thoroughly**: Use the Explore tab to verify filter results
2. **Avoid Over-Complexity**: Simple filters are easier to understand and maintain
3. **Consider Performance**: Very complex filters may impact evaluation speed
4. **Document Logic**: Explain filter conditions in the rule description
## Advanced Rule Patterns
### Pattern 1: Department-Based Access
**Scenario**: Grant department members access to their department's data
**Implementation**:
* Subject Filter: `Department equals "Finance"`
* Object Filter: `OwnerDepartment equals "Finance"`
* Permission: Allow
### Pattern 2: Time-Based Access
**Scenario**: Temporary access for consultants
**Implementation**:
* Subject: Specific consultant group
* Object Filter: `ProjectEndDate after TODAY`
* Permission: Allow
* Review regularly to remove expired access
### Pattern 3: Hierarchical Access
**Scenario**: Managers access their team's data
**Implementation**:
* Subject Filter: `Role contains "Manager"`
* Object Filter: `TeamId in [managed_teams]`
* Permission: Allow
### Pattern 4: Compliance Restrictions
**Scenario**: Implement ethical walls
**Implementation**:
* Subject: Restricted user group
* Object: Specific conflicted matters
* Permission: Deny
* Higher precedence than allow rules
## Rule Precedence and Conflicts
When multiple rules apply to the same subject and object:
Rules targeting specific users override group rules
Rules targeting specific resources override filtered resources
If both Allow and Deny rules apply at the same specificity level, Deny wins
Default permissions only apply when no specific rules match
### Conflict Resolution Example
Given these rules for User A accessing Resource X:
1. Default: Allow (entity level)
2. Rule 1: Deny for Group B (User A is member)
3. Rule 2: Allow for User A specifically
**Result**: User A has access (specific user rule overrides group rule)
## Troubleshooting Rules
### Common Issues
* Allow 1-2 minutes for propagation
* Verify subject and object selections
* Check for conflicting higher-precedence rules
* Test using permission explorer
* Review filter conditions carefully
* Check group membership if using groups
* Verify attribute values in source data
* Test filters with different operators
* Look for deny rules with higher precedence
* Check if default permissions changed
* Verify user group memberships
* Use permission testing to trace the denial source
* Simplify complex filter conditions
* Reduce number of OR conditions
* Consider splitting into multiple simpler rules
* Contact support for optimization assistance
## Next Steps
Use permission testing tools to verify rules work correctly
Create groups to simplify rule management
Set appropriate default permissions as rule foundation
Understand how rules affect overall access patterns