Documentation Index
Fetch the complete documentation index at: https://support.entegrata.com/llms.txt
Use this file to discover all available pages before exploring further.
Overview
Data sources are the foundation of your data pipelines. In Entegrata, you connect to various data sources, select the specific tables or datasets you need, and configure how they relate to each other. This guide covers everything you need to know about working with data sources in the mapping editor.Understanding Source Types
Primary Source
The primary source is the main source of data for your entity:- Determines the base set of records
- All other sources are joined to this source
- Each entity must have exactly one primary source
- The first source you add becomes the primary source
Related Sources
Related sources are additional data sources joined to enrich your primary data:- Can have multiple related sources per entity
- Joined using one or more key fields (foreign key relationships)
- Can come from different systems or databases
- Client table (to get customer client number)
- Marketing engagement table (to get campaign responses)

Adding a Primary Source
Use the Add Source Wizard to add your first source. The wizard walks you through three steps: selecting a source, configuring a primary key, and setting up a record identifier.Open the Add Source Wizard
In the mapping editor, click the + Add Source button in the Data Sources placeholder area.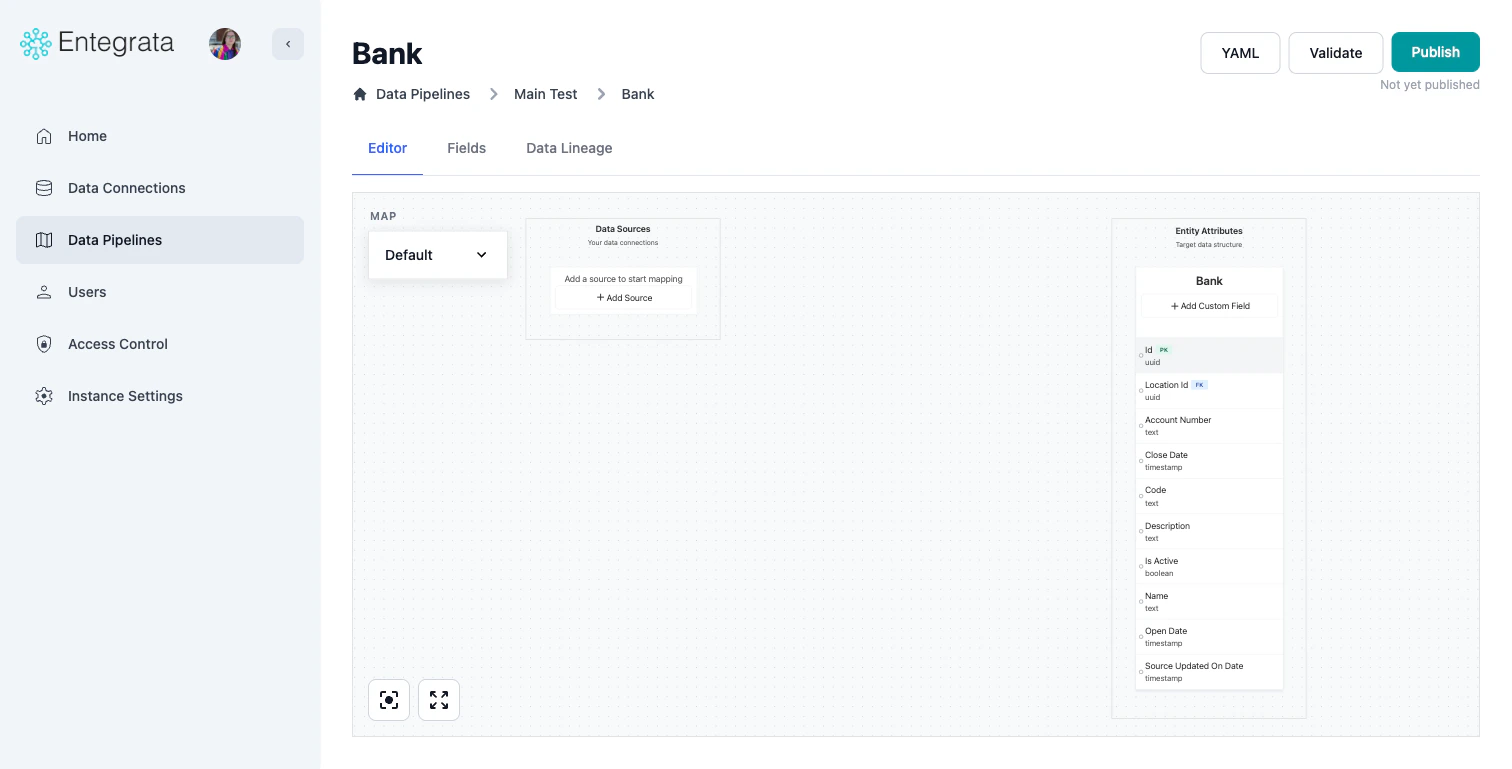
Select Source
Browse the DataSourceBrowser tree to find your source. Connections are listed at the top level with their logos, and each connection expands to show available resources (tables/datasets). The number next to each item shows the count of available fields.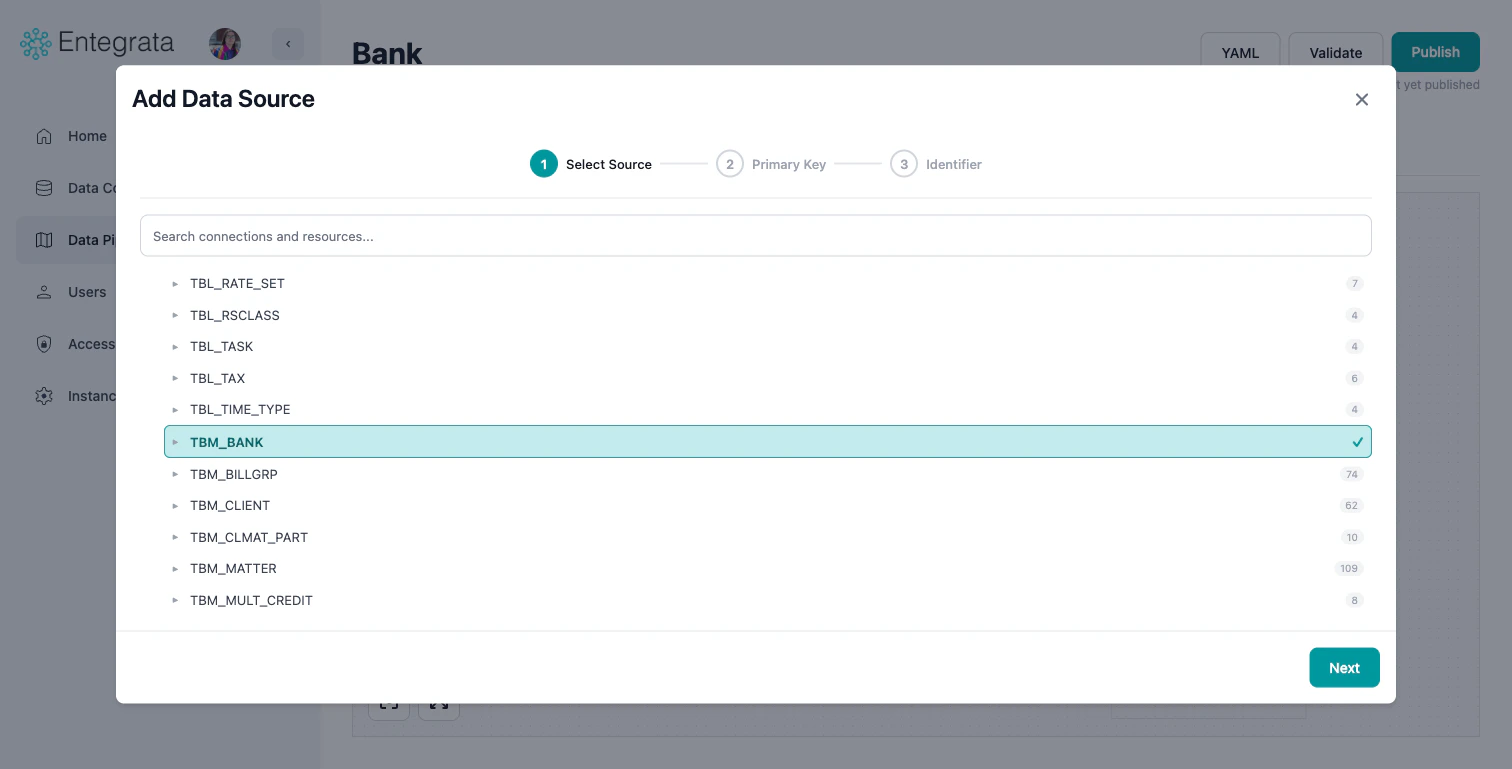
- Use the search bar to filter connections and resources
- Click a connection to expand it and see its resources
- Click a resource to select it (highlighted in teal with a checkmark)
- Click Next to proceed
Configure Primary Key
Select one or more fields that uniquely identify each record in this data source.
- Use the multi-select dropdown to choose primary key fields
- If the source has a known primary key, it may be auto-suggested
- You can select multiple fields for composite primary keys
- Click Next to proceed
Configure Record Identifier
The record identifier determines how records from this source are uniquely identified in the entity. For primary sources, you have two options:Click Add Source to finish.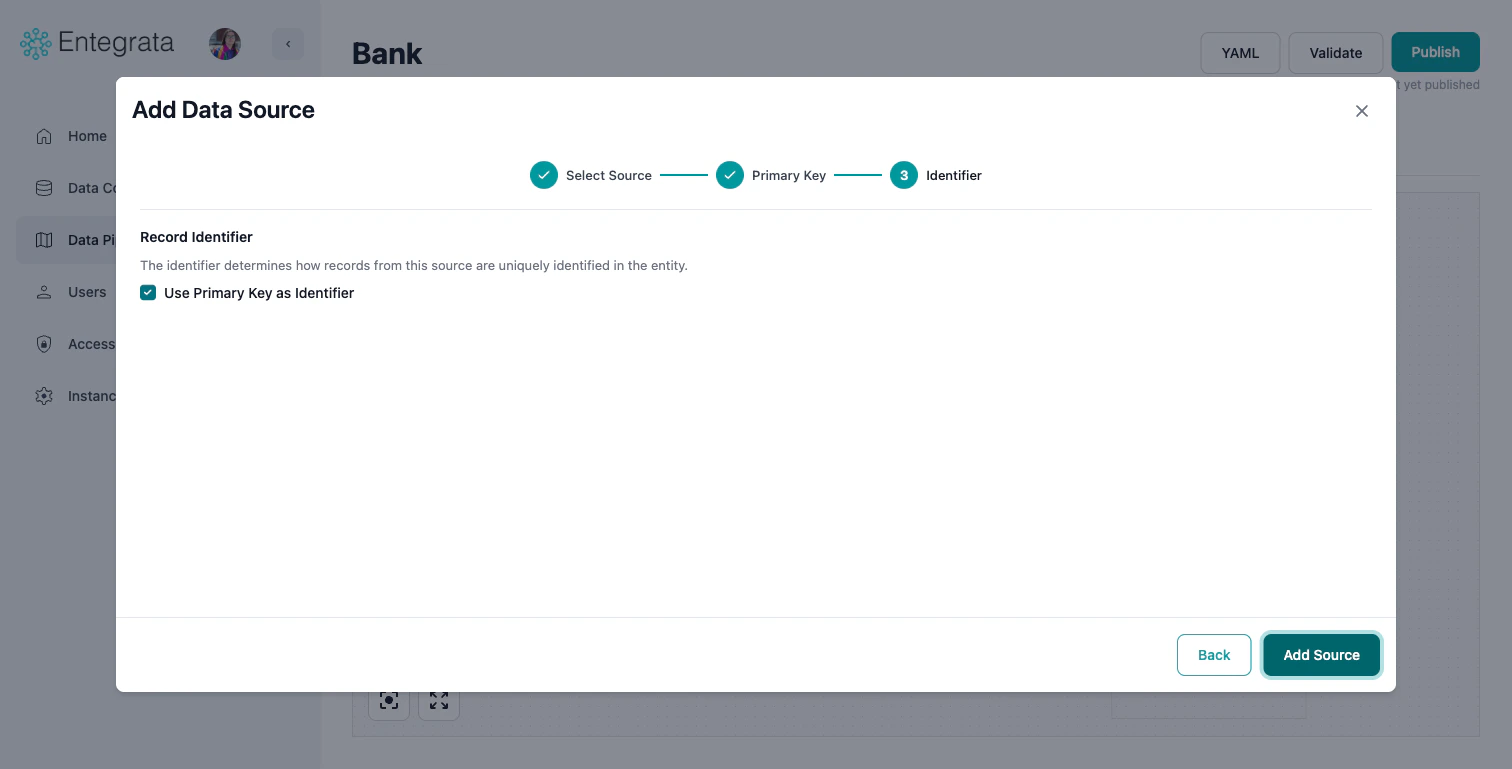
- Use Primary Key as Identifier (default, recommended): Check this box to use the same field(s) you selected as the primary key.
- Custom Identifier: Uncheck the box to configure a custom identifier using functions like COALESCE, CONCAT, or HASH.
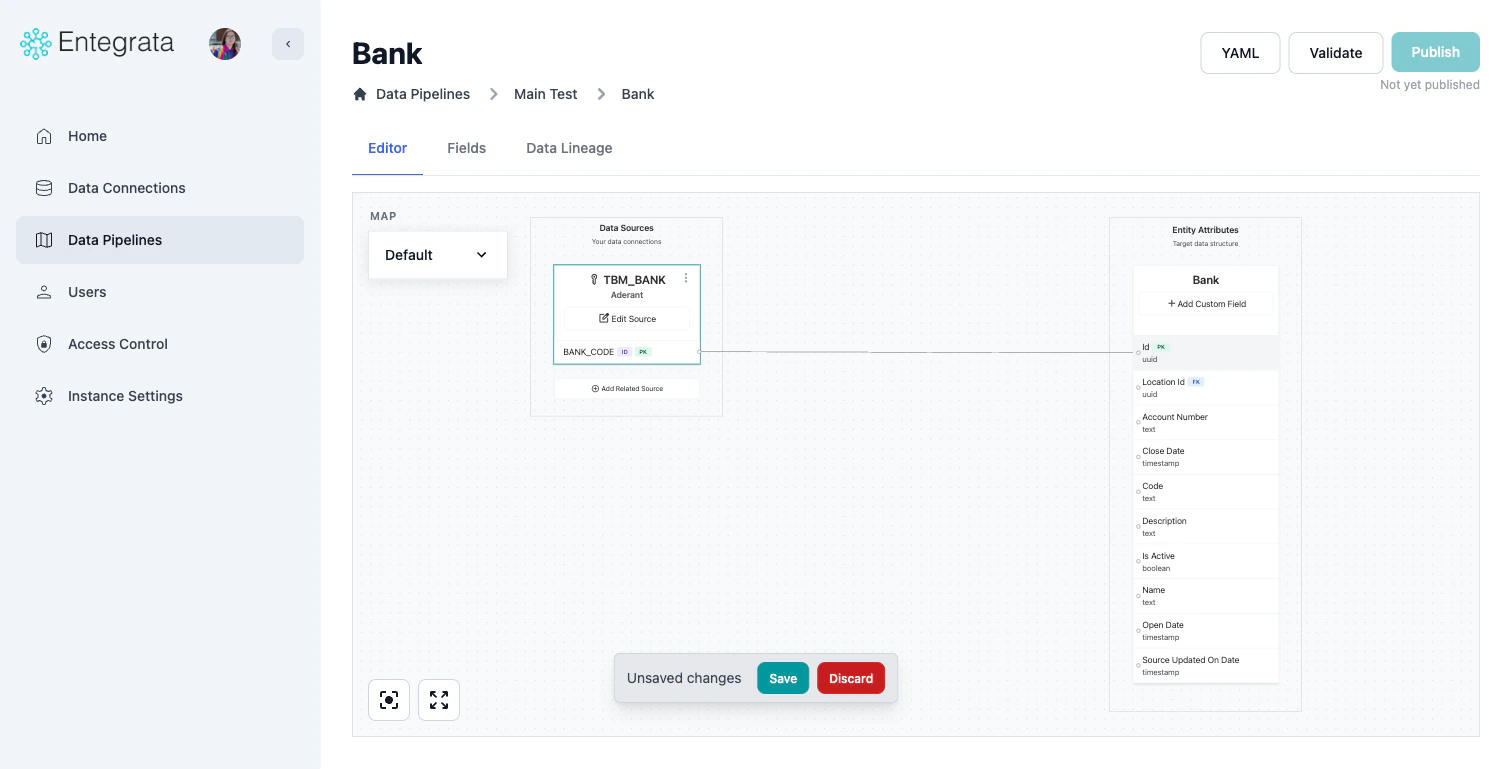
The primary source determines the base records. All other sources are joined to this.
Adding Related Sources
Related sources are joined to your primary source to enrich data. You can add a related source in two ways:- Click the + Add Related Source placeholder below your existing sources
- Open the source node’s three-dot menu and select Add Related Source
Select Source
Browse and select a resource from the DataSourceBrowser, the same as when adding a primary source.
Configure Record Matching
Define how records from this source relate to the primary source: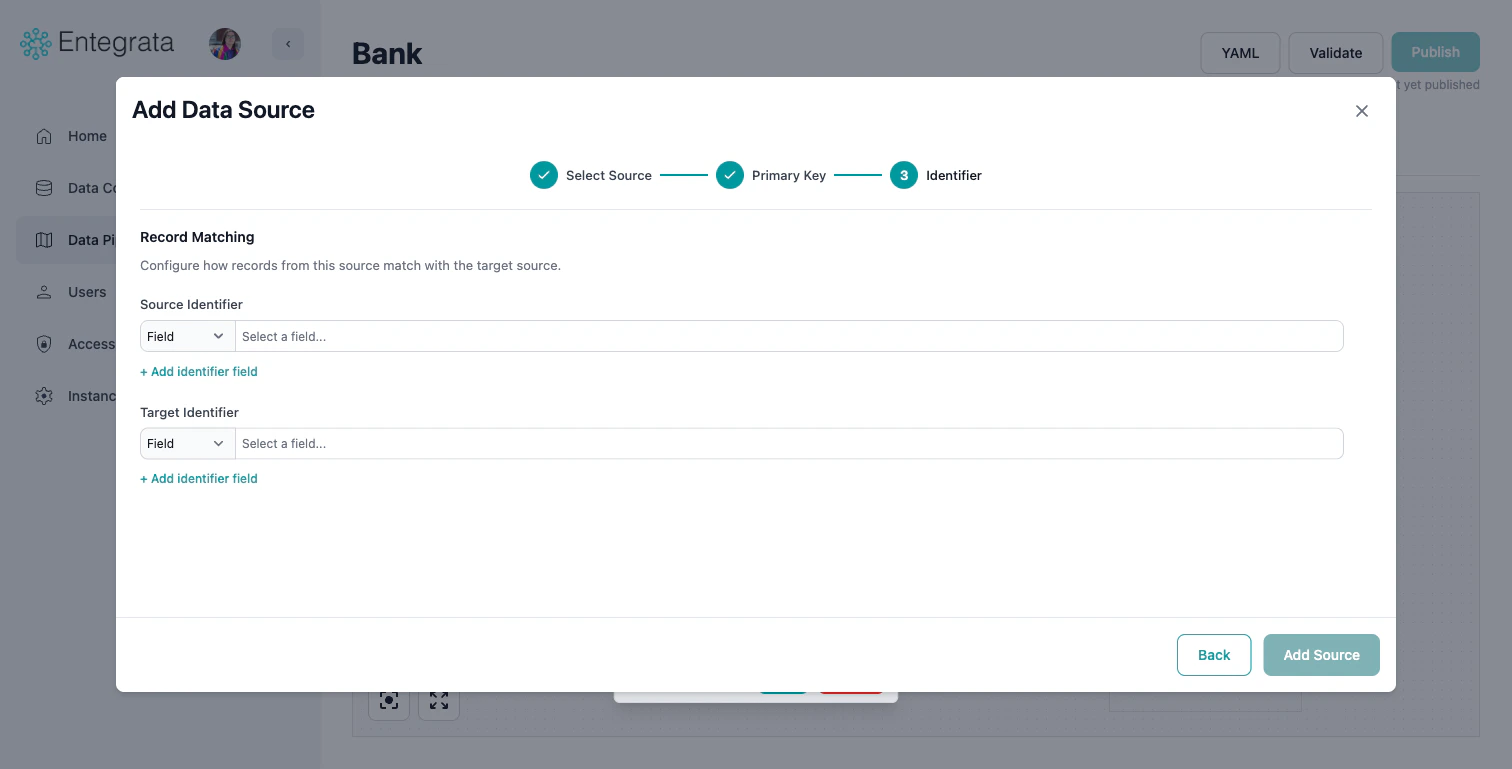
- Source Identifier: Select a field (or custom expression) on this source whose data relates to the primary source.
- Target Identifier: Select the corresponding field on the primary source that matches.
- Use the Field/Custom dropdown to switch between selecting a field directly or writing a custom expression.
- Click + Add identifier field to add additional matching conditions.
Editing Source Properties
To edit an existing source’s configuration, use the three-dot context menu on the source node and select Edit Properties, or click the Edit Source button on the source node.
Fields Tab
Add or remove fields (columns) available from this source. Use the search bar to find fields, or click the + button to add a custom expression.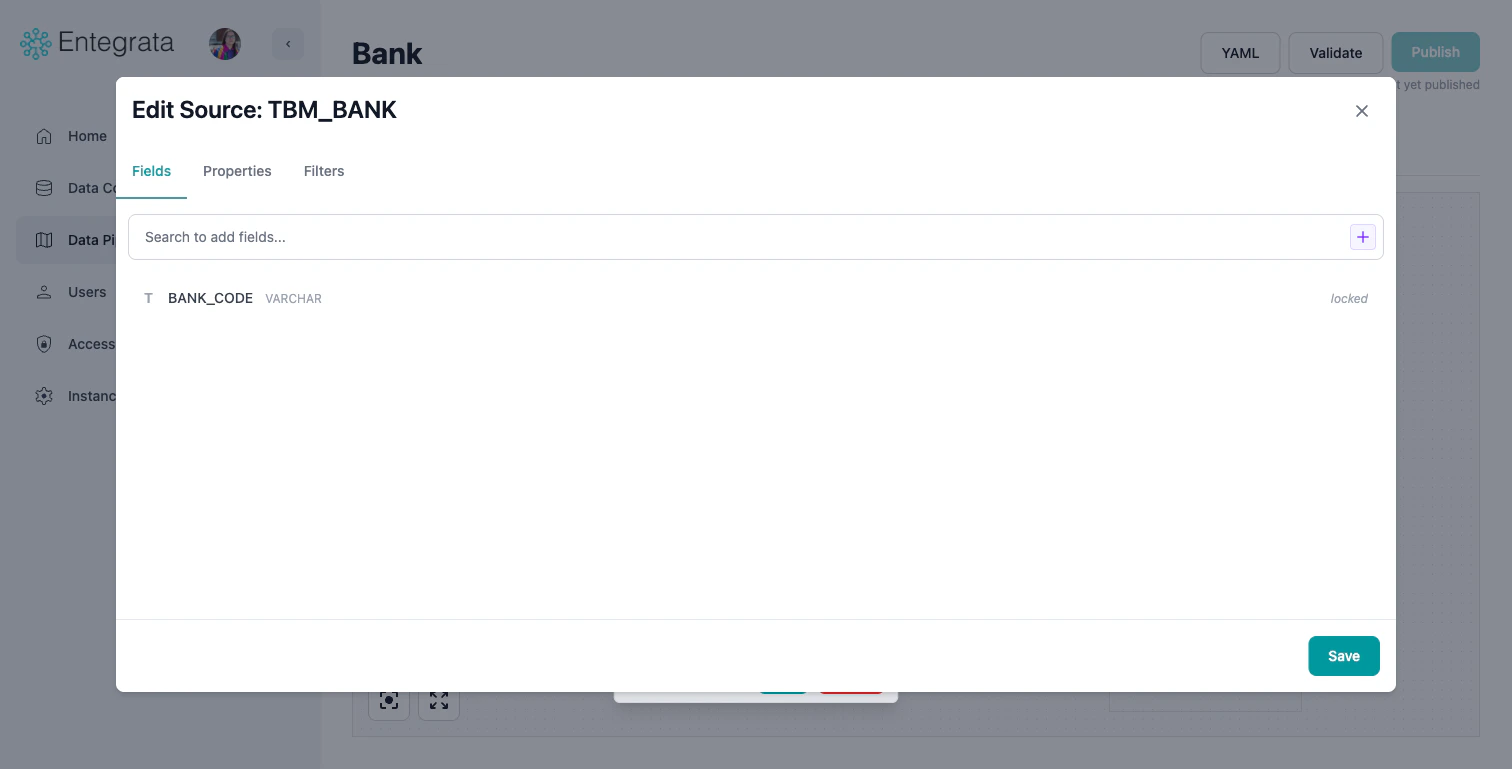
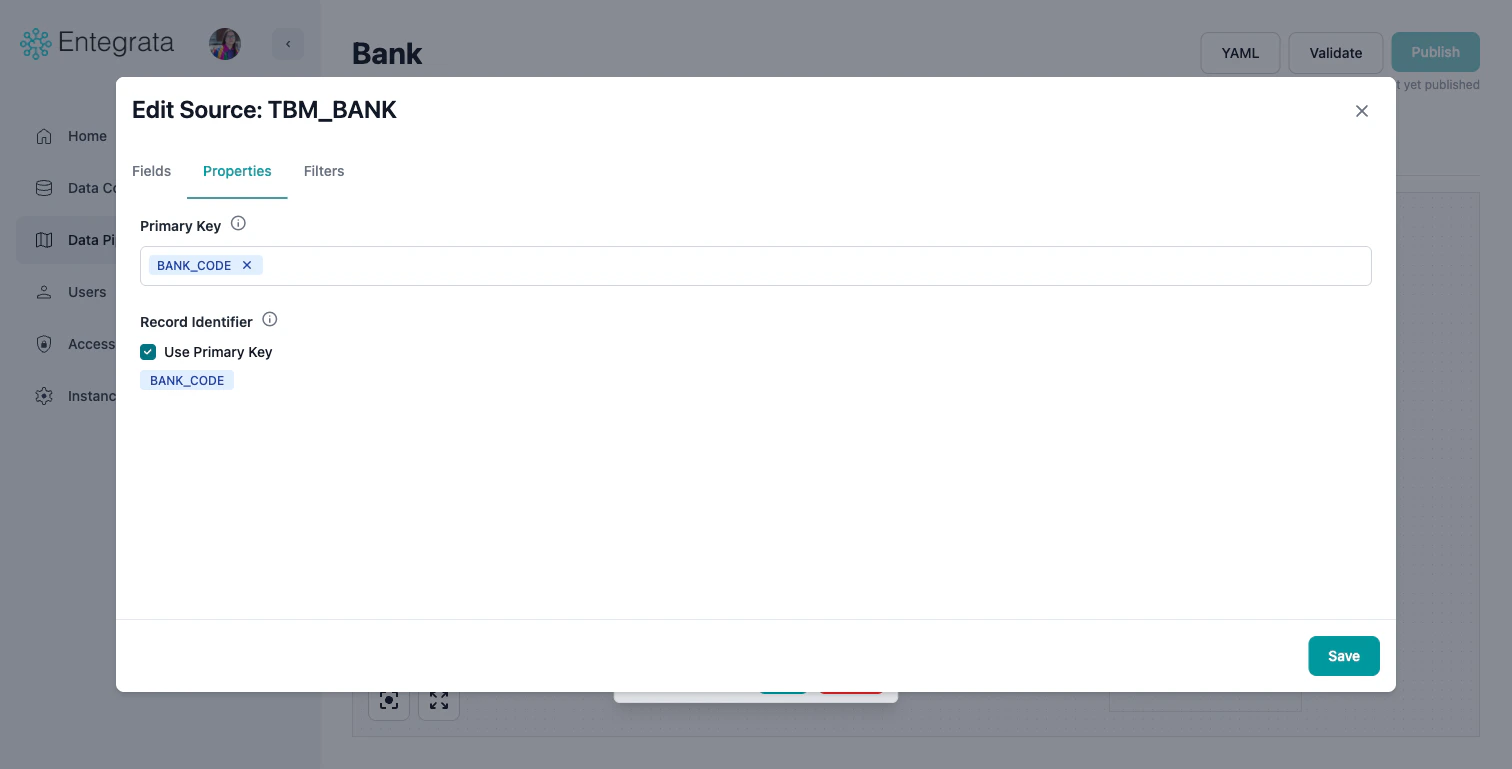
Properties Tab
View and modify the source’s primary key and record identifier settings.- Primary Key: Change the field(s) used to uniquely identify records
- Record Identifier: Toggle “Use Primary Key” or configure a custom identifier
Filters Tab
Add filter conditions to restrict which records are included from this source. This is equivalent to adding a WHERE clause.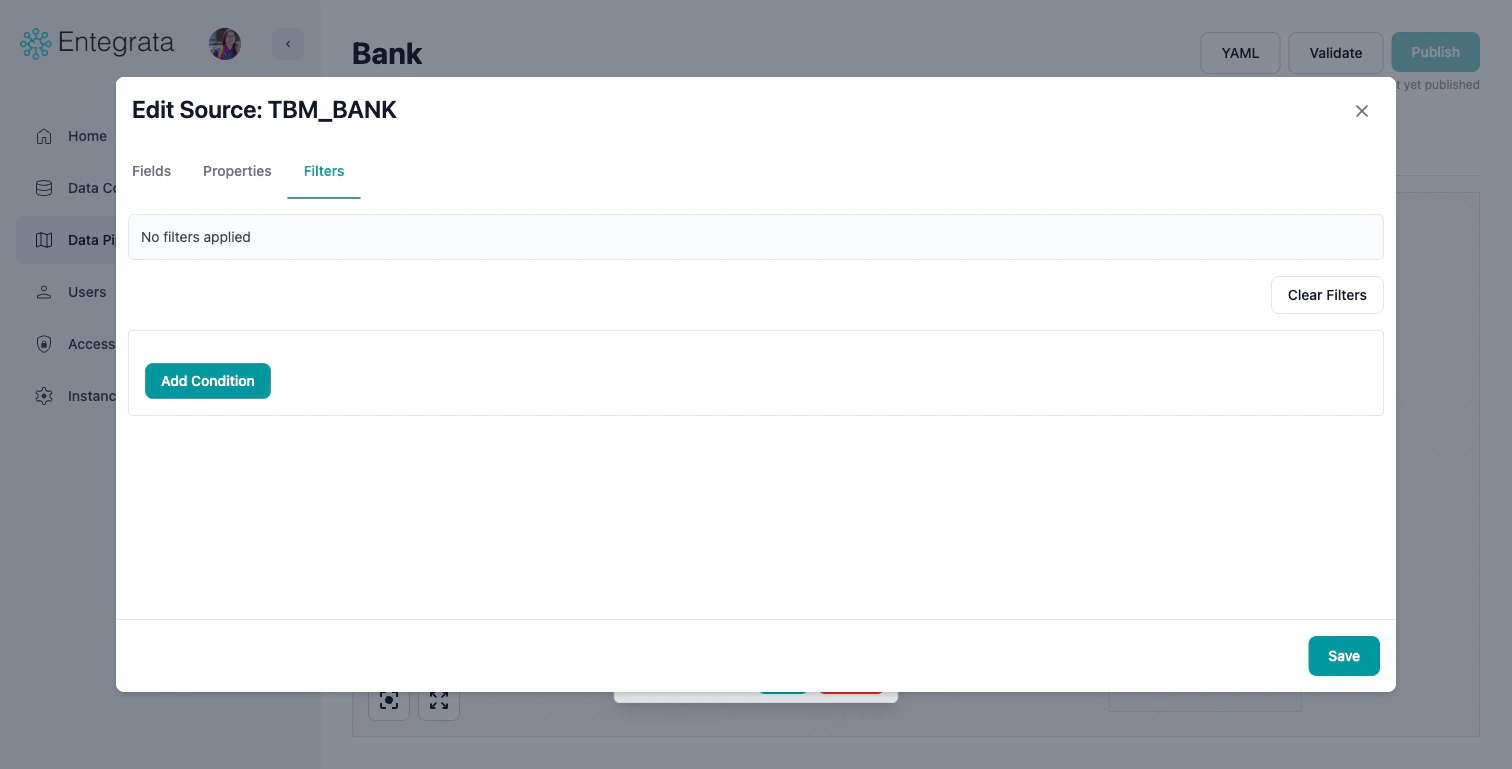
Managing Multiple Related Sources
When working with many related sources:Nested Joins
Related sources can join to other related sources (not just the primary):Add Second Related Source
When configuring record matching, select the first related source instead of the primary source as the target.
- Primary: Customers
- Related 1: Orders (joined to Customers)
- Related 2: OrderItems (joined to Orders, not Customers)
Troubleshooting
Source Connection Failed
Issue: Cannot connect to the data source. Solutions:- Verify the connection credentials are current
- Check network connectivity
- Ensure you have permission to access the source
- Contact your administrator to refresh the connection
No Tables Visible
Issue: Can’t see any tables or datasets in the source. Solutions:- Verify you have read permissions
- Check if you’re looking in the correct schema/database
- Refresh the connection in the admin portal
- Some sources may require specific catalog configuration
Too Many Records After Join
Issue: Join produces more records than expected. Solutions:- Check for duplicate values in join keys
- Verify you’re joining on the correct fields
- Look for one-to-many relationships
- Add additional join conditions to make relationship unique
- Consider if this is actually correct (e.g., one customer, many orders)
Best Practices
Related Topics
Data Mapping Editor
Learn about the visual mapping editor interface
Mapping Fields
Map source fields to your entity fields
Multi-Field Mapping
Advanced transformations with multiple source fields
Publishing Mappings
Deploy your configured mappings to production