
Overview
Running Automap from a pipeline steps you through each unmapped silver data type in that pipeline, one at a time. Data types come in dependency order, so a data type is mapped before any data type that depends on it. On each data type, Automap picks or suggests a primary source and loads field suggestions, which you then review in the familiar mapping editor. To learn how suggestions are rated, see the Automap Overview.Required permissions
- Data Pipelines: Access
- Manage Production Pipelines or Manage Dev Pipelines, for the pipeline: Update
- Manage Silver Entities: Update
Start a Session
1
Open the pipeline list
Go to Pipelines to see your pipelines.
2
Choose Automap
Open the options menu (⋮) on the pipeline’s row and select Automap.
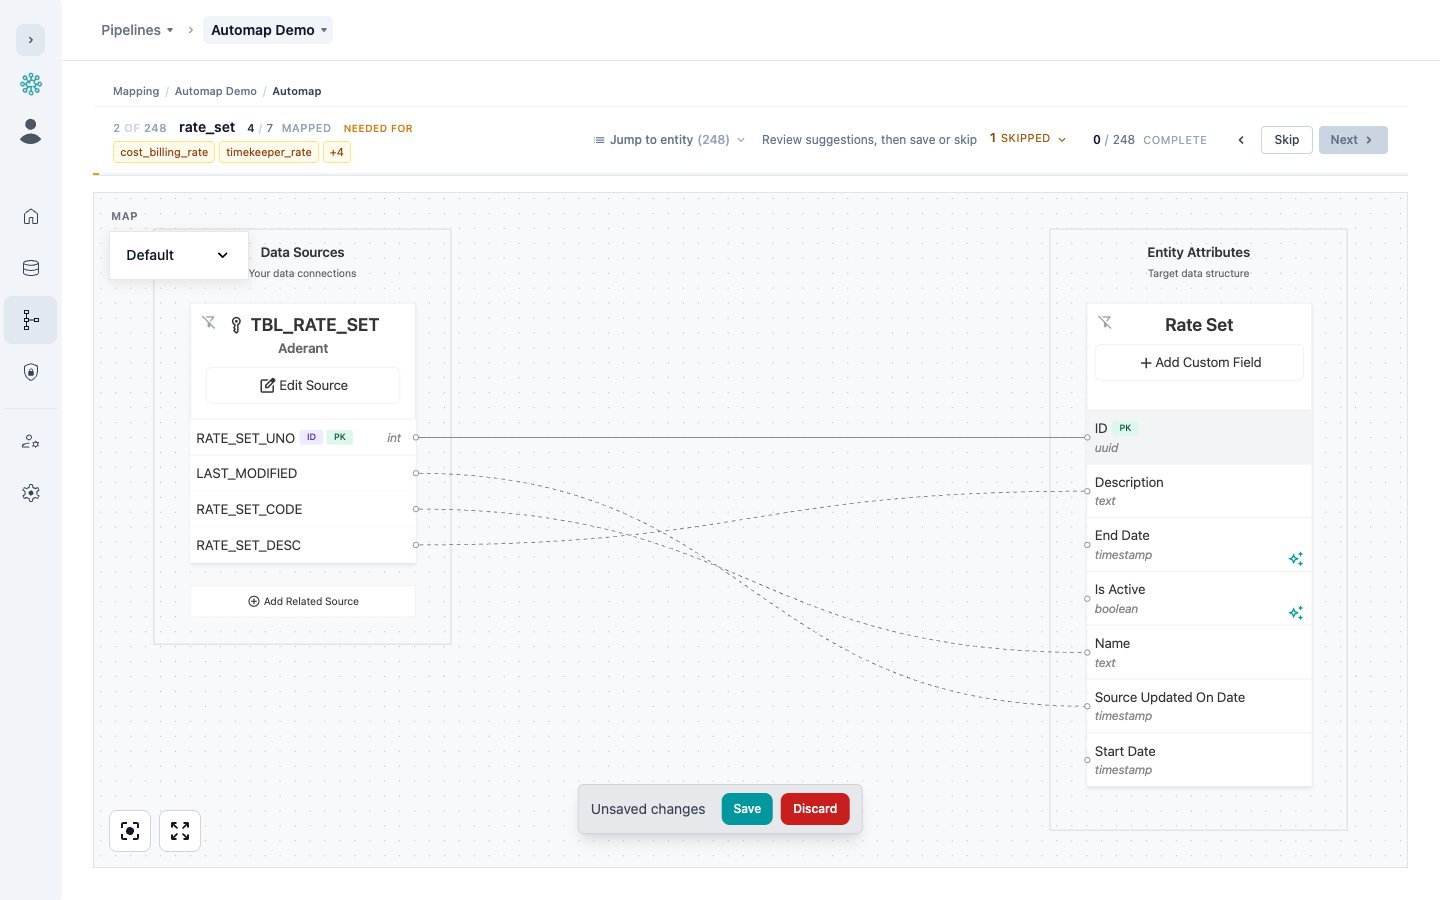
Map Each Data Type
1
Let Automap find a primary source
If the data type has no primary source, Automap looks for one.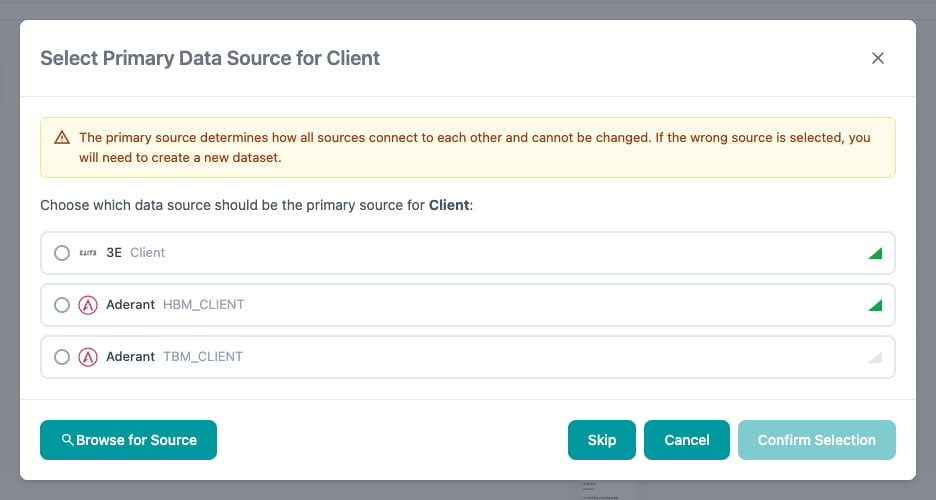
- If one candidate is a clear match, Automap selects it and saves it right away.
- Otherwise, Select Primary Data Source opens with candidate tables ranked by confidence. Choose the table that holds one row per record and click Confirm Selection, click Browse for Source to search the catalog, or click Skip to move on.
2
Review field suggestions
The status line reads Loading field suggestions…, then Review suggestions, then save or skip. Accept, dismiss, and configure joins as described in Automap in the Mapping Editor.
3
Save
Click Save. Next stays disabled until you save or skip the current data type.
4
Go to the next data type
Click Next. Automap loads suggestions ahead of time for the next few data types, so they open quickly.
Skip a Data Type
Click Skip to move past a data type without mapping it. Skipping doesn’t save its field suggestions, but a primary source Automap already saved for it stays saved. Skip this entity? asks how long to skip it:- For this session: leave the checkbox clear. The data type returns the next time you start a session.
- For future sessions: select Don’t surface this entity again in future auto-mapping sessions. The data type stays skipped until it’s mapped or you restore it. This setting is saved in your browser, so it doesn’t follow you to another browser or device.
Finish
After the last data type, the completion screen shows All done. with the number of data types mapped and skipped. Click Back to Pipeline to return to the pipeline. Mappings you saved during the session are ordinary saved mappings. Publish and deploy them as usual. If you refresh the page mid-session, your place, your skips, and your completed data types are kept. Starting a new session from the pipeline list resets them, except for data types you skipped for future sessions.Troubleshooting
Related Topics
Automap Overview
How suggestions are rated and applied
Automap in the Mapping Editor
Run Automap on a single data type
Managing Data Types
Add and organize data types in a pipeline
Publishing Mappings
Publish saved mappings